

I am co-teaching an afterschool program at a middle school for the next few weeks. For the last 2 days we have been dyeing some fibers to use in other projects later on. Last week was yarn with koolaid, Tuesday was roving with food coloring. For the koolaid, I let the girls just try things, but with food coloring (and roving which needs a little special handling) I wanted them to have more of a plan. I decided to have them dye with food coloring and to mix their own colors. So I went looking for a color chart, figuring someone had put together a chart with the recipes for making all kinds of colors with your basic palette of food colorings. But I didn’t find one. I found versions for coloring frosting, for select groups of colors and lots of cool experiments but not something I could hand to the kids like a recipe with examples of the colors they would get.

So I made one.
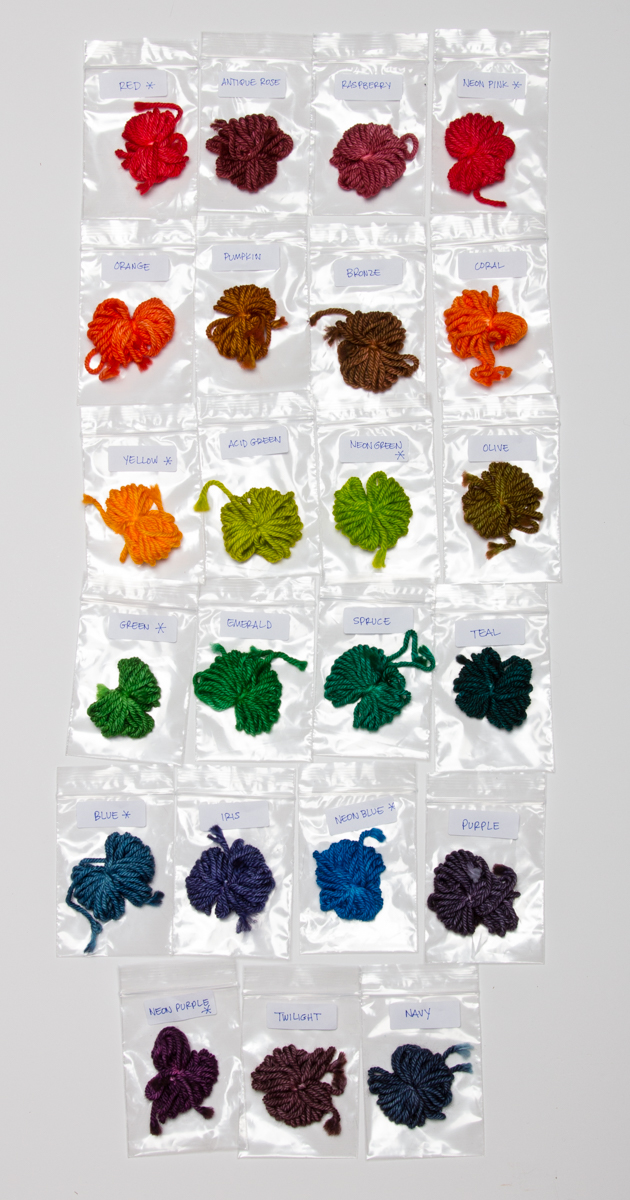
I did a little experimentation by first writing down all of the various recipes I could find in a scattering of tutorials and charts. I made up mini skeins (about 4 yards each) of wool yarn and mixed up each of the colors with McCormick food colorings (assorted and neon) in a plastic yogurt cup with a splash of vinegar and about 1/2 cup of boiling water. I let them steep for about 10 minutes and then rinsed. I did 25 colors total, with a few I dyed over again and tweaked the recipe because I didn’t like the color (or it was too close to another color). In the end, I kept 23 and put together a chart that you can use.
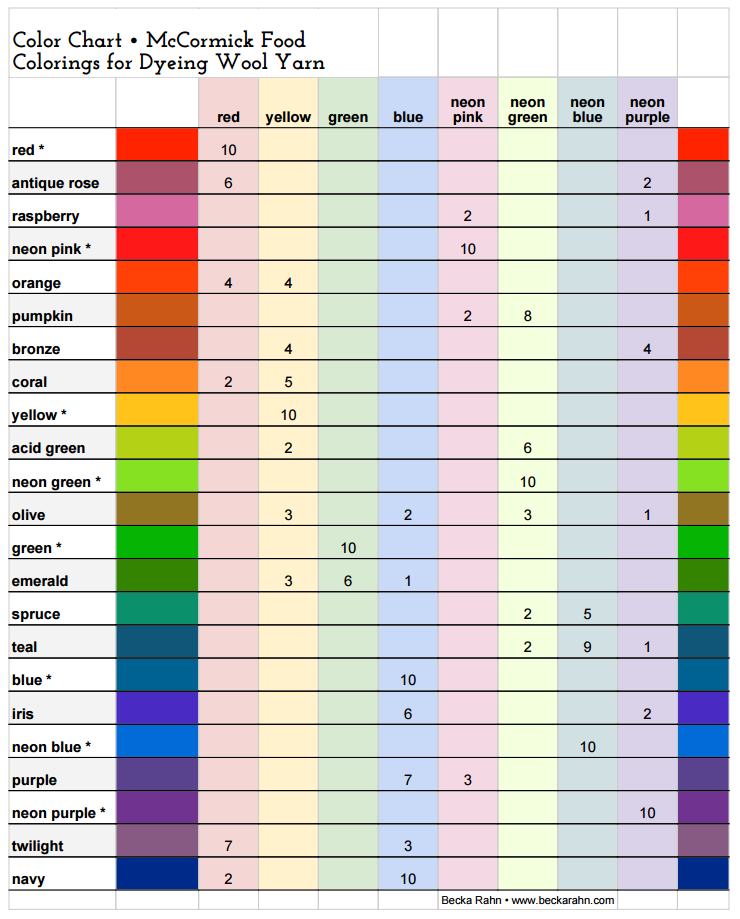
You can download my Dye Color chart here. (You are welcome to print it for your own use or to use for classes, youth groups etc.)
The colors with a * are the straight food coloring colors. An “assorted” box has red, yellow, green blue. A “neon” box has neon pink, neon green, neon blue and neon purple. All of my colors are created from those 8 basic colors. The “dye” colors are across the top, the numbers are the number of drops of food coloring. The colored bars are an approximation of the colors. The calibration of my monitor/printer makes these pretty close for me, but yours may shift the colors. If in doubt, do a swatch.
 A few things to note if you try this yourself.
- The mini-skeins are the super-saturated version of the color. There was a lot of dye and not very much fiber. You can get lighter colors by using the same amount of dye and a lot more fiber (and more water.) Or to explain it another way: 10 drops of food coloring is enough to dye about .5 oz of yarn to a pretty saturated color. If I used 10 drops of food coloring and 2 oz of yarn I would get a more pastel shade. The amount of water only matters so that the dye has enough room to move around.
- Food-coloring and koolaid are “set” when you have exhausted the color. That means that the yarn has grabbed all of it and the liquid is completely clear in your container. Your goal should always be to heat it long enough to exhaust the dye. I try not to dump extra dye down the sink, but get it all in my fiber.
- I dyed all of my samples on superwash merino. Your mileage may vary. Superwash wool tends to soak up dye like nobody’s business. Other kinds of yarn may not be as saturated; our roving was lighter colors. Water chemistry will also effect your colors. I taught in Idaho once and I was shocked at how much different my go-to dye colors turned out in the very different water there vs. my house.
- I have heard mixed results about the long-term colorfastness of food-coloring and koolaid (from sources I trust.) If in doubt, I wouldn’t use koolaid dye for something I hope would be passed down from generation to generation. But for new mittens that I will wear out after a season or two? It will definitely work for that.
Here’s my method for dyeing yarn and roving.
- Soak the fiber in plain white vinegar for about 1/2 an hour. I did this at home before I went to join the afterschool kids. That way we didn’t need to wait for it. Drain out most of the vinegar. (Don’t wring it out very aggressively or you can felt your fibers.)
- With the koolaid/yarn, we immersion dyed, so I had the kids put the koolaid powder in small tupperware containers and I filled them with boiling water. (These are 6th graders so they could handle that.) Add your fiber (no stirring!) and let it sit until it is cooled. There was enough heat from the boiling water that it exhausted the dye. (To make 2 color skeins, we just stretched the yarn across 2 containers and put a towel underneath to catch the drips).
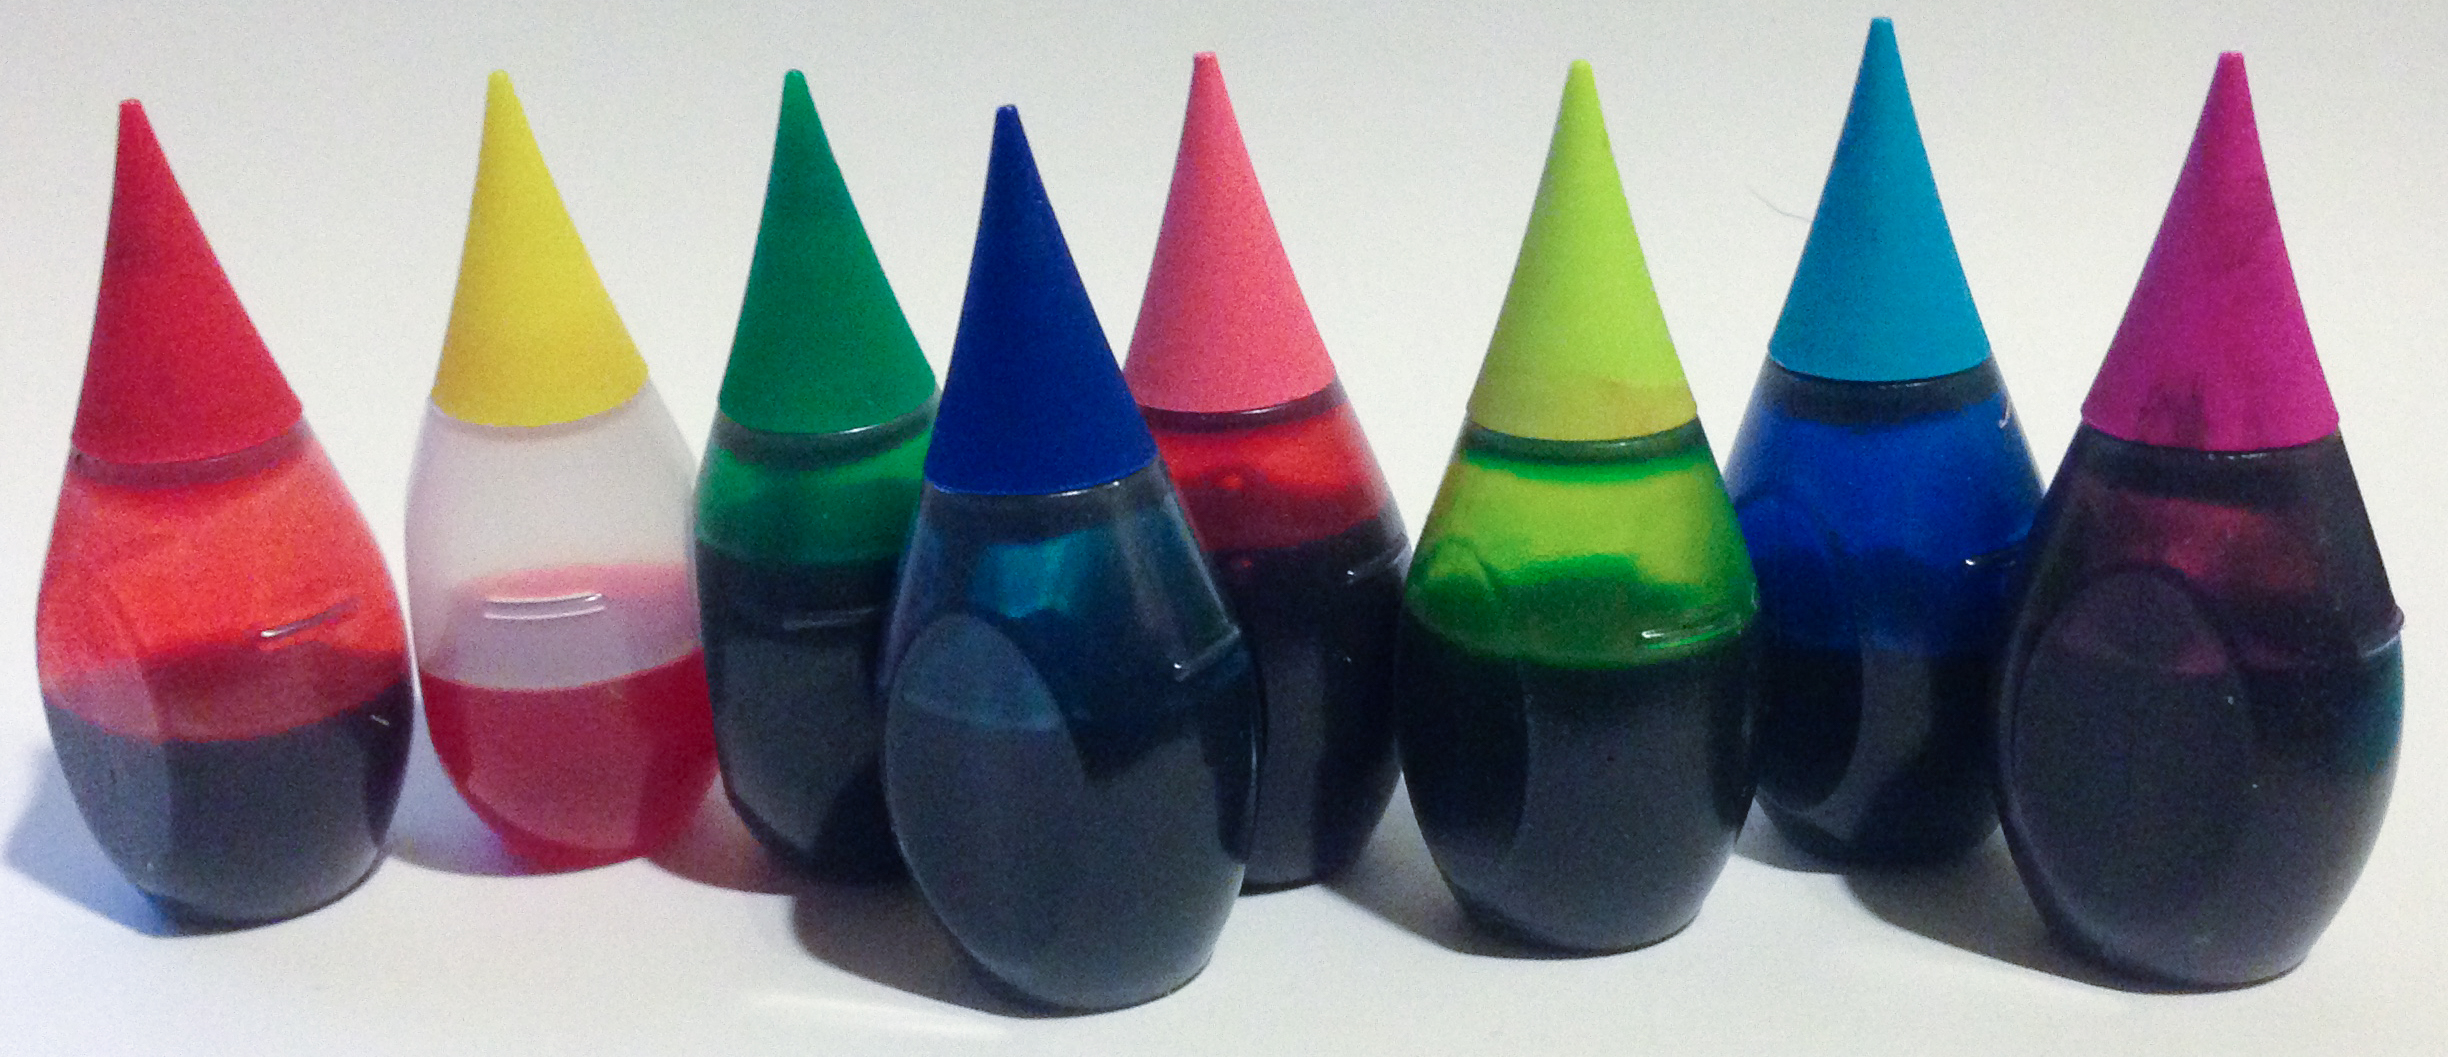
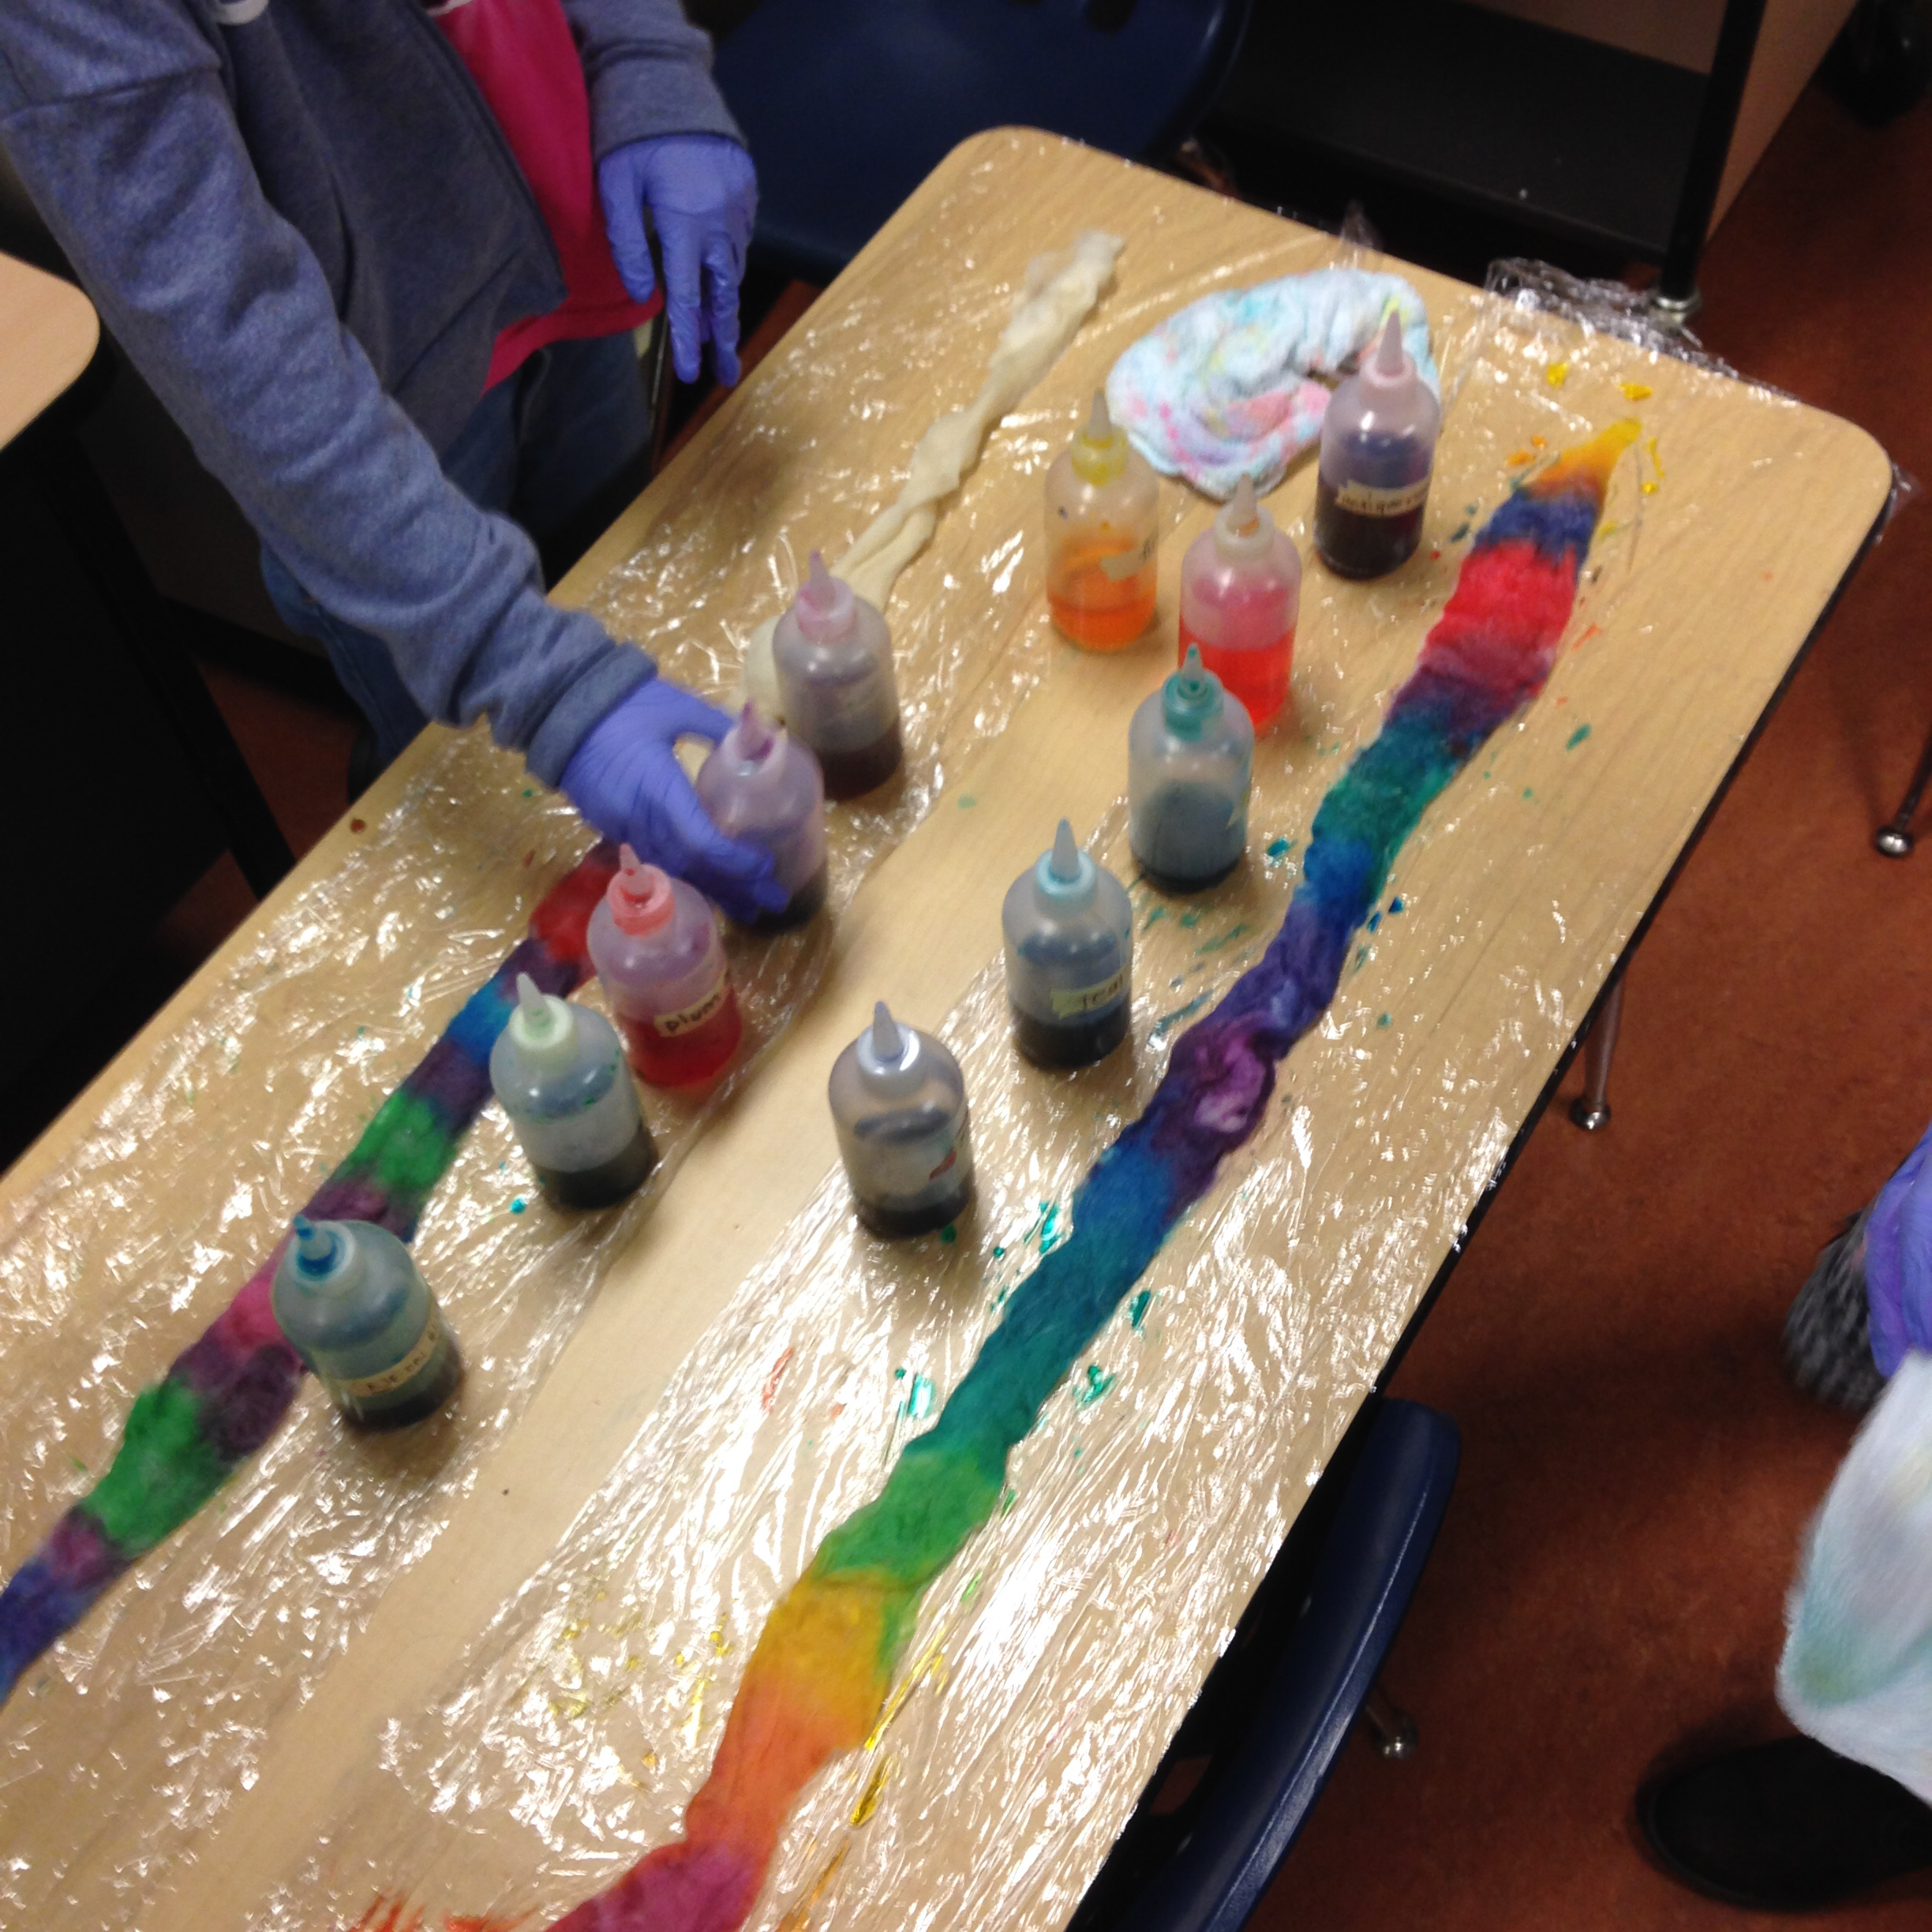
- For the food coloring/roving, I didn’t want them to work hot. So we just mixed the drops of food coloring in squeeze bottles and filled with water. We put the roving on plastic wrap and they squirted the colors and gently pressed it down to get the color all the way through the fiber. When they were done, we folded the long ends of the plastic wrap over the roving and rolled the whole thing up like a cinnamon roll and popped it into a ziploc bag. When I got home, I put each one into the microwave and steamed for 2 minutes + rest 1 minute + 2 minutes until the dyes were exhausted.
- After the fiber was completely cool, then I immersed the yarn/roving in a sink full of room temperature water to soak for a few minutes and then drained and put it on drying racks.
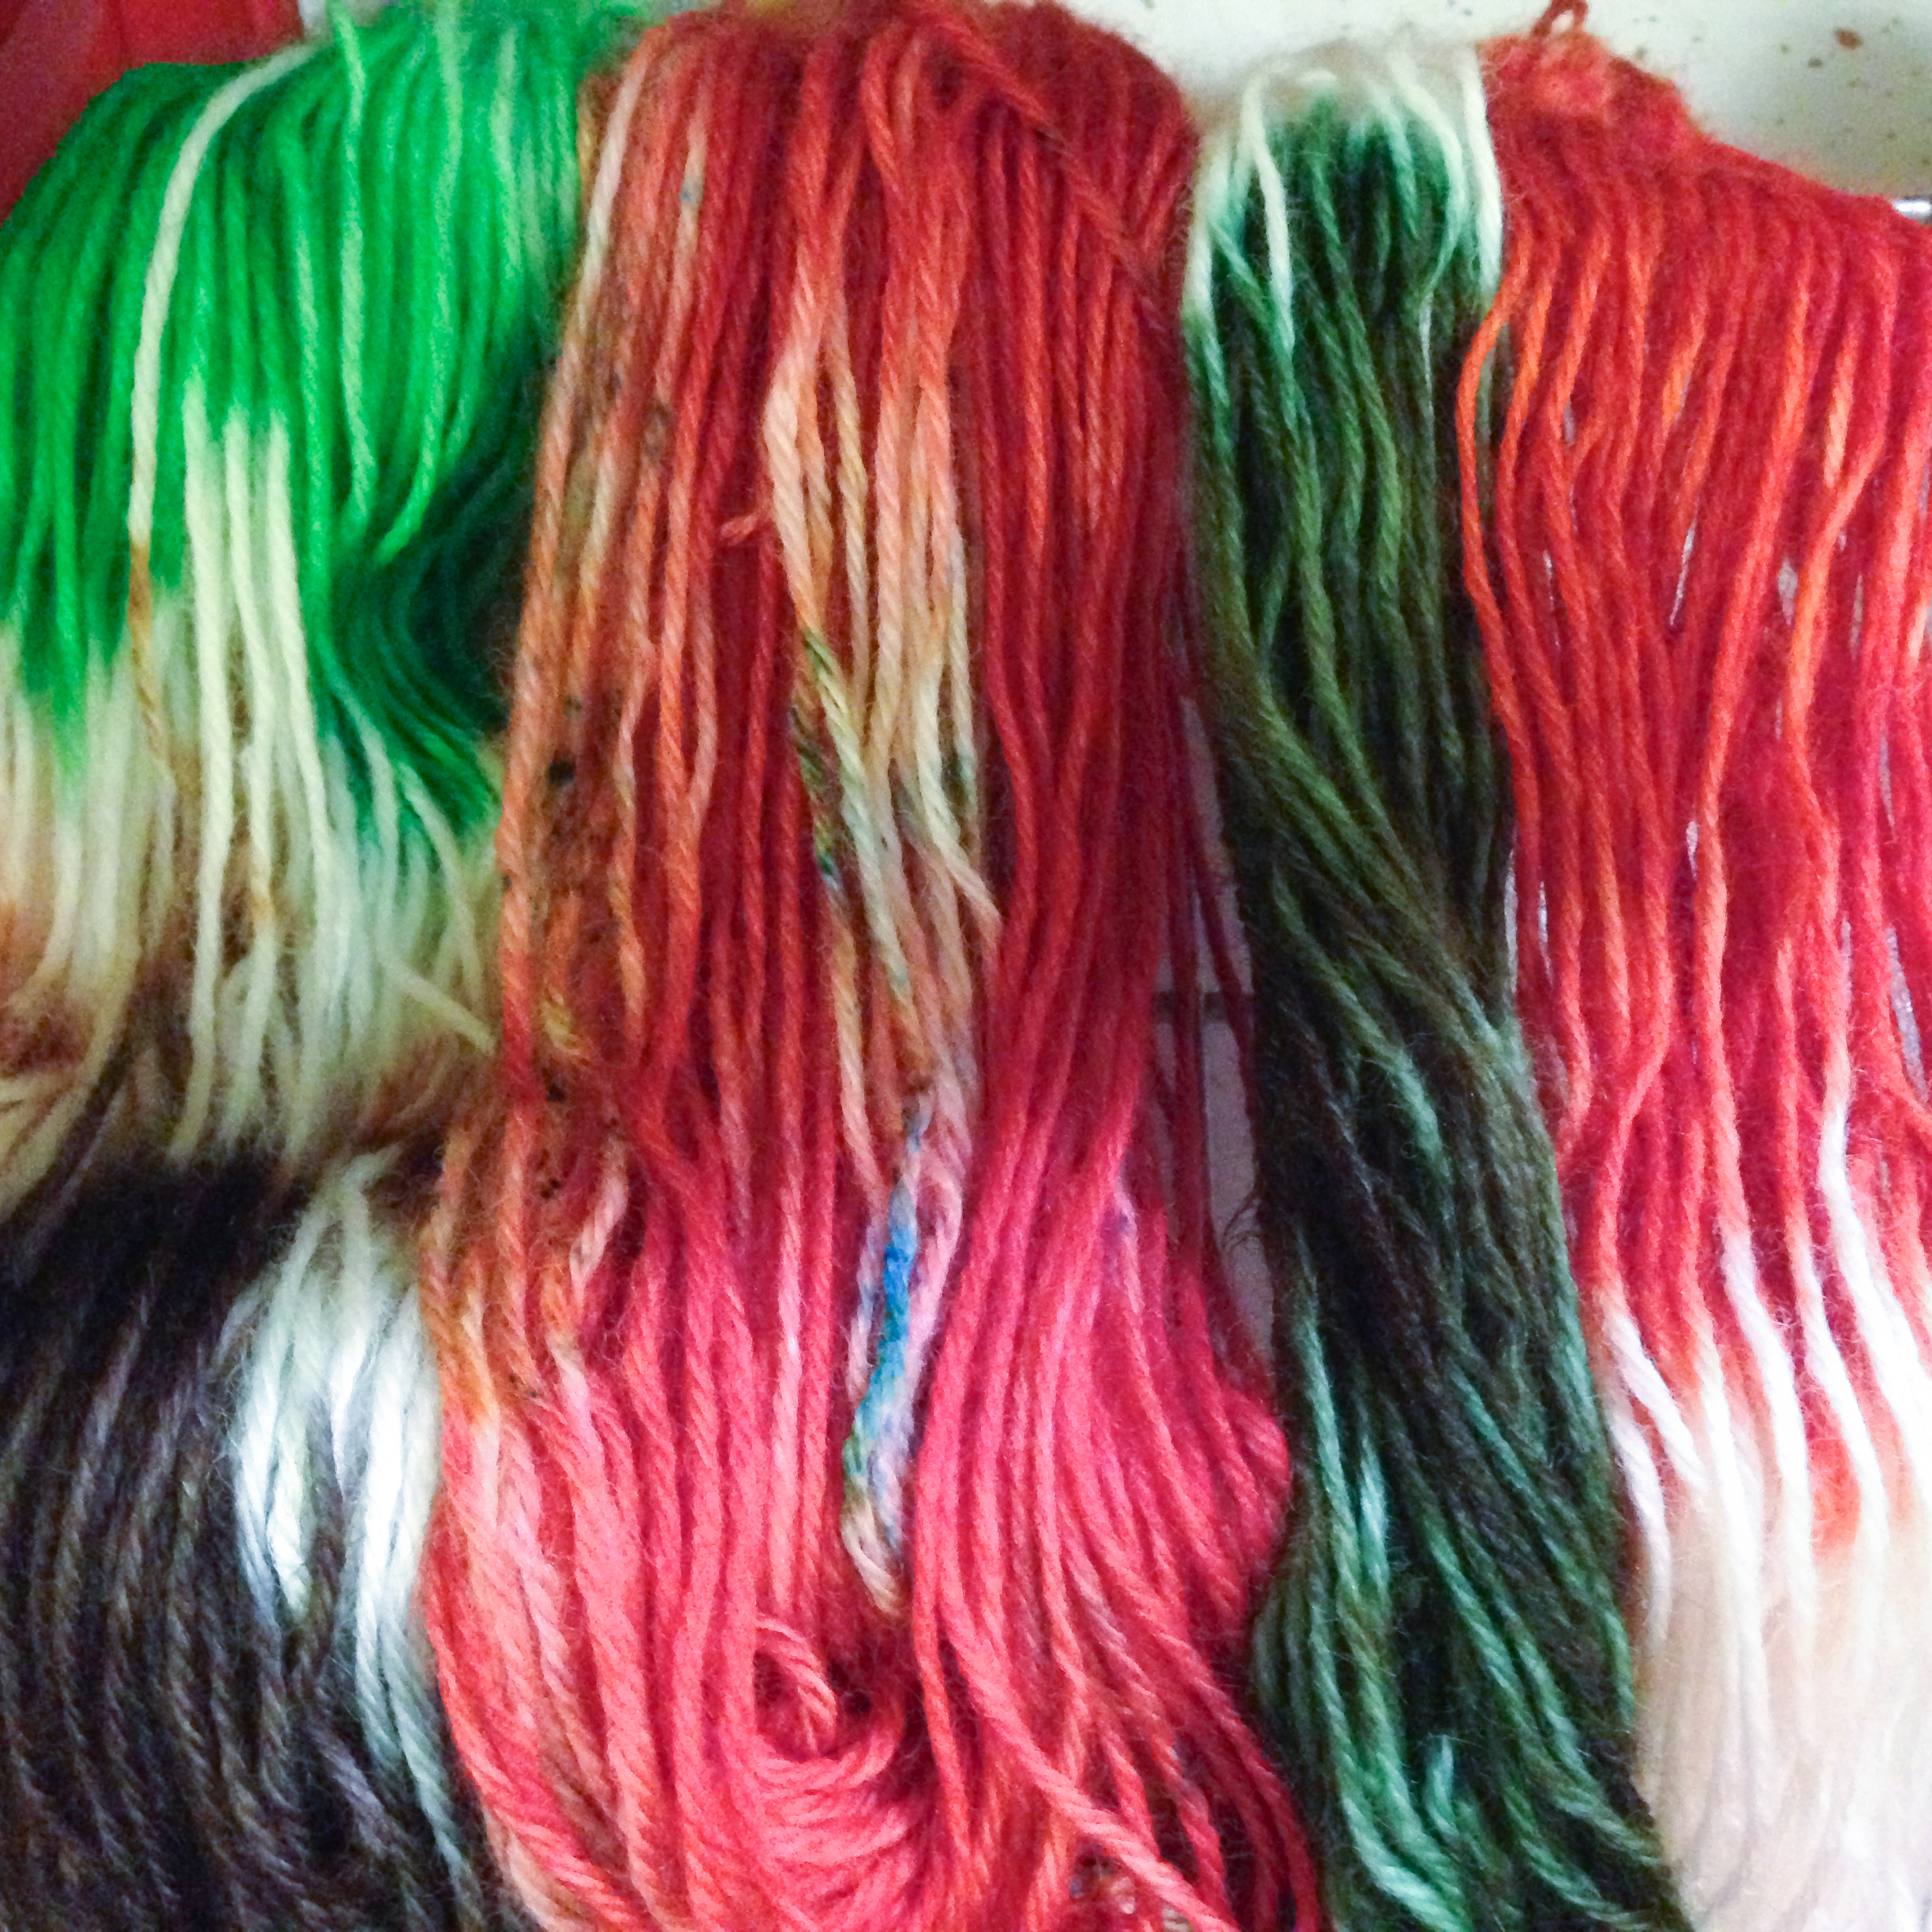
The spots and splotches in some of their yarn colors are because I let them try sprinkling dry koolaid powder in a different color over the yarn once it was immersed in the dye container. It was a cool experiment!
Thanks so much! This is very useful.
Thanks for such a thorough explanation including the color chart. The suggestion of the type of yarn you think works well with this technique is also quite helpful–as I suppose various yarns may be too oily or coarse to take the dying as well as the merino.
Superwash is really the key. It takes the dye so well. But you are right, I have had very mixed results with different kinds of wool. (I have done a lot of dyeing with mystery fibers when I worked at the art center.)
Thank you for the chart! I am really impressed with your results.
You are very welcome. I was impressed with the results too, to be honest. I never thought I would get colors that nice or the variety.
Thanks for the chart! I particularly love the emerald colour you’ve come up with. As for colourfastness, I’m currently wearing a shawl made from cashmere I dyed with red Kool Aid. I’ve pretty much lived in this thing since I finished making it two years ago, and the colour has held up beautifully. It doesn’t get washed often, and when it does, it’s in wool wash.
Thank you for sharing your chart!
Do you put the ziploc bags containing the plastic-wrapped yarn in the microwave as-is, or move the yarn to a different container? I’m wondering about melting the plastic in the microwave.
Usually I put the plastic wrapped yarn into a microwavable container, but this time I did it in the ziploc bag because I needed to get it home from school before I heat set it. Less mess. If you get heavy “freezer” bags they are much less likely to melt. Dollar store ones will melt; the same with dollar store plastic wrap. All reasons that it is a really good idea to do this in a well ventilated space and make sure you aren’t breathing dye/plastic fumes. I have a dedicated dye microwave in my garage. Also be sure not to seal the ziploc or it will build up steam and pop and scare you to pieces. (This happened during a class once.)
Thanks :)