

I decided to give you all a gift this year. For many years I sold patterns for all kinds of things in my Etsy shop, including a bunch of simple holiday ornaments. But I have really changed the focus of my shop and what I am doing and I phased out those patterns a while ago. But I still have them and they are really cute and they shouldn’t just sit here on my computer with no one using them. So I decided that I would post them here for free as my gift to you.
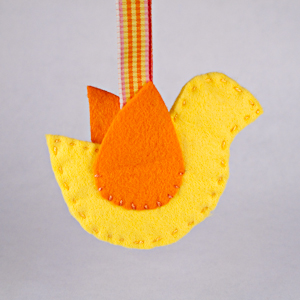 The first one is a variation on an ornament I made with my mom when I was about 2 years old. She says I “helped”. I have the original on my Christmas tree and used it as the inspiration for this pattern.
Materials
- two pieces of felt, 4 x 6 inches each in 2 coordinating colors
- 6 inch piece of narrow ribbon
- embroidery thread in a coordinating color
Tools
- scissors
- sewing needle
- pins
Instructions
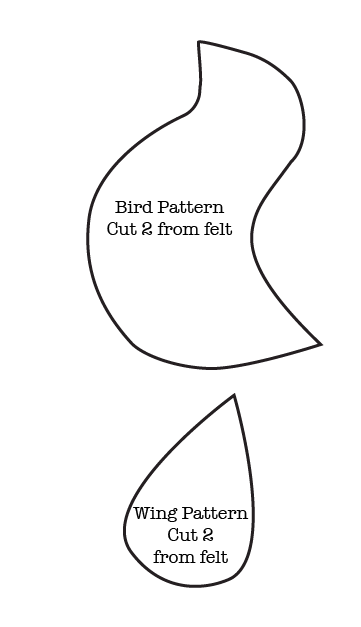
1. Pin the pattern pieces to the felt and cut two birds and two wings.
2. Place the bird pieces so that they are facing opposite directions. Lay one wing on each of the bird pieces. Adjust and pin in place.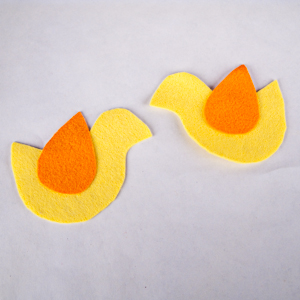
3. Using embroidery thread that matches the wing color, stitch each wing to the body piece.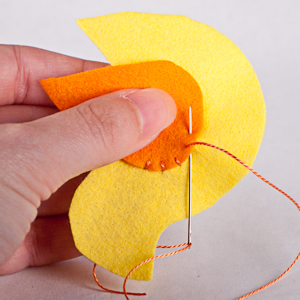
4. Cut a 6 inch piece of ribbon and fold in half. Put the two bird body pieces together, wing sides out, sandwiching the ends of the ribbon in between. Pin to hold the ribbon in place.
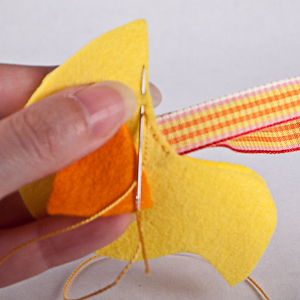 5. Stitch around the outside edge of the bird, through both layers of felt. Fold the wings back out of the way as you stitch.
You can use a running stitch, a whip stitch, or a blanket stitch, depending on what look you like. Be sure to catch the ribbon in your stitches to hold it in place. When you have stitched all the way around, tie a knot and you are finished.
Here are the pattern pieces. Just option-click or right-click the image to save it to your computer and you can print it out.
Thank you!