I originally wrote up this post for another reason and it didn’t get posted. So I thought I would share it here with you. This is one of my favorite tips for touching up your photos for posting in your Etsy shop or many other purposes. Enjoy!
Fixing Grey and Gloomy with the Curves Tool in Photoshop
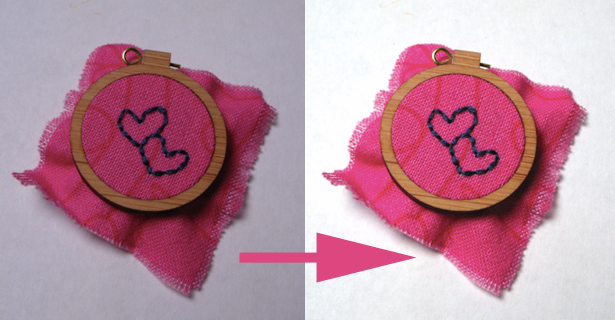
Curves is probably my favorite Photoshop “touch-up” tool. I shoot a lot of my photos against a white background because I like the way that makes the background “disappear” and it really helps a buyer focus on the work. Sometimes if I shoot these photos on an overcast day or when I just can’t get quite enough light in my workspace, the white background ends up looking dull grey/blue/yellow and the whole photo is a little gloomy. Not very appealing.
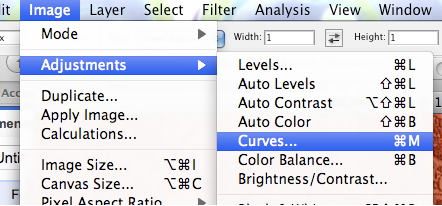
My favorite way to fix this “grey & gloomy” is to use the Curves tool. Open your image and go to the “Image” menu, then choose “Adjustments”, then “Curves”.
 A dialog window will pop up. Look for the eyedropper icon that looks like it is full of white paint. (There will be a black and a grey one too.) Your cursor will change to an eyedropper.
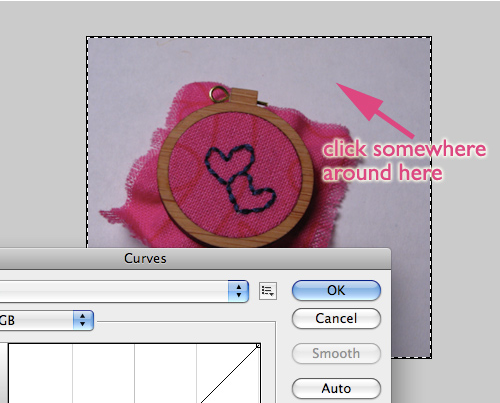
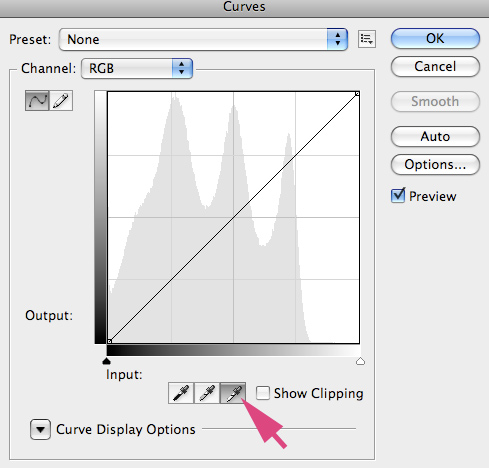 Go over to your image and click in any white area of the background. I usually choose whatever looks like the brightest spot in the image. By clicking, you are telling Photoshop: “This spot I just clicked is supposed to be pure white. Please readjust everything else in this image so that spot looks white.” You can try clicking a couple of different spots in your image until you get just the right adjustment. Once you are happy, then click “OK”, save your image and you are all set.
 Do you use black or grey as your photo background? This tip works for you too! Just choose the black or grey eyedropper and follow the same steps. There are lots of other things you can do with Curves too, so feel free to experiment!
(The screen shots for this tutorial are from a Mac using Photoshop CS3. Other versions of Photoshop will have the same tool, but the menus might look slightly different.)


Great tip! Thanks.