17 September, 2020

Live Online Class: Color Matching Doodle Mandala Fabrics

2020-09-17T18:33:03-05:00, , |Comments Off on Live Online Class: Color Matching Doodle Mandala Fabrics

Learn to design your own hand-drawn fabric designs from a sharpie drawing doodle that we’ll translate into a digital repeat and upload to Spoonflower.com to print on to fabric or wallpaper. We’ll choose the colors for your design by learning how to match the colors you see on your computer screen to colors in your house – your couch fabric, a favorite photograph, or kitchen paint colors – to make your own home decor accent pieces.

This class will be presented as a detailed demo followed by a live Q&A and a handout so you can easily follow along with the steps in the process and complete your project after class.


21 January, 2020

The Return of the Spoonflower Masterclass (kind of)

2020-01-21T14:50:27-06:00Spoonflower & Fabric Design, UpcomingClasses|Comments Off on The Return of the Spoonflower Masterclass (kind of)

In July 2020, I am teaching a 5-day class at the Touchstone Center for Craft in Farmington, PA. It is a masterclass in designing your own digitally printed fabrics with Spoonflower, with a focus on using Photoshop as your main digital design tool. I haven’t taught a class like this in more than a year, but not for lack of interest, just for lack of opportunity. It’s hard to put together a class like this without somewhere like Touchstone to help coordinate it.

You may have found my blog because of the Masterclasses that I used to teach at Spoonflower in Durham. We had to put those on hiatus, unfortunately, because the space we were using to teach in was needed for other things and we couldn’t make the budget stretch enough to be able to rent classroom space. (Space is always the biggest challenge I have in getting a class like this put together.) So I am really excited that Touchstone invited me to be there! I call it a masterclass because of the amount and depth of material we get to cover in class, but you can take the class even if you have never designed anything before. You don’t need to have any special skills and you don’t need to have ever used Photoshop.

This is a description of the class:

Learn to design your own fabrics with Spoonflower, working with Adobe Photoshop as a fabric design tool. Using photographs, paintings, drawings and cut paper textures as starting points for your designs, class time will be focused on practice with digital tools and techniques for creating seamless textures, learning how to work with layers, and understanding the techniques to accomplish specific effects. You will see hands-on samples of all of the Spoonflower fabrics and talk about optimizing your design for printing on different surfaces, troubleshooting color and scale, and choosing the right fabric for your project. You do not need drawing or painting skills; no experience with Photoshop or fabric design is necessary, although you should be comfortable with basic computer functions (copy/paste, saving and uploading files, working with a thumbdrive). You will leave class with several print-ready design files and will receive printed swatches of your designs mailed to you after class. Visit spoonflower.com to learn more about this platform.

And you can read about the technology requirements and some FAQs here.

If you are interested in taking the class, Touchstone has given me a couple of discount codes for half-price scholarships that I can give away to two students. Which is AWESOME. Send me an email if you are serious about the class and want to talk more about the scholarship details. I want to help you get there!

26 October, 2018

Save This Layout and Selling your Spoonflower designs. (I learned something new.)

2018-10-26T11:33:23-05:00Spoonflower & Fabric Design, Tutorials|3 Comments

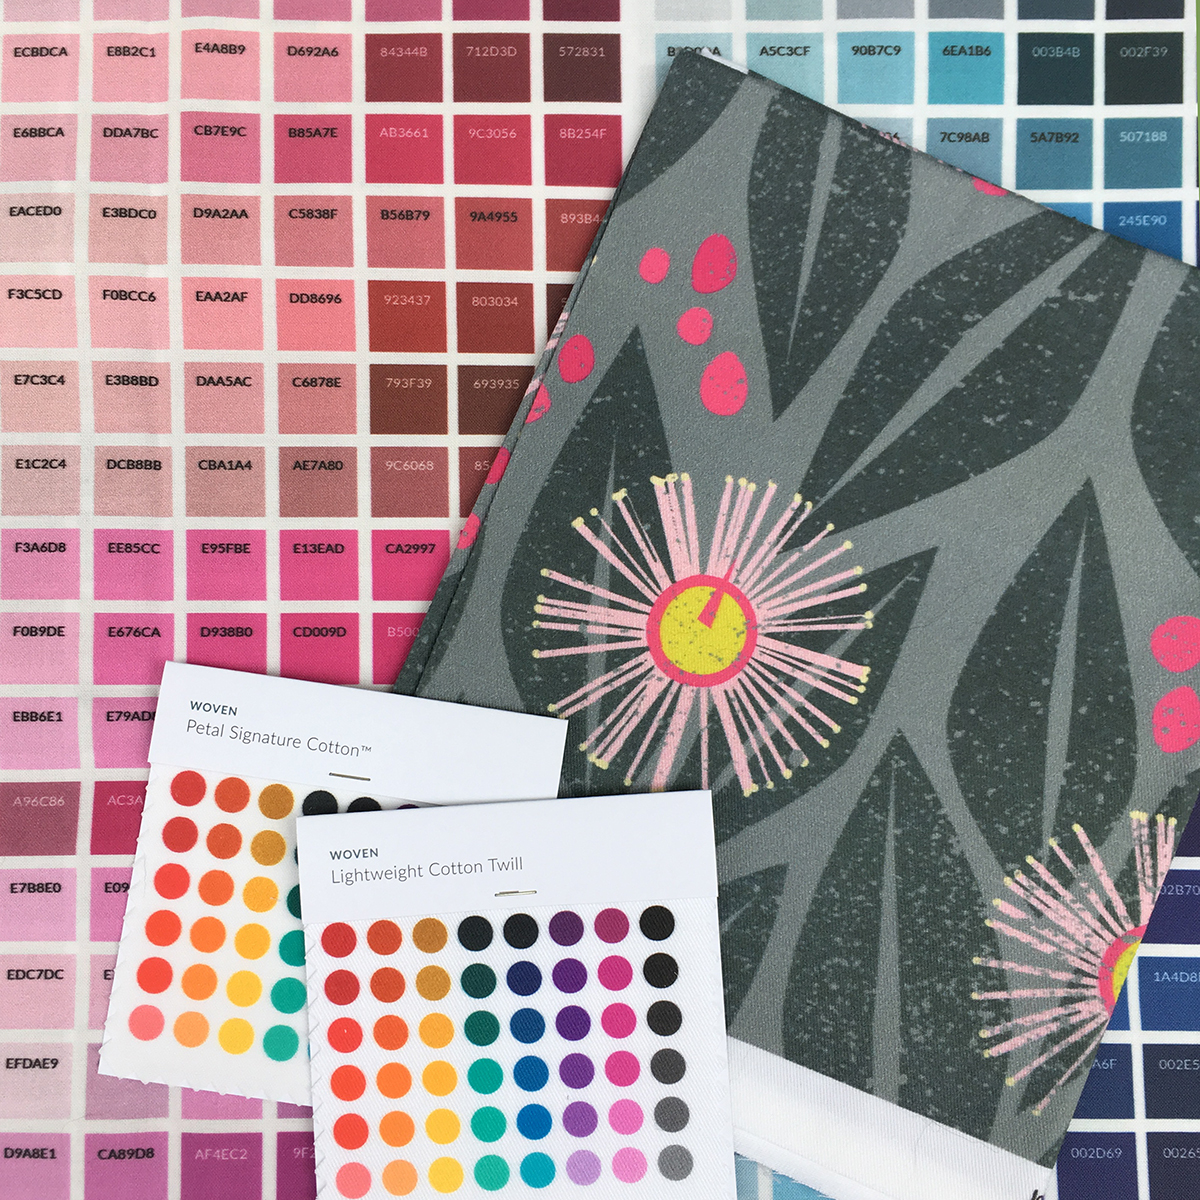
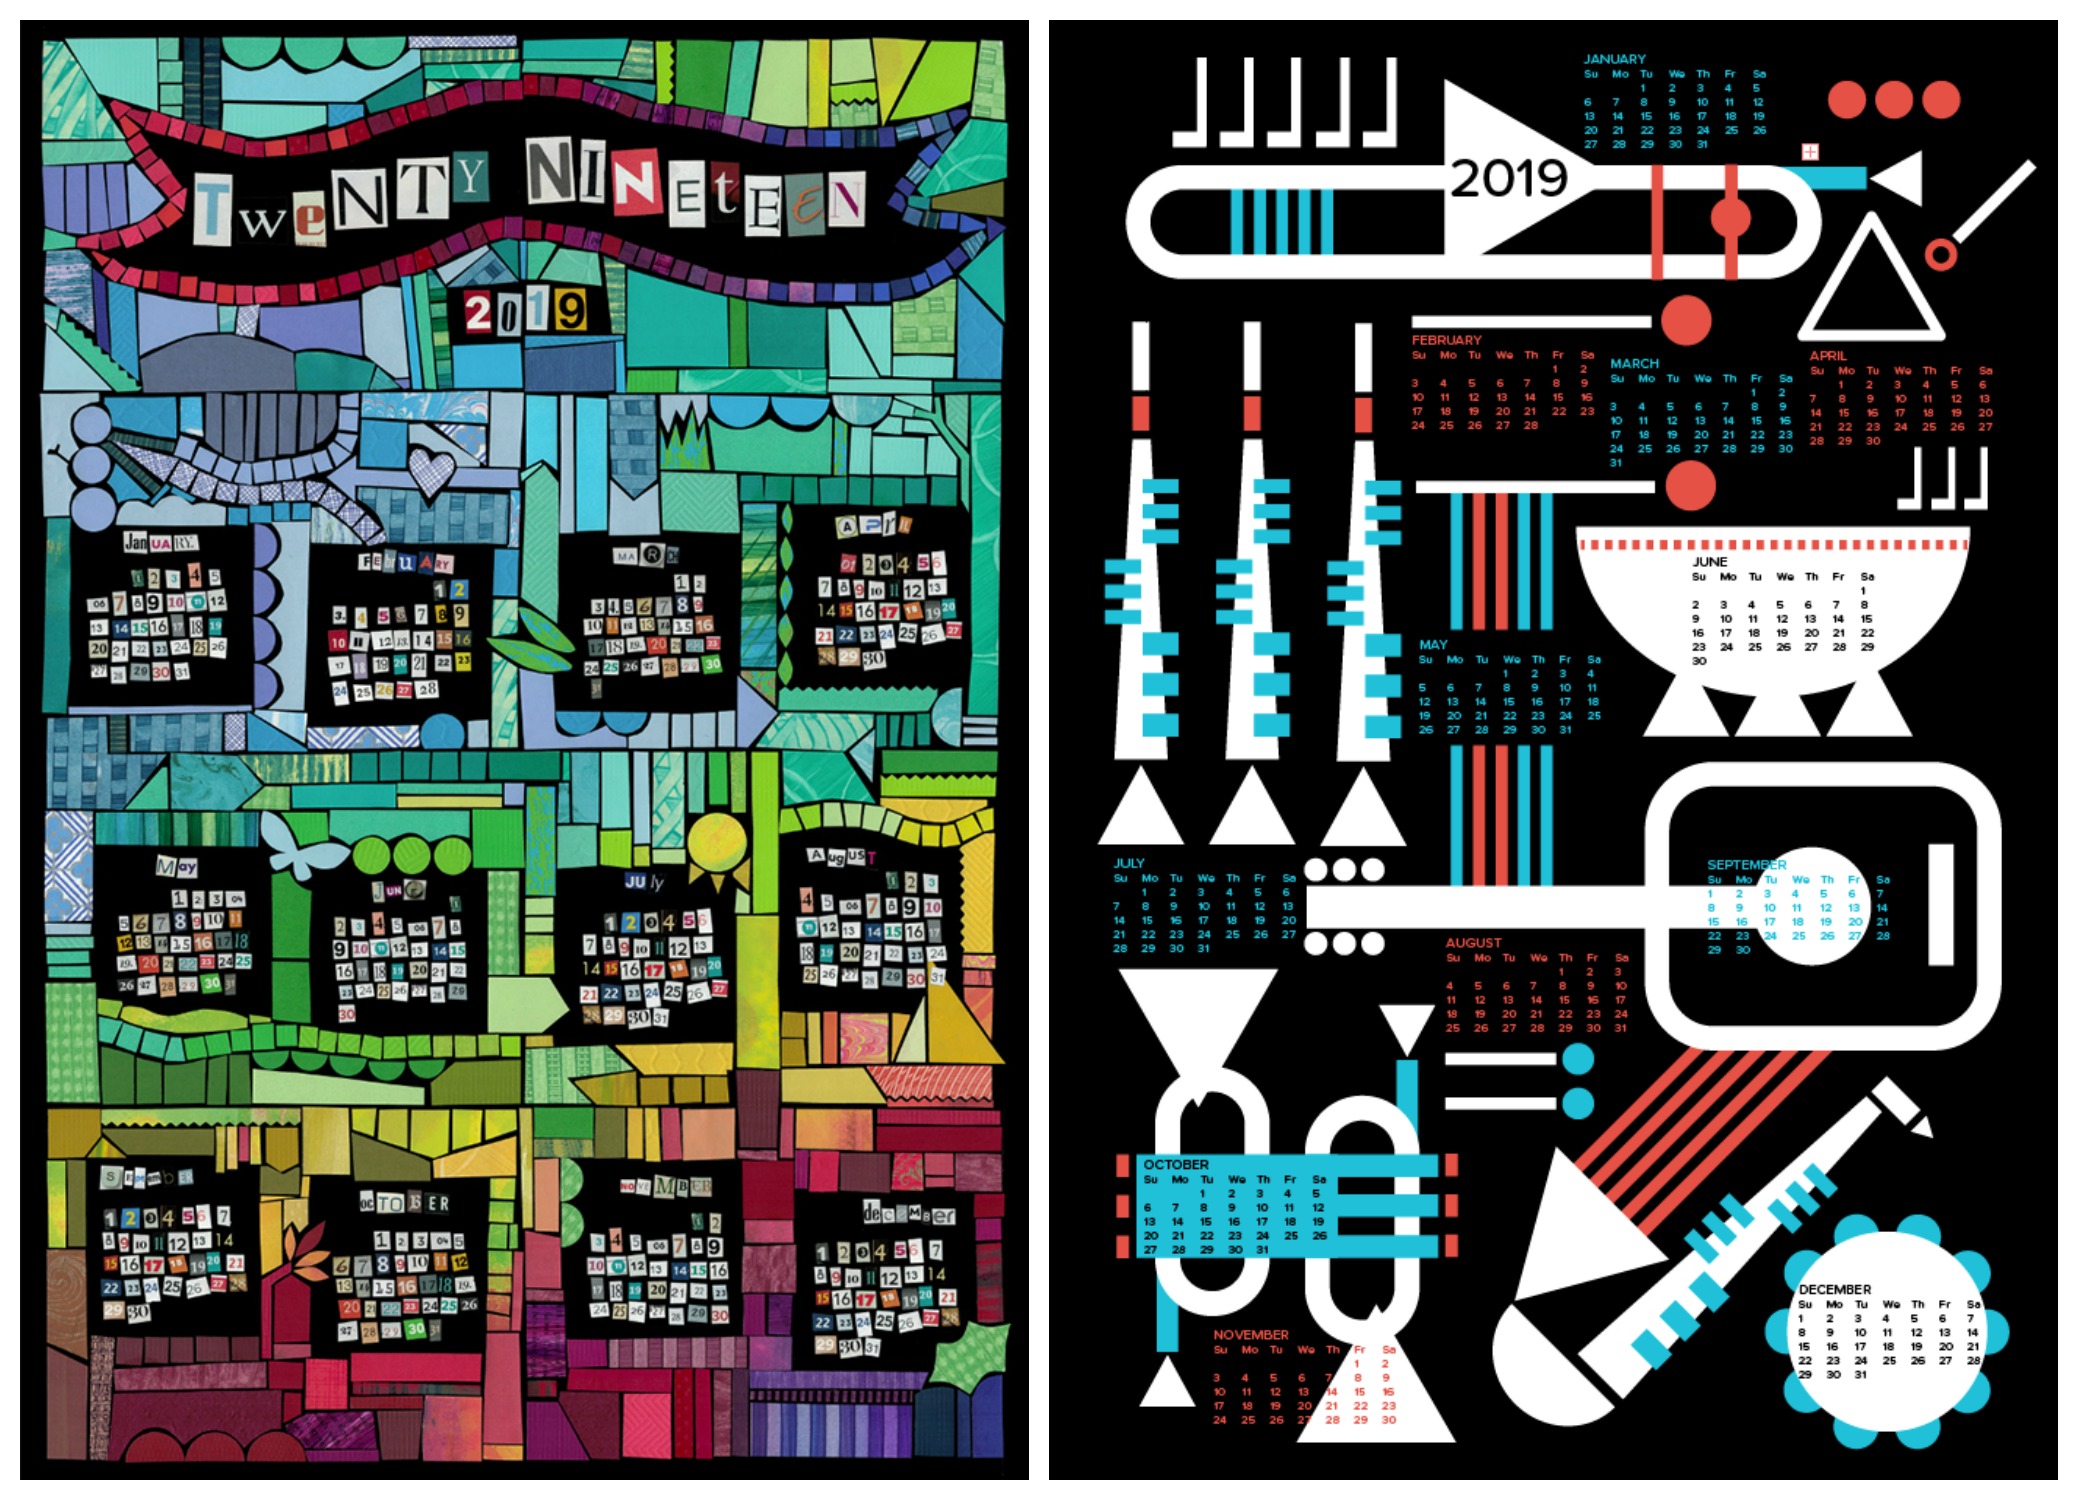
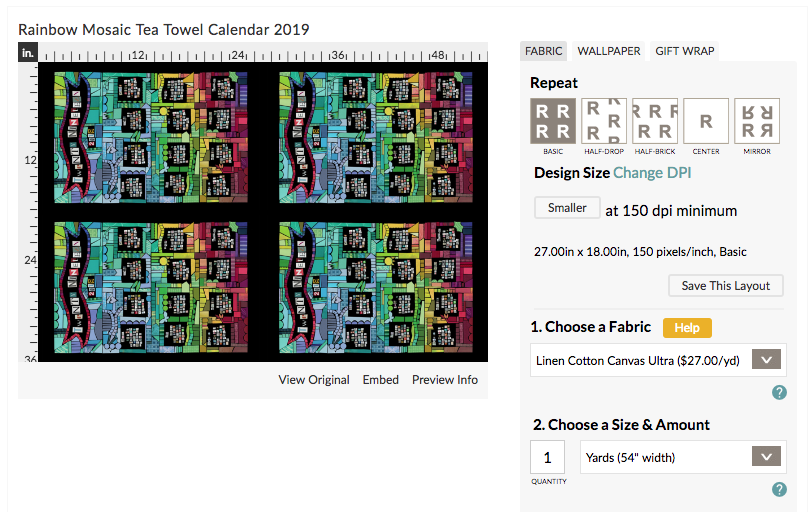
I’ve been designing a bunch of tea towels for my Spoonflower shop lately. The September design challenges were all about tea towels and I did a couple of tea towel calendars too. Those kinds of designs aren’t really made to repeat. Instead you are designing a panel that is set up to be exactly the size of a fat quarter of fabric. For linen-cotton canvas, which is my preferred fabric for those, that means I am designing a rectangle that is 27×18 inches.

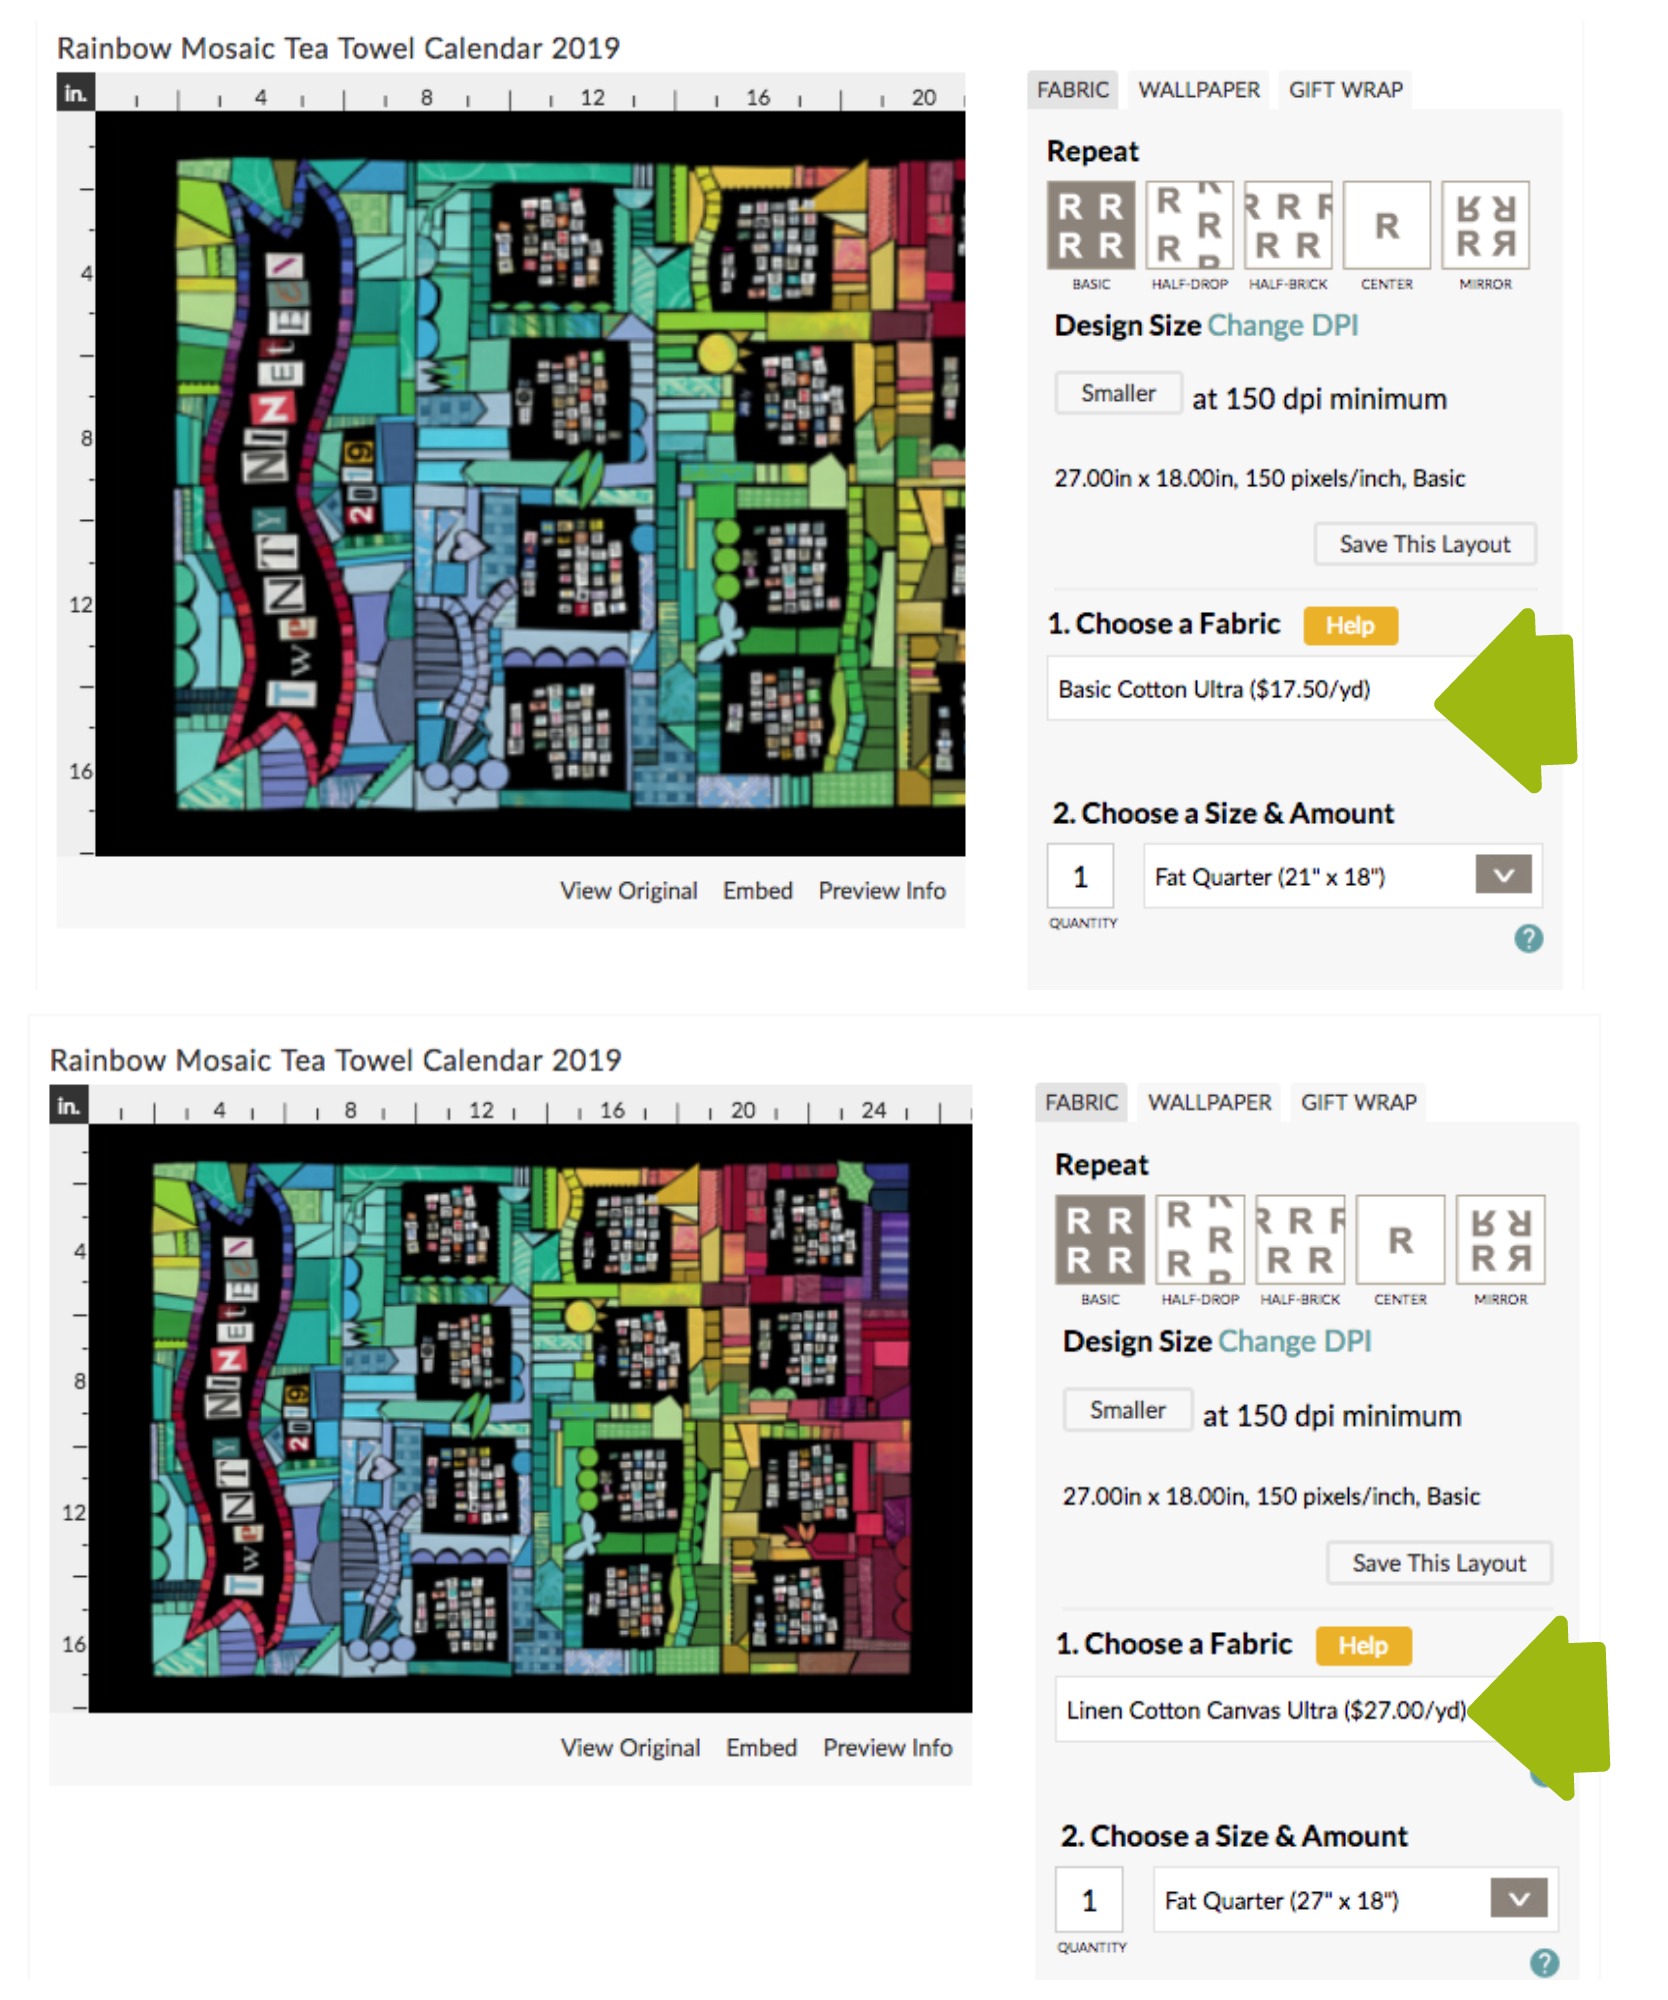
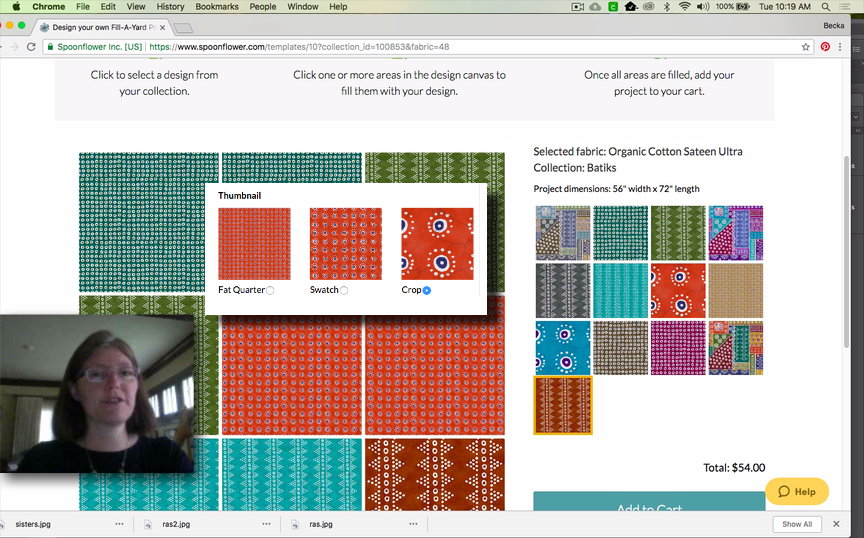
I had sold several of the designs to people shopping on Spoonflower, but a couple of those shoppers chose a different fabric than the linen-cotton canvas, which might not seem like a problem, except that different fabrics have different widths and so the size of the fat quarter is different. If you choose basic cotton for example, a fat quarter is only 21 x 18 inches. Which means that you are going to lose 6 inches of my design. The top photo here is showing you what a fat quarter of basic cotton looks like; the bottom shows linen-cotton canvas. If you order this design in basic cotton, a third of the calendar will be missing.

If you haven’t used Spoonflower a lot, you might not realize that what you see is exactly what you get – if that design is cut off in the preview, then that’s what your fabric is going to look like. It’s an easy mistake to make. I caught it when I saw these orders come through and contacted Spoonflower to get in touch with those customers, since I was pretty sure they didn’t actually want to have only 2/3 of the design and everything got fixed up. What I didn’t know is that I actually could do one more thing to help make that less likely to happen to other people.

Save this Layout

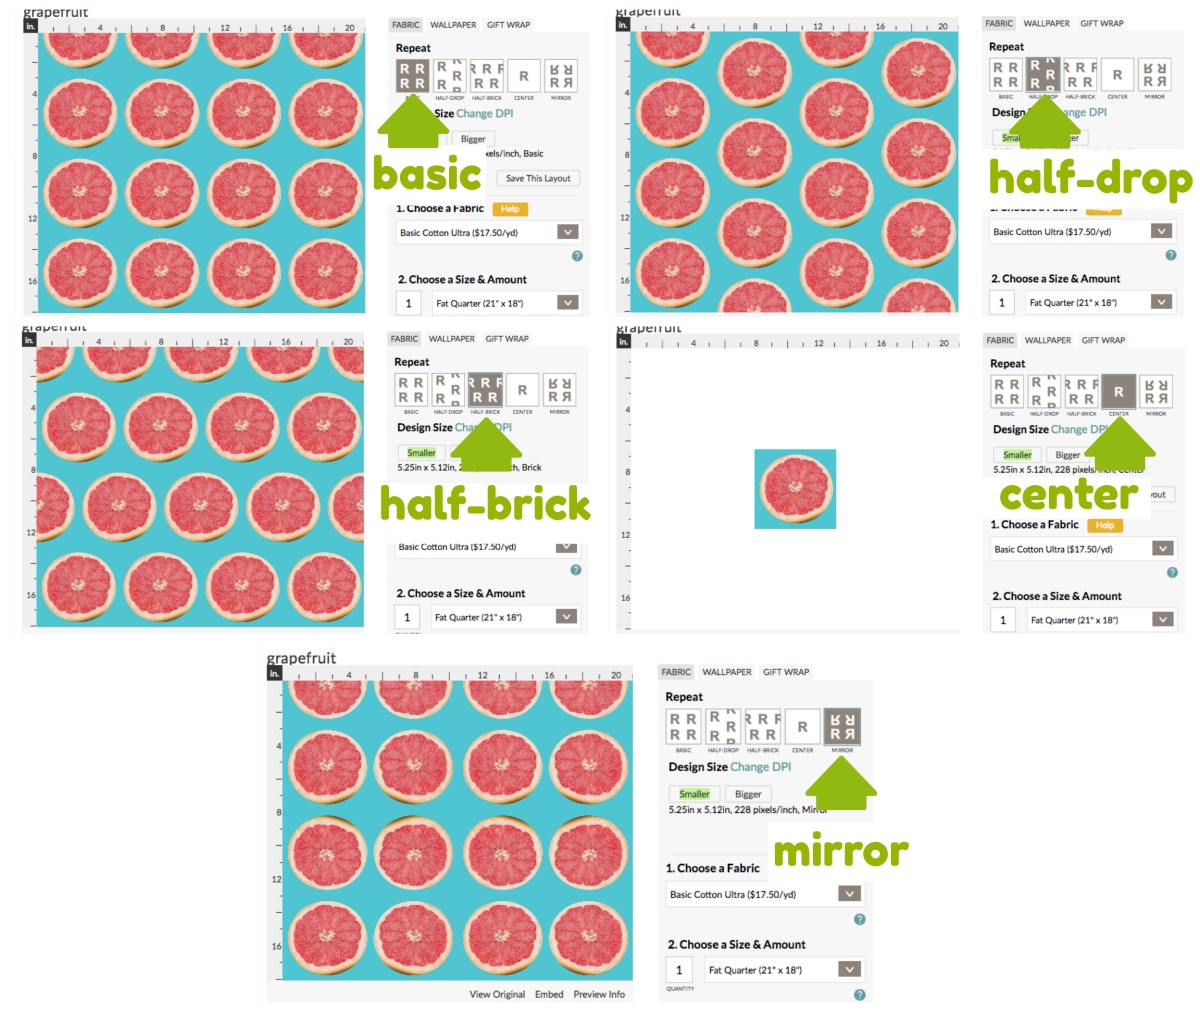
When you upload a design to Spoonflower there are a few things you can change about the way it uses your design to fill the piece of fabric. The first section is the Repeat of your design. By default it is repeated in a basic grid pattern. The design repeats like tiles on a checkerboard and fills the amount of fabric you have selected. There are 5 different ways that you can repeat it. Basic is the default, but you can also choose from half-drop, half-brick, center or mirror. Half-drop and half-brick offset your design by half vertically or horizontally. If you can imagine what the pattern on a brick wall looks like, you get the idea.

Here is a grapefruit design shown in each of the different repeat patterns; you can see how the pattern changes on the left. You will notice with the “center” option there is only 1 grapefruit. That’s because center takes one of your design and puts it exactly in the center of the fabric. The rest of the fabric is blank. (You might use this if you were printing a photograph of something to make a wall hanging and you didn’t need it to repeat.) The design always starts repeating from the bottom left corner of the fabric. If you look at the basic example, that’s why you see half grapefruits, because the fabric was only large enough for it to fit the repeat 3 1/2 times.

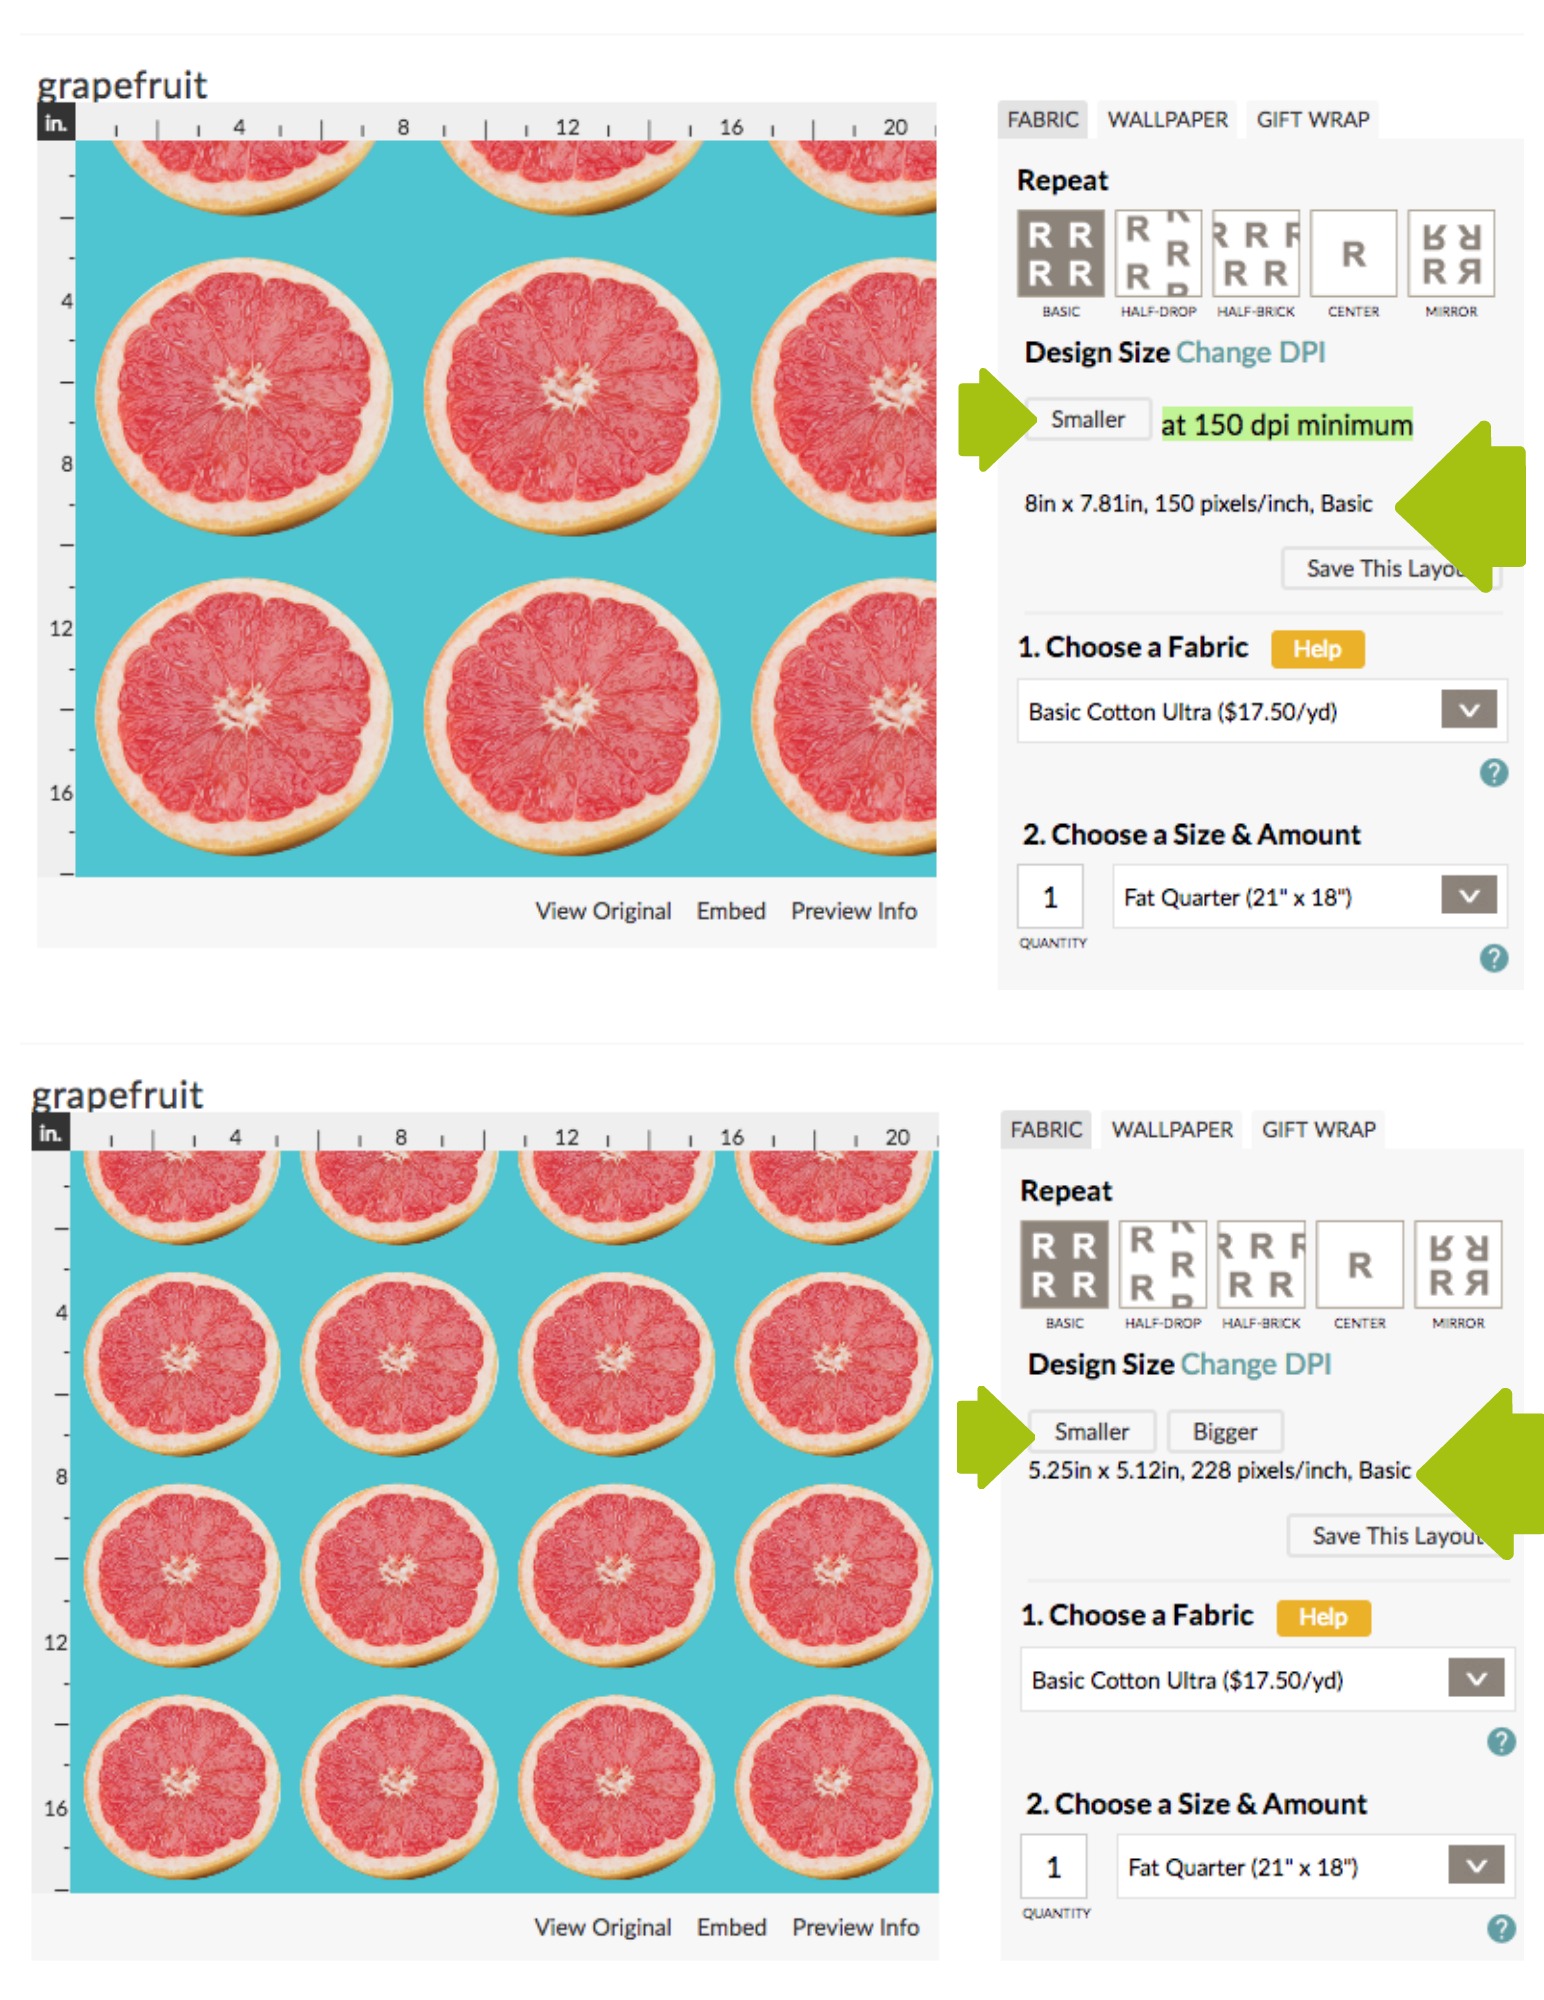
The next thing you can change is Design Size. There are buttons to make the design Smaller or Bigger and it will shift it by increments. The preview will show you exactly what it will look like on the left. You can’t ever make a design bigger than the original that you uploaded (because it can’t invent more pixels than it had originally), but you can scale it smaller just with the click of a button.

Here is the grapefruit at the size I originally uploaded (about 8 inches) and scaled down (about 5 inches).

Both the Repeat and Design Size you can set how you like and save by clicking the Save This Layout button. This does two things: it locks in that layout of repeat and size so that it remembers it the next time you look at this design and if you make it for sale, it locks it in for shoppers. They won’t be able to change anything about your design. (They can message and ask you to make tweaks if they want to have it smaller or a different color) So that way you are sure that it is printing the way you intended it to (and the customer isn’t choosing a repeat style that doesn’t match up).

What I just learned

What I didn’t know until a Spoonflower friend pointed it out to me just recently is that the Save This Layout button ALSO saves a default fabric choice and a default size. How did I not know this? You’d think when you wrote the book on a thing, you would learn all of the tricks. Turns out, there is always something new to learn. Thanks Tina for the heads up!

Why is a default fabric choice important? That takes us back to that tea towel I was talking about earlier in the post. When I set up the layout for that tea towel, I chose Basic for the repeat. Although it isn’t a repeating design necessarily, if you happen to choose to buy a yard of fabric, this design will fit exactly four times on a yard. Four tea towels. Great for gifts.

I didn’t need to change the Design Size so I left that as I uploaded it. Then I clicked Save this Layout. What I didn’t know before is that it ALSO saves the Fabric and Size you have selected (below the Save This Layout button). So I can choose Linen-Cotton Canvas and Fat Quarter and then hit Save This Layout. Now any customer who looks at this design should see it defaulting to the exact fabric/size that the design was made to fit. They can still change those options, but it is much less likely that they might choose something that won’t work because the defaults are now set to the right thing.

I went back through and checked all of my designs that were supposed to be fat quarters (tea towels, cut-and-sew toys) and made sure that I set the default fabrics for those to be a fat quarter of the right size.


If you want to check out my tea towels and tea towel calendars, I have them all in a collection here at Spoonflower.

10 July, 2018

Video Tutorial: Fill-A-Yard Projects with Spoonflower

2020-04-21T21:17:12-05:00Spoonflower & Fabric Design, Tutorials, Videos|Comments Off on Video Tutorial: Fill-A-Yard Projects with Spoonflower

A quick video tutorial of how to use Spoonflower’s Fill-A-Yard feature. Thanks to a student from my online class for the question.

If you need a little more help working with collections, be sure to check out my online classes. I go through collections in the Spoonflower Step One class.

27 June, 2018

Spoonflower Handbook Master Class: Fabric Design with Photoshop

2018-06-27T14:44:02-05:00, |Comments Off on Spoonflower Handbook Master Class: Fabric Design with Photoshop

The focus of this workshop will be an introduction to working with Adobe Photoshop (Fall) or Adobe Illustrator (Spring) as a fabric design tool. We will spend 2+ intense days getting to know the tools in each software to make seamless repeats, layers and more. Several of our class exercises will build on concepts presented in The Spoonflower Handbook, taking these projects “beyond the book” with more advanced tools and skills, as well as one-on-one instruction.

This session will focus on working with Adobe PHOTOSHOP to design fabric. Becka will teach you how to use the basic tools in Photoshop to edit, add layers and design seamless patterns using Photoshop. The goal is to help you understand how the Photoshop tools and techniques work so that you can make the designs you have in your head. Class time will be focused on practice with tools and techniques like creating seamless textures, learning how to work with layers, and understanding the settings for tools to accomplish specific effects. Becka will have samples of all of the Spoonflower fabrics and talk about optimizing your design for printing on different surfaces, troubleshooting your designs and choosing the right fabric for your project.

For this class, you do not need drawing or painting skills; no experience with Photoshop, Illustrator or fabric design is necessary, although you should be familiar with the Spoonflower site and comfortable with basic computer functions.

See all of the details at https://www.beckarahn.com/masterclass

8 May, 2018

A weekend learning to design fabric with Spoonflower

2018-05-08T09:46:52-05:00Everything Else|Comments Off on A weekend learning to design fabric with Spoonflower

These fantastic ladies spent the weekend with me learning to design fabric with Spoonflower using Adobe Illustrator. I made them work hard. Illustrator is not intuitive and it isn’t easy, so I admire them so much for their great attitudes the whole weekend long. These are the designs they created the very first day, inspired by Ed Emberley drawing books. How many of you have heard of Ed Emberley? He was my favorite artist when I was a kid and I don’t think anyone in my class had heard of him. So it was very fun to make that introduction.

If you want to learn more about the fabric design classes I teach, check out my online classes and master class pages.

Go to Top