20 February, 2015

Upcoming Class: Digital Keepsake Tea Towel

2015-02-24T23:41:16-06:00Classes & Teaching, Sewing & Design, UpcomingClasses|Comments Off on Upcoming Class: Digital Keepsake Tea Towel

RahnRecipeCard

This is a recipe written in my Grandmother’s handwriting, which I turned into a linen tea towel.  Cool huh?  This was inspired by a post a couple of years ago on Spoonflower’s blog and I have turned the idea into a class, which is coming up in March.  We will scan a recipe card and learn how to scale it up so it fills a fat quarter of fabric, perfect for a tea towel.  Don’t have a recipe?  You could also use a handwritten note, a signature, a quote, or a poem as long as it is something about the size and shape of an index card.

My recipe cards weren’t quite the right size ratio to fill the whole fat quarter – there was a little white space around the edges – so I made this simple gingham pattern to fill in the gaps and add a pretty border.  You will learn how to do that too!  This class is broken up into 3 class sessions.  There is a gap before the last session so we have time to order our fabric and then meet back one more time so we can show and tell (or troubleshoot) and then I will demonstrate how to hem them (with pretty mitered corners) and show you some more great designs based on this same scanning and scaling technique.

You can register at Textile Center.  Dates are Wednesdays March 25, April 1 and April 29 from 6-8 pm.

1 December, 2014

Infinity Scarves

2014-12-01T16:36:04-06:00Gallery Exhibitions, Sewing & Design, Spoonflower & Fabric Design|2 Comments

infinityscarves

I am getting all kinds of new things ready for the show I am doing at the American Craft Council Library on December 13.  So excited!  This is the first large collection of my digital prints that I will have for sale.  Last week I finished the cowl scarves.  I know that the “giant infinity scarf” is a major trend, but I just don’t think they are that flattering.

(stock photo)

(stock photo)

These are made with a more simple and elegant kind of silhouette.  More like a necklace.  These are all made from polyester crepe, which is soft and lightweight and drapey and the colors are vibrant and gorgeous.  I haven’t used this fabric before and I am in love.  Each design also has a story:

square

24 October, 2014

Meh to home dec and some great tutorials

2014-10-24T14:04:35-05:00Sewing & Design|3 Comments

chester

I have spent the last 4 weeks making a variety of home dec type objects for a variety of reasons.  Placemats, table runners, pillows.  And the thing is, I just can’t get in to it.  It’s relatively easy sewing as those things go.  Mostly straight lines, lovely fabrics, but I just can’t get excited about the finished objects.  How many throw pillows does a person need exactly?  How about you?  Love it or hate it?  Do you redecorate for every season?

Meanwhile, I did find some fun, helpful and inspiring tutorials while I was working out all of the details on these projects:

9 October, 2014

Sometimes the best tutorial has no words

2014-10-09T22:53:11-05:00Embroidery, Sewing & Design, Tutorials|Comments Off on Sometimes the best tutorial has no words

photo(5)I had a vast quantity of tiny rolled hems to do this week.  The project is something I can’t really share yet, but I can talk about rolled hems and what I learned.  So I have done both machine stitched and hand stitched rolled hems before and although I am pretty good at the machine variety, I hadn’t really mastered the hand stitch. I could make it work, but they were fiddly and so very slow.  It was frustrating.  So I started to do a little research.  Maybe there was a better way to do the stitch?

The tips that really helped?

Rolled Hem Hankies at the Purl Bee.  Not only are the photos beautiful and clear, but the tip about slobbering on your fingers is essential.  I did just grab a damp washcloth and throw it on the table in front of me, but it’s amazing how much of a difference that made in getting the roll to happen.  She also does the stitch just slightly differently than what I was taught (with much of the stitch hidden in the roll) and this is much nicer.

It turns out that the best “tutorial” I found has no words.  But just by watching an anonymous and skilled seamstress hem a Hermes scarf, I picked up another really helpful hint or two.  If you watch the video you will see how she pins the scarf to a heavy pincushion.  This is genius.  It’s like having an extra hand to put some tension on what you are stitching and I could go twice as fast.  My tomato pincushion isn’t heavy enough.  I ended up weighting it down awkwardly with a pair of scissors.  But the next time I have a batch of hemming to do, I will take a few minutes and make a heavy weighted pincushion.  You can also watch how she does the corner. I am not sure exactly what she did, but based on my observations, I folded just the tiny tip of the corner at 45 degrees and then double rolled to make a neat little miter at the corner and secured it with a couple of tiny stitches.

My own trick is to use a beading needle to do the stitching.  Although this one was a little long (I couldn’t find my short ones), I really like working with tiny needles.  When you are only trying to make a stitch that catches 2 or 3 threads of the fabric, it is so much easier with a small needle.  I almost always hand stitch my hems.  I like hand stitching and I like the way a hand stitched hem can just disappear and not draw attention to itself.

If you want to learn more beautiful hand stitched hems, the Coletterie blog has been posting a really great series about all kinds of hem finishes.  Here is their take on the hand rolled hem.

11 September, 2014

A Saga of Sewing Machines: Review of Bicor, Viking, Bernina, Babylock and more…

2017-03-01T12:56:53-06:00Sewing & Design|9 Comments

I have bad luck with sewing machines.  Or maybe that should be recently I have had bad luck with sewing machines.  I sew a lot.  As with most tools, I really think that you and your machine need to have a relationship.  There is no one “perfect machine” and there isn’t one you can call the “best”.  But there are machines that work better for each person than others.  I am the same way with computers.  I name them so I can talk to them and they can learn to behave themselves.  (This machine right now that I am typing on is named Carson.) But my recent sewing machines and I have not had very good relationships.

The very first machine I learned to use was my mom’s 197X Singer that she bought from the Family Thrift grocery store.  It is a solid tank of a machine.  I sewed painted theater curtains and costumes and who knows what else on that lovely machine.  It isn’t pretty, but it was a workhorse.  They don’t make Singers like this anymore.

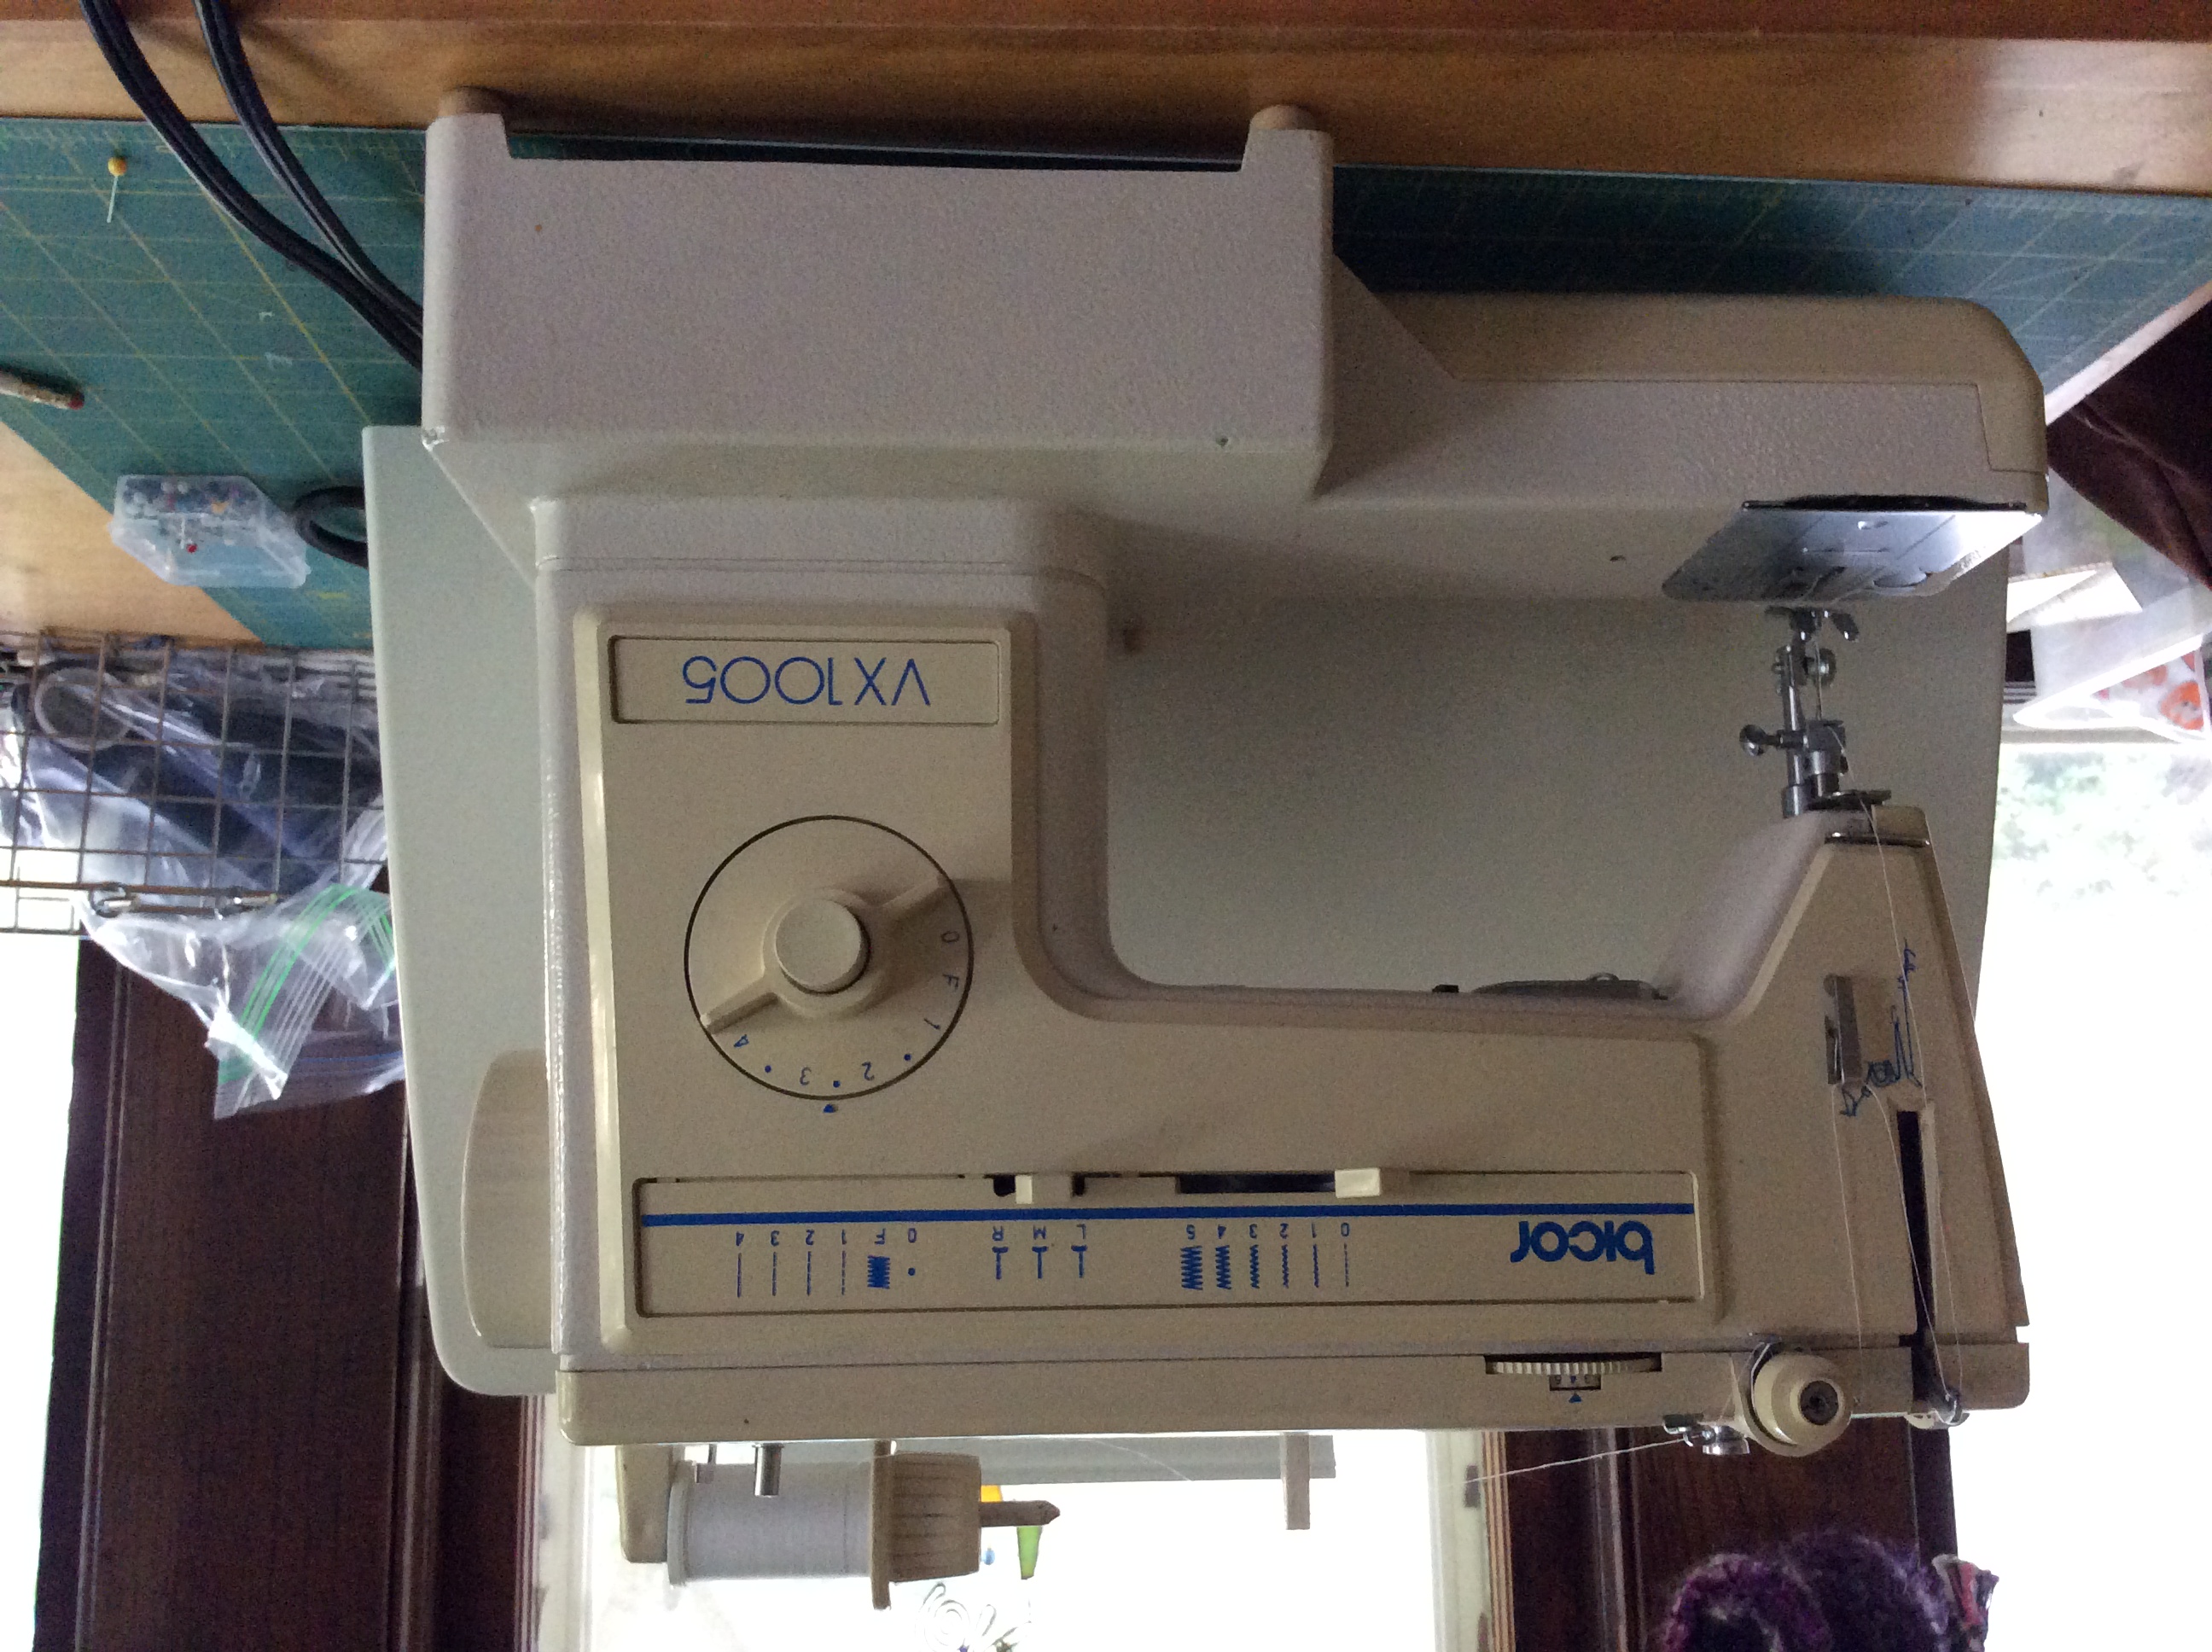
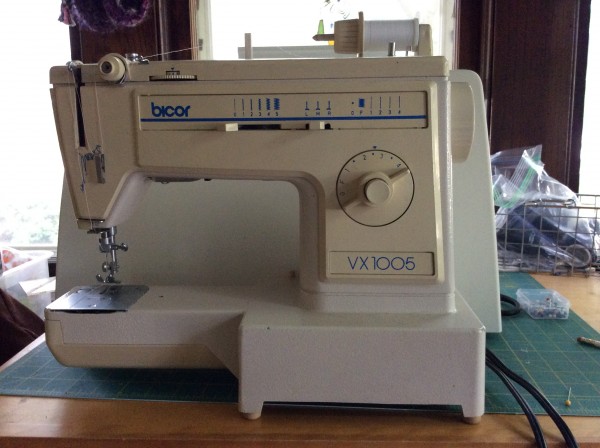
When I was 17 and had my very first paycheck from my very first summer job, I bought myself a Bicor VX1005.  This beautiful girl was $100 from Walmart and has been the single only consistently running machine I have had for 20+ years.  To this day, when the others croak she is always there and ready to go.  Bicor was made by Brother and I will always love Brother because of this machine.  Her strength is mostly with straight stitch.  Tension is always beautiful, stitches are even.  She does not do a good job with chiffon or anything too thin and the zipper foot is mediocre, but I can hem and do basic stitching all day.  I made my prom dress and my wedding dress on this machine.

photo (14)


After I started doing costuming and teaching sewing, I bought a new fancy machine to replace this one and give myself some more bells and whistles.  That was a Babylock Quilters Choice. At the time these machines were made by Brother.  So I was really excited to get this upgrade to my little basic Bicor machine. This one is affectionately called “The Lemon”.  It is a super cool machine and I paid a lot for it.  Fancy buttonholes, alphabets, thread cutter.  And it did sew beautifully.  It ends up that it has a software problem.  The software problem gradually lets the timing get out of synch and then suddenly your needle goes through the bobbin case with a big ga-smash and you have to have a $100 repair.  After several times of hauling it in for this repair, I started to see the same story appear on blogs and learned that it’s not just me, it’s a design flaw.  It self destructs.  So this one sits in my studio and collects dust.  I can’t sell it or give it to anyone in good conscience because I know it is a ticking time bomb.  Sigh.

I then had a brief affair with a 1952 Singer, which is lovely but only does straight stitch and nothing else.  Not quite enough, but a great old machine when I need it.

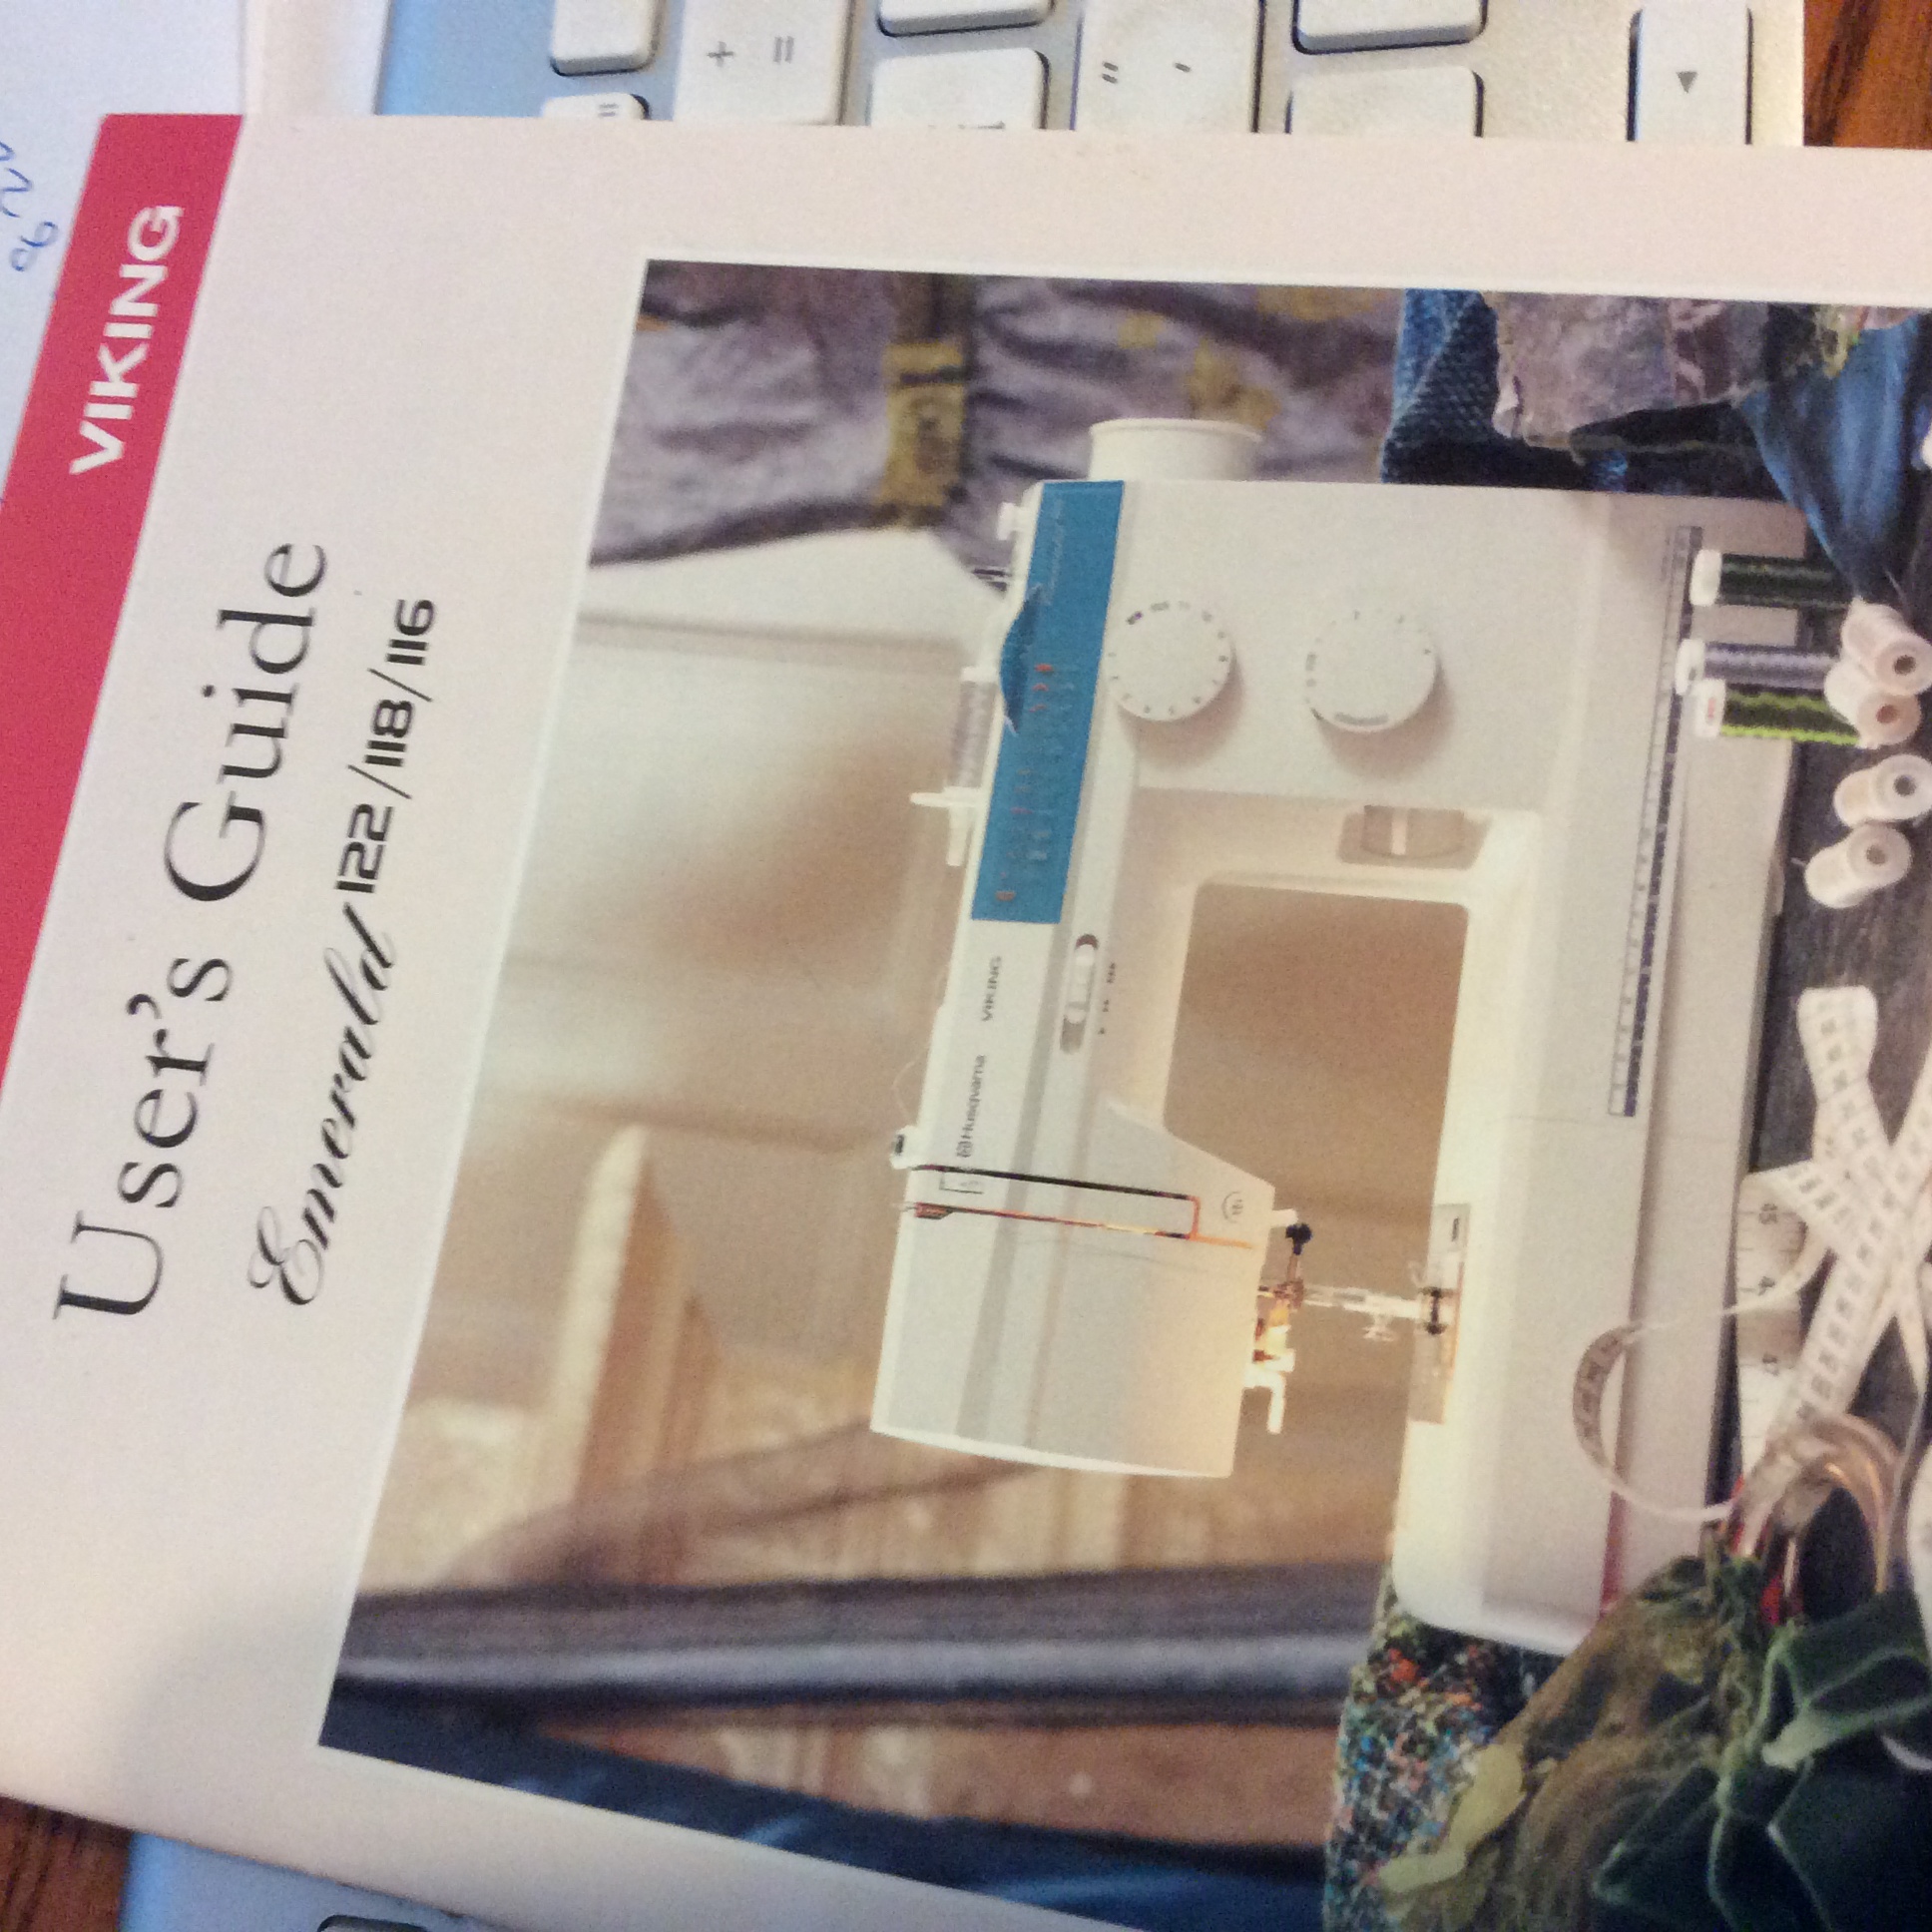
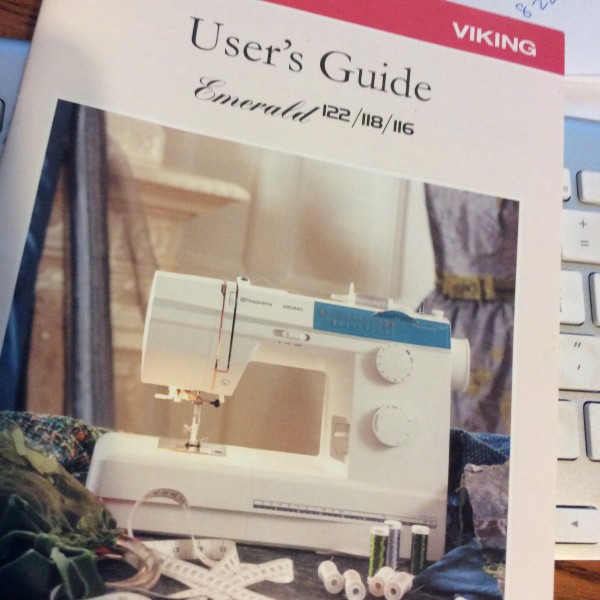
I auditioned a lot of machines in the meantime.  I read reviews, I stitched on things and I asked everyone I knew what they loved. I tried friend’s machines.  And then I bought a Viking Emerald. Which now belongs to my sister. (And by the way, B, I found the owner’s manual, which I will send to you!)

photo (15)

I was so fed up with the computer system, that I went for a full-on manual machine.  It is basic, solid, sturdy, it works great and the price was right.  My only complaint with this one is that it was too basic for the kind of sewing I wanted to do and I had gotten spoiled with the Lemon.  I had outgrown this machine (which I didn’t realize) before I even bought it.

So I passed that along to my sister and went shopping again. This time, I listened to what everyone else told me and bought a Bernina Activa 230. Many people had owned multiple Berninas and loved them. This one was on sale and it seemed like it was just what I needed and so many people loved Berninas.

This machine was the biggest disappointment of the bunch.  I hate the Bernina.  I had it for 2 weeks and I was already yelling at it.  The tension was finicky.  It ate thread.  Anything too thick threw all of the stitches and tension out of whack.  The zipper foot was stupid and I couldn’t stitch a zipper to save my soul.  (This is why I learned to hand pick them.  Which I like better anyway.)  I wanted to love it, but it’s seriously underpowered and undersized and way too picky for me.  I think probably Berninas can be great machines, but I am not feeling it.  This one came down with a tension issue about 2 weeks ago and I cleaned it and babied it and I have put it in time out rather than yell at it some more.  I will take it in and get it repaired (I am sure it is nothing major), but it is available if anyone wants it.  I have just accepted that it needs to go.  We don’t get along.

(Somewhere in here while fighting with the Bernina, I bought a Brother 1034D Serger on a whim for $200 on Amazon and I love love love it.  Never owned a serger before.)

So today, I bought a Pfaff.  It’s an Expression 3.2 and I haven’t even unpacked it yet.  Why a Pfaff?  At my former job, we owned 6 basic Pfaffs and they survived 12 years and hundreds of kids sewing on them and they are STILL RUNNING.  They have been banged around and abused (thread octopi in the bobbin case) and  threaded incorrectly and had crummy thread used in them and buttons pushed and needles broken and although they squeak and rattle, they still stitch beautifully.  I scoffed at them when I first saw them 12+ years ago.  They were pretty basic.  They thread kind of funny.  The bobbin winder didn’t really work after a while.  But the more I thought about my own sewing machine saga, the more I thought I just needed a machine that just worked.  Like those Pfaffs.  No matter what you do to them.  We gave them all names during summer camp this year to help them get through the summer.  We figured if they had names we could keep track of their issues better (they are getting pretty elderly) and they would feel loved.  So we (the teachers) named them after our grandmothers and the ladies who taught us to sew: Helen, Muriel, Ruth, Grace, Nancy and Barb.  Good karma.

So I bought one that is a couple of steps up from those student machines and I can’t even tell you about it because I have only stitched 8 inches on it so far.  It has plenty of bells and whistles.  Pfaff makes this built in walking foot gizmo that I just think is brilliant (our student machines had it) and they have the best zipper foot ever.  (Trust me.  You teach a class full of 9 year olds how to put in zippers with just any zipper foot and you will see.)  So I am hopeful.

Edited to add: I know that this is a really popular post that gets a lot of views, so I wanted to post a follow up. I love the Pfaff. Wouldn’t trade it for the world.)

In order to have really good karma, I am taking nominations to name this machine.  (My dress form is named Dolores.  My computer is Hippolyta.  I named the Bernina “Scarlett” because it made me say Damn! a lot.)

I want your best name suggestions.  Let’s make sure she feels welcome.

3 September, 2014

Reverse Appliqué

2014-09-24T18:28:38-05:00Embroidery, Sewing & Design, Tutorials|1 Comment

Last week I spent a day at the MN State Fair demonstrating mending.  Well, it started as demonstrating mending, but watching someone stitch a hem is about as much fun as watching paint dry.  ReUseMN, the organization that was sponsoring the demos is all about reuse and repair and each day they had a different group showing how to fix up something.  I had brought a bunch of little projects with me, but I needed something that would draw people over.  So I started “mending” a t-shirt with reverse appliqué.

photo 2

Appliqué means that you take a little piece of fabric and stitch it on top of another piece of fabric, like a patch.  It’s a good way to fix a hole.  Reverse appliqué means that you take  little piece of fabric and stitch it behind another piece of fabric.  When you trim away that top layer, you can make really cool designs and you can get rid of a hole or a bleach stain.  You can see one flower petal in progress on the t-shirt above.  The yellow fabric is another t-shirt that I brought along. I put a piece of yellow behind the red, stitched each petal and then cut away the red t-shirt.  I worked on this shirt all day, making 4 sunflowers with leaves and a butterfly.  (I turned the rest of the yellow t-shirt into some t-shirt yarn and made an infinity scarf.  That’s a fun project for another post.)

photo 1

If you love the look, be sure to check out Natalie Chanin’s work.  She has made reverse appliqué (especially with knits) pretty famous.  Molas, a South American art form, are also made using reverse appliqué.  The Hood Museum of Art has a great article about making molas that you can download here.

Frequently asked questions while I was working and chatting with people at the fair:

Won’t that just shred itself where you cut it?  You can’t wash it?

I am always surprised when I get this question.  Why would I make clothing that I couldn’t wash?  For the most part, knits don’t fray or come undone when you cut them.  Especially t-shirt knit.  The edges will curl up a little bit especially on an edge that gets stretched a lot, but it’s going to hold up just fine.

You have to sew it by machine if you really wanted to wear that, right?

I guess there is a perception that if you make it by machine that it is somehow stronger and better.  (If you didn’t check out Natalie Chanin before, let me just say that every stitch of her garments are hand sewn and meant to be worn.)  As long as I use good sturdy thread (perle cotton for this) and make sure I secure my ends, hand sewing can be stronger than sewing by machine.  This kind of stitching is also decorative because I chose to make the stitches somewhat large and in a contrasting color, but those pieces are going to stay together.

Cut then stitch?

Many people assumed that I had cut out the holes first and then stitched something behind.  It’s a lot easier to actually stitch first and cut after because everything stays nice and flat and the holes don’t stretch out of shape.  I did these shapes free-hand, but you could easily draw some light pencil lines as a guide for stitching.  I pinned the two layers of fabric together and used the pins to help me see where the edge of my yellow fabric was so I didn’t accidentally stitch off the edge.


Go to Top