23 May, 2011

Giveaway Day!

2011-05-26T06:36:56-05:00Freebies & Patterns, Weaving, Felting & FIbers|159 Comments

Welcome to Giveaway Day.  A little background: Sew Mama Sew sponsors a “Blog Giveaway Day” in May every year.  To participate, you sign up, your name is added to a long list of other blogs who are also participating and then you post your giveaway.  At the end of the week, winners are chosen and prizes are awarded.  Visit Sew Mama Sew to see the complete list and enter to win all kinds of groovy stuff.

MY GIVEAWAY:

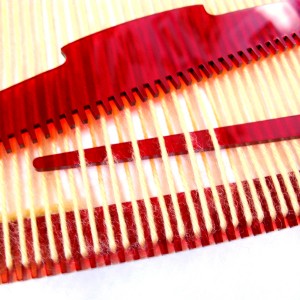
Prize Number One is one of my Little Frame Loom kits in cherry red.

It is a simple weaving loom which is great for small projects and is easy to learn for kids and beginners. You can use a wide variety of materials for weaving – yarn, recycled plastic, paper, novelty fibers.

The kit includes:
• 7 x 5 ¼ inch frame loom
• beater comb for packing the rows of weaving together
• needle-style shuttles in 2 lengths
• instructions with color diagrams & photos, including two ways to warp and finish your project
• link to additional video instructions
I designed the loom and tools and have them laser cut for me from acrylic plastic.

Prize Number Two is a tiny quilting hoop ornament in pink and green “flying geese” triangles.  The bamboo hoop is just an inch across and the fabric is digitally printed and then hand quilted with some tiny stitches.  I also designed these hoops and have them laser cut from bamboo plywood.

(The links above are to similar items in my etsy shop if you want to see more details or photos.)

HOW TO ENTER:

  • Leave a comment on this post and answer the following question:  Which would you most like to learn how to do: weaving or quilting?  Why?
  • Be sure to include your email address so I can contact you when you win.  (If you put it in the box, it won’t be displayed to the public.) Yes, I will ship internationally.
  • Contest will be open through May 25.
  • Please don’t worry if your comment doesn’t show up immediately.  I have to approve it first and I will do that as often as I can throughout the day.  :)

Contest is now closed.  Thank you!

13 December, 2010

Giveaway Day!

2010-12-18T09:03:12-06:00Everything Else, Freebies & Patterns|96 Comments

I am a little late getting this posted because Minneapolis got 20+ inches of snow over the weekend and we are a little distracted by shoveling!

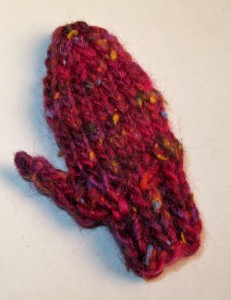
In honor of the snow, I am giving away mitten ornaments for your tree.  I will give away three pairs of tiny knitted mittens like these:

To enter, leave a comment and tell me:

what is your favorite color?

how many inches of snow you have at your house right now?

5 December, 2010

Mini Mitten Ornaments: A free pattern

2010-12-05T18:42:41-06:00Freebies & Patterns|Comments Off on Mini Mitten Ornaments: A free pattern

I wanted to knit some tiny mitten ornaments and although I found all kinds of cute patterns using sock weight and other tiny yarn, I didn’t come up with anything for worsted weight, which I have oodles of scraps of.  These mittens knit up in about 15 minutes and are simple enough that you can add stripes and some simple patterns if you are so inclined.

Materials: Worsted weight yarn scraps, four size 3 DPN, yarn needle

CO 12 stitches. (I like them divided evenly on 3 needles.)

K1 P1 ribbing for 6 rows.

K1 P1 KFB P.  Repeat 2 more times.  You now have 15 stitches.

Knit 8 rows.

K2tog, K 3.  Repeat 2 more times.  (12 stitches)

Knit 1 round.

K2tog, K2.  Repeat 2 more times.  (9 stitches)

Knit 1 round.

K2tog, K1.  Repeat 2 more times.  (6 stitches)

Cut your yarn.  Thread the end through a yarn needle.  Pass the yarn end through the last 6 stitches.  Pull tight and then pull the end to the inside of the mitten.  (I don’t weave in ends on this, I just stuff the yarn tails to the inside of the mitten.)

To make the thumb, you will do a short section of i-cord.

CO 3 stitches.  Knit 4 rows of i-cord.

K2tog, Knit 1.  Cast off, leaving about a 6 inch tail.

Thread the end of the yarn through your needle.  Slip the yarn end down through the center of the i cord and use the end to stitch the thumb in to place.  I put the bottom (cast on) edge of the i-cord even with the top of the ribbing.

Bury all the ends of yarn inside the mitten.

25 January, 2010

Quilted Valentines – A tutorial

2010-01-28T10:01:19-06:00Freebies & Patterns, Tutorials|6 Comments

What you will need:  scraps of fabric about 4 inches square (almost anything will work), scrap of batting , pencil, buttons, sewing needle, thread, sewing machine, iron, blank cards, scraps of colored card stock, double-stick tape or glue stick.

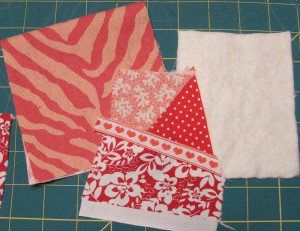
Start with your fabric (a piece for the front and a piece for the back) and batting.  I have a plain tiger print (left) and I made a quick little piece of crazy patchwork by pulling some scraps out of my bin and stitching them together (middle) and a piece of cotton quilt batting (right).  Felt or a scrap of polar fleece would work fine for batting too.  (The photo doesn’t show the backing pieces.)

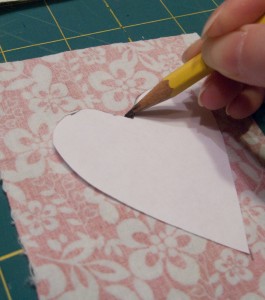
Draw and cut out a heart from scrap paper to make yourself a pattern.  If you like slightly lop-sided hearts like I do, get your favorite kid or husband to draw it for you.   Size depends on how big the card is that you are making.  My hearts are about 3 inches tall.   Put the pattern on the wrong side of your back fabric piece and trace with a pencil.

Stack up your fabric pieces in this order from top to bottom:

  • Back fabric (wrong side/traced side up)
  • Front fabric (right side/pretty side up)
  • Batting

Stitch all the way around the heart, following your pencil line.  (I hear you.  Somebody said, “But you need to leave an opening to turn it right side out.”  Nope.  Just trust me, we get to that next.)

Trim away the extra fabric, leaving about a 1/8 inch seam allowance.  Clip the dip at the top of the heart and trim off a little at the tip, to help it turn a little neater.  You can clip the curves too if you want to.

Now, how to turn it right side out?

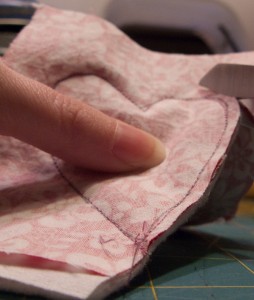
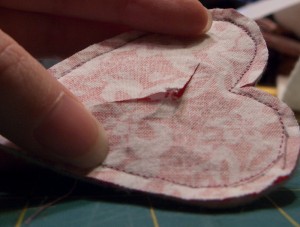
Pinch the layers with your fingertips and pull them apart so that you have just the center of the backing fabric.  With a sharp pair of little scissors or a seam ripper, make a little slash through just that backing fabric. Don’t go all the way to the stitching line but keep it in the center.

Why not leave an opening in the stitching?  I like how this way you get a really nice smooth stitched edge all the way around (no hand sewing), plus this backing part of your heart will be stitched to the card, so it doesn’t show.

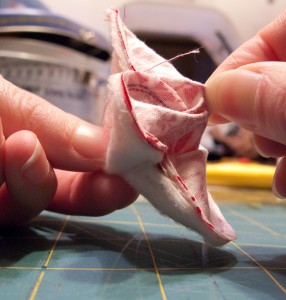
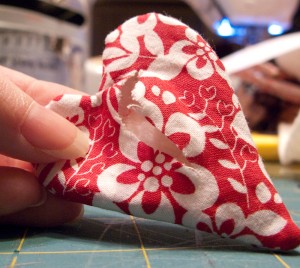
Use the slash you made to turn the heart right side out.  With a chopstick, gently smooth it out then bring your heart over to the ironing board and give it a good dose of steam.  (We’re looking at the back in this photo.)

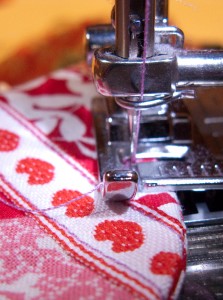
Now, quilt it!  Stitch about 1/4 inch from the edge all the way around the heart.  Do a second border of stitching or some doodles in the center of you like.  I like to press it again after this step.

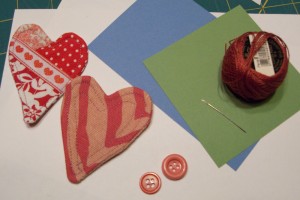
Now it’s time to assemble the cards.  Choose a quilted heart, a button and a scrap of card stock.  I used some recycled card stock from a holiday project.  Using embroidery thread, stitch through the heart and button to attach them to the card stock scrap. I like to make mine off-centered. Tie a knot on the back to hold everything in place.

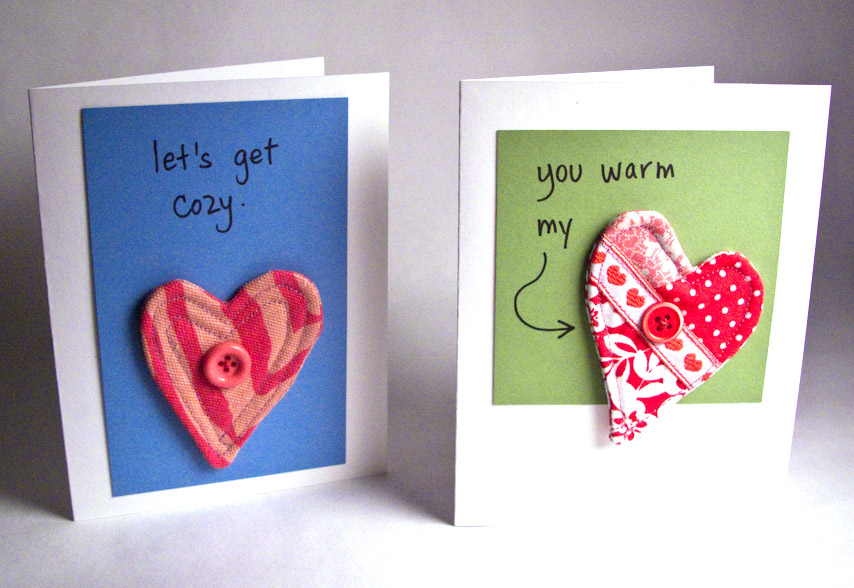
There are two quilted hearts stitched to their card stock scraps.  Now to finish them up.  Use double-stick tape or glue to attach your quilted heart/colored card to a plain card.  Write a message if you want to or leave it blank.

Happy sewing!

11 December, 2009

I’ve never seen a purple cow…

2020-11-11T13:21:21-06:00Freebies & Patterns|3 Comments

Holiday gift making is in full swing around here, which gives me nothing to tell you about because then I would ruin the surprise.  So, here’s a little project for you that I thought it was time to post again.

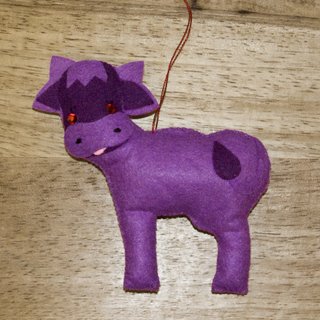
The original purple cow christmas tree ornament came from a 1970’s church bazaar and was purchased by my Grandma.  It is the favorite ornament of my youngest sister but sadly the original had a run-in with a mischievous puppy.  So this is my reproduction of the Purple Cow.  Download a free pattern and instructions for your own cow.

Go to Top