12 December, 2011

Blog Giveaway Day is Here!
2011-12-18T08:40:55-06:00Freebies & Patterns|336 Comments

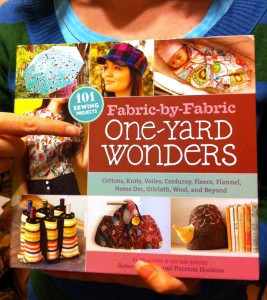
That’s right, I am giving away a copy of the book! 

I have two designs in Fabric-by-Fabric One Yard Wonders and I want to share the awesome with all of you.

How to enter:

  • Leave a comment on this post and tell me: What is the best handmade gift you have ever received OR what gift have you made that you are proudest of?  (Comments have now been turned off.)
  • Be sure to include your email address in the box in the comment form.  It won’t be public if you put it there, but I will be able to see it so I can contact you when you win.
  • Don’t worry if your comment doesn’t show up right away.  I moderate comments and I will approve them whenever I get a chance.
  • Comments will be open until December 16 at 5 pm.
  • I will choose a winner by random drawing.  And I will draw some extra names from my favorite answers for some runner-up prizes too.
  • I will ship internationally.

That’s it.  Pretty simple!

And I want to play along too, since it’s not fair to ask all of you to do all the work, so…

The best handmade gift I have ever gotten:  I love a lot of pretty awesome handmade gifts so I will share two favorites: My engagement ring.  My husband folded an origami butterfly ring out of silvery paper and gave me that when he proposed.  I also have a carved and painted tiny wooden giraffe that my dad made for my mom when they were dating/newlyweds.  Last year for Christmas, my mom decided that the little giraffe needed to come stay with me.

The handmade gift I am proudest of: Usually that is the last thing I finished.  So right now I am proudest of a beautiful lace cowl I made for my friend Lynn’s birthday.  She is a pretty stellar knitter, so I worked really hard to make sure it would be something she would love.

To find more giveaways for the Giveaway Day event, check at Sew Mama Sew for all of the hundreds of blogs participating.

26 May, 2011

The Winners

2011-05-26T22:11:38-05:00Freebies & Patterns, Weaving, Felting & FIbers|Comments Off on The Winners

My Random Number Generator has picked two winners:

The loom goes to Sadie and her girls, who said:  “I would love to learn how to weave, so that I could share that skill with my two young daughters. It would be fun to make gifts and projects together as a family and allowing them to sit behind my sewing machine makes me a nervous wreck. Weaving would be a relaxing and rewarding craft to start.”

I am glad my random number landed on you because your comment made me laugh.  I teach sewing to kids and I know exactly what you are feeling!

The quilting hoop ornament goes to Rae, who said: “I would love to learn to quilt. Nothing says love like a quilt. “

I second that.  You’ve got to love somebody a lot to make them a quilt and you always feel loved when you are wrapped up in one that someone made for you.

Thank you everyone for the comments and another fun giveaway day.  I can’t believe how many wannabe weavers there are out there!  I will definitely think about doing some more weaving posts for you.

23 May, 2011

Giveaway Day!

2011-05-26T06:36:56-05:00Freebies & Patterns, Weaving, Felting & FIbers|159 Comments

Welcome to Giveaway Day.  A little background: Sew Mama Sew sponsors a “Blog Giveaway Day” in May every year.  To participate, you sign up, your name is added to a long list of other blogs who are also participating and then you post your giveaway.  At the end of the week, winners are chosen and prizes are awarded.  Visit Sew Mama Sew to see the complete list and enter to win all kinds of groovy stuff.

MY GIVEAWAY:

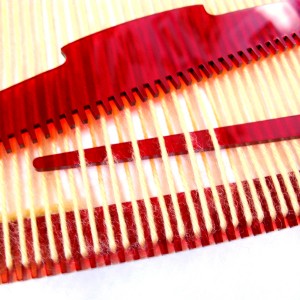
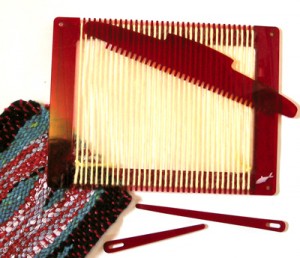
Prize Number One is one of my Little Frame Loom kits in cherry red.

It is a simple weaving loom which is great for small projects and is easy to learn for kids and beginners. You can use a wide variety of materials for weaving – yarn, recycled plastic, paper, novelty fibers.

The kit includes:
• 7 x 5 ¼ inch frame loom
• beater comb for packing the rows of weaving together
• needle-style shuttles in 2 lengths
• instructions with color diagrams & photos, including two ways to warp and finish your project
• link to additional video instructions
I designed the loom and tools and have them laser cut for me from acrylic plastic.

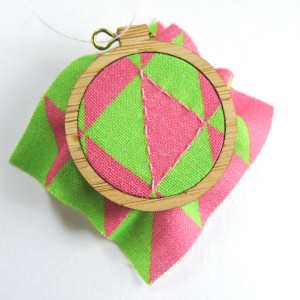
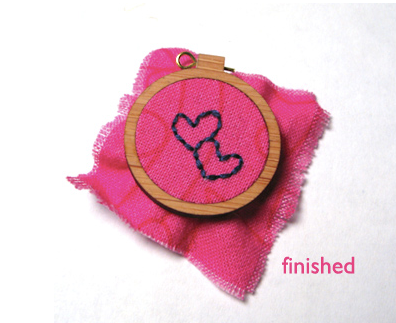
Prize Number Two is a tiny quilting hoop ornament in pink and green “flying geese” triangles.  The bamboo hoop is just an inch across and the fabric is digitally printed and then hand quilted with some tiny stitches.  I also designed these hoops and have them laser cut from bamboo plywood.

(The links above are to similar items in my etsy shop if you want to see more details or photos.)

HOW TO ENTER:

  • Leave a comment on this post and answer the following question:  Which would you most like to learn how to do: weaving or quilting?  Why?
  • Be sure to include your email address so I can contact you when you win.  (If you put it in the box, it won’t be displayed to the public.) Yes, I will ship internationally.
  • Contest will be open through May 25.
  • Please don’t worry if your comment doesn’t show up immediately.  I have to approve it first and I will do that as often as I can throughout the day.  :)

Contest is now closed.  Thank you!

4 May, 2011

Photoshop Tips: Curves

2011-05-05T19:15:12-05:00Tutorials|1 Comment

I originally wrote up this post for another reason and it didn’t get posted.  So I thought I would share it here with you.  This is one of my favorite tips for touching up your photos for posting in your Etsy shop or many other purposes.  Enjoy!

Fixing Grey and Gloomy with the Curves Tool in Photoshop

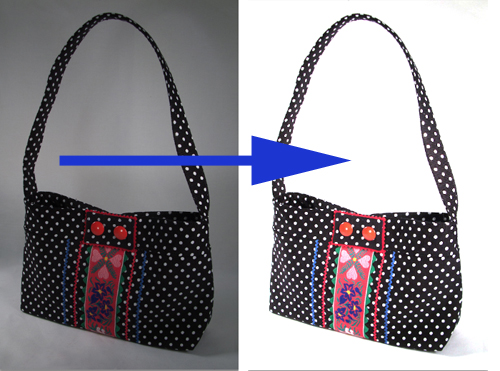
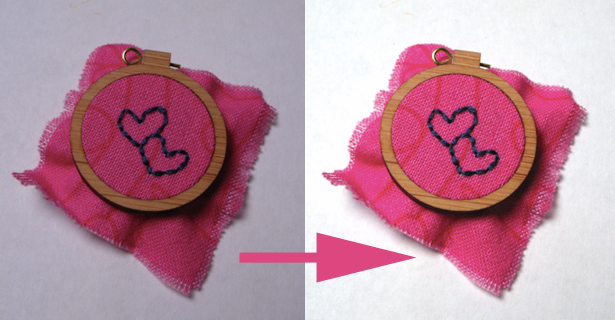
Curves is probably my favorite Photoshop “touch-up” tool.  I shoot a lot of my photos against a white background because I like the way that makes the background “disappear” and it really helps a buyer focus on the work.  Sometimes if I shoot these photos on an overcast day or when I just can’t get quite enough light in my workspace, the white background ends up looking dull grey/blue/yellow and the whole photo is a little gloomy.  Not very appealing.

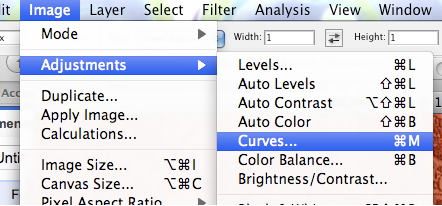
My favorite way to fix this “grey & gloomy” is to use the Curves tool.  Open your image and go to the “Image” menu, then choose “Adjustments”, then “Curves”.

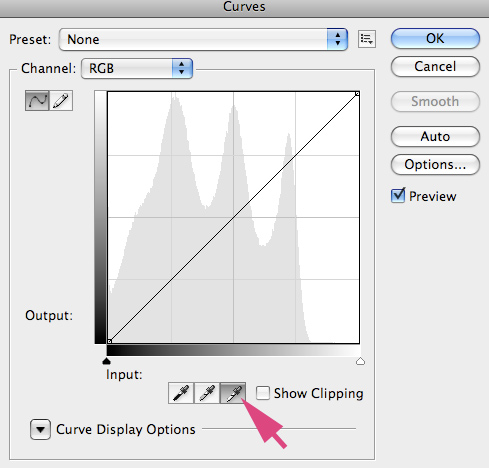
A dialog window will pop up.  Look for the eyedropper icon that looks like it is full of white paint.  (There will be a black and a grey one too.)  Your cursor will change to an eyedropper.

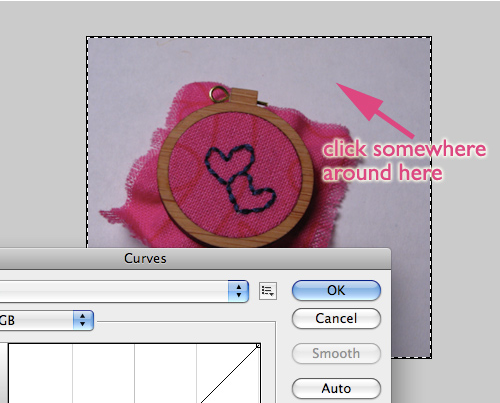
Go over to your image and click in any white area of the background.  I usually choose whatever looks like the brightest spot in the image.  By clicking, you are telling Photoshop: “This spot I just clicked is supposed to be pure white.  Please readjust everything else in this image so that spot looks white.”  You can try clicking a couple of different spots in your image until you get just the right adjustment.  Once you are happy, then click “OK”, save your image and you are all set.

Do you use black or grey as your photo background?  This tip works for you too!  Just choose the black or grey eyedropper and follow the same steps. There are lots of other things you can do with Curves too, so feel free to experiment!

(The screen shots for this tutorial are from a Mac using Photoshop CS3. Other versions of Photoshop will have the same tool, but the menus might look slightly different.)

Go to Top