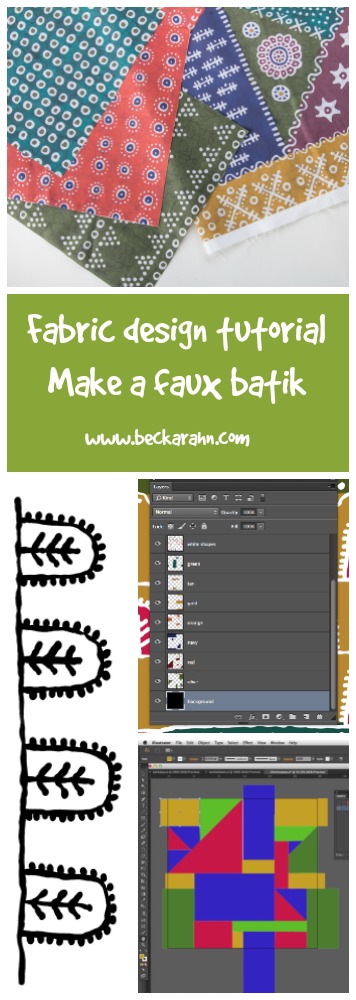
Part Three of my faux batik tutorial is all about making your scanned paintings into vector shapes. For this we are going to switch over and open the files in Adobe Illustrator instead of Photoshop. As I said about Photoshop, there are certainly other vector based programs that you can use as well, but I am not as sure that they have some of the specialized tools that Illustrator includes. Way back when I was first learning Illustrator, I hated it. It did not make any sense to me at all. I think it might now be my favorite tool, but it is a heck of a learning curve.
Making simple vector shapes.
I opened a new blank file in Illustrator and then placed one of my painted elements into the document. (Place a file by going to the File menu and choosing Place.) Select your image by clicking on it using the black arrow or select tool. You can tell it is selected because Illustrator draws a box around it.
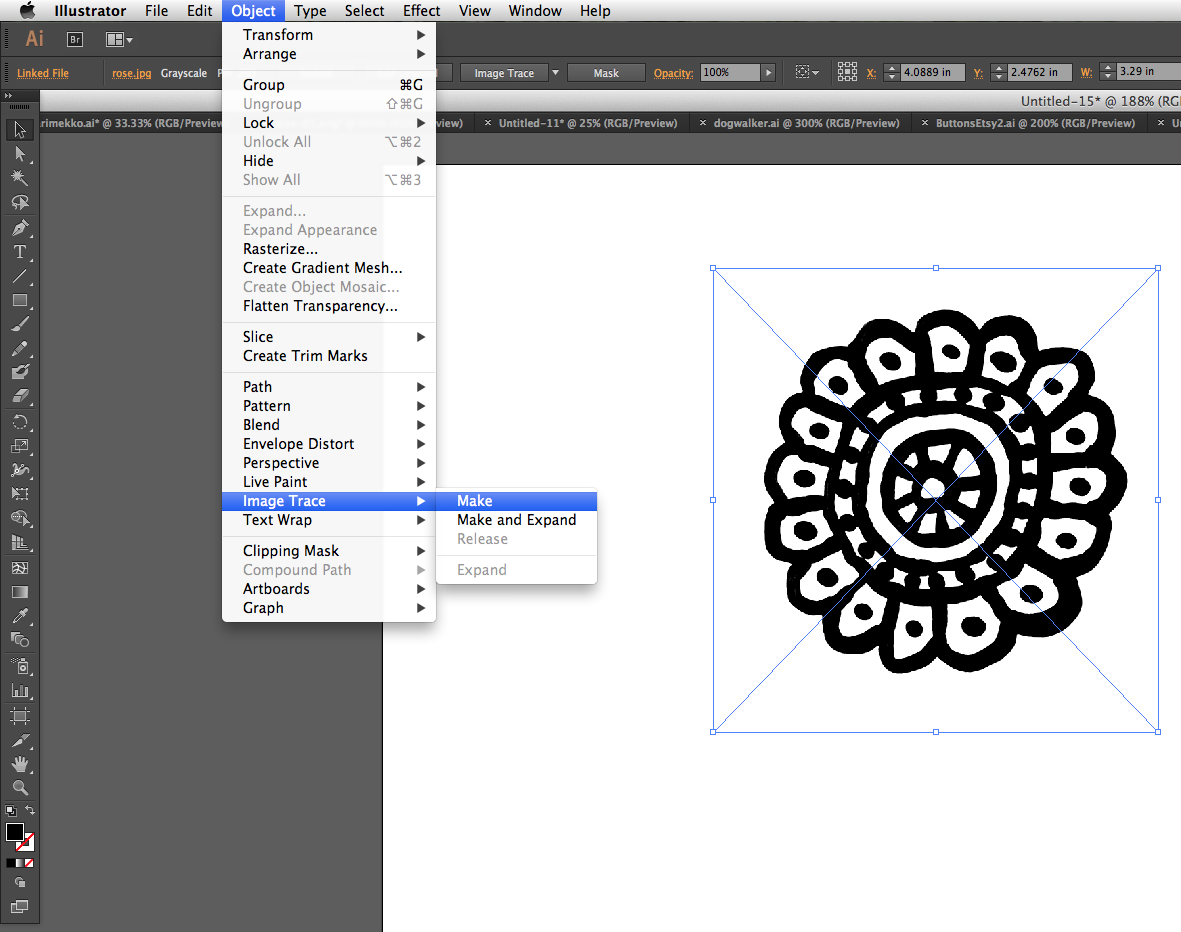 To convert this element into a vector shape, go to the Object menu and choose Image Trace -> Make and Expand. This Image Trace tool has lots of settings you can tweak but I just went with the built in defaults for these designs and that worked great. When it traces your image, it looks for the contrasting edges and it draws new vector lines to match them. Here’s what it looks like after it has been traced.
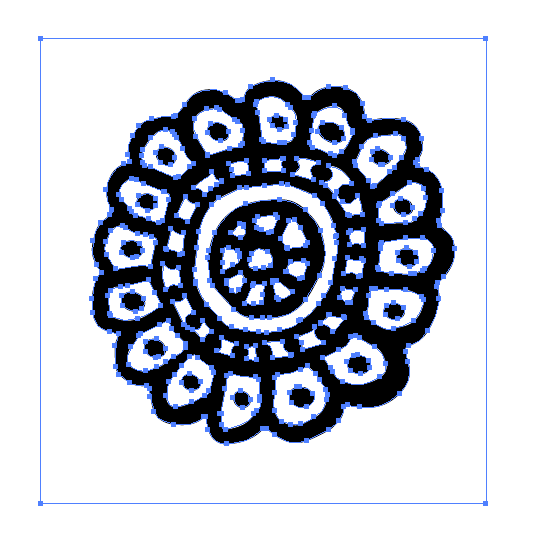
The little blue dots and outlines are showing me the new points and lines it has drawn to make these shapes. When you look at the shape, you really aren’t going to see a difference. So what did it do? The best way to show you is to zoom in to the design very closely.
 On the left is the rosette in Photoshop and the right is in Illustrator after we have traced it. In Photoshop, you can see the shape is made of an exact number of pixels and you can see all of the jagged or pixellated edges when you look at it very closely. If I wanted to use this design and make it bigger, you would see this jagged edge. The pixellated edge also makes it difficult to color it in a different color because you can see the edge isn’t pure black but is many different shades of grey. To make a smooth looking curve when it is smaller/zoomed out, it needs to approximate to smooth out the edges. In Illustrator, the trace tool converts the shape into vectors or “pins and lines” instead. So now if I make this shape very large, the computer says, “I know there is a pin here and a pin here and a line in between them” and it redraws the shape at whatever size I need it. It always has a smooth edge because vectors can adapt. Because it is a smooth edge, it’s also easy to switch colors and get something very clean. Why don’t we always use vectors then? Some things can’t be made into simple shapes. Think about a photograph and how many millions of shades and tints and subtle color things are going on. Neither format is better, it just depends on what you need to achieve.
The last thing I want to do is get rid of the extra white space around my shape. When the trace tool traced the shape, it included the white background from my Photoshop file. To get rid of that extra white paper, I first selected the shape. By default, traced images are always “grouped” together so all the pieces stay as one unit. To ungroup the shape, choose the menu item Object -> Ungroup.
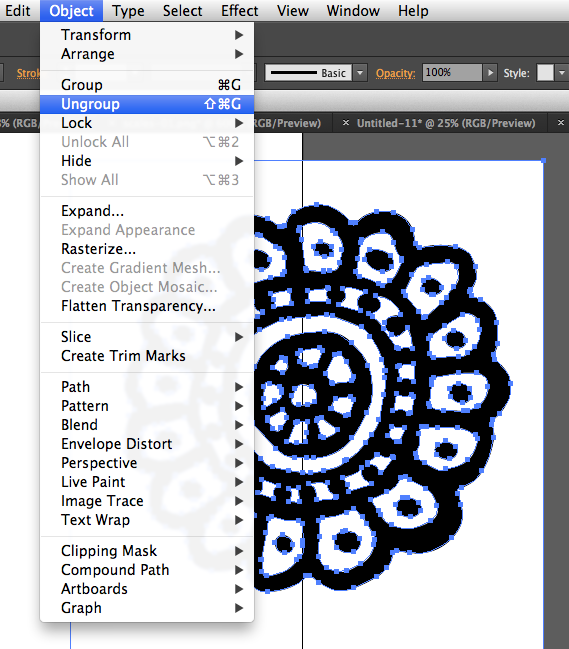 Now click away from your element in an empty space (to deselect it) and click back on the white box to select just that part. Then hit delete. Finally, I want to group all of the bits of this rosette back together again so I can move them around as one piece. To regroup it, I click outside of the rosette somewhere and drag so that I draw a box around the entire rosette. This tells the computer to select everything that’s inside the box that I just drew. Then I go back to the menu and choose Object -> Group. Now it is grouped back together and the pieces will stay where they belong.
To get ready for the next part of my design, I will go ahead and convert all of my elements into vector shapes. I will place them, trace and keep them all together in this same file, which I call my “toolbox”. We will work with the toolbox more when we get to Part Four.
Lost? Confused? Please feel free to chime in with questions in the comments.
More in this series: Part One • Part Two • Part Three • Part Four • Part Five • Part Six