

 Usually I write tutorials with fabric in mind, and although this would make very cute fabric, I have an idea for something a little different with this one.
Making the Hearts
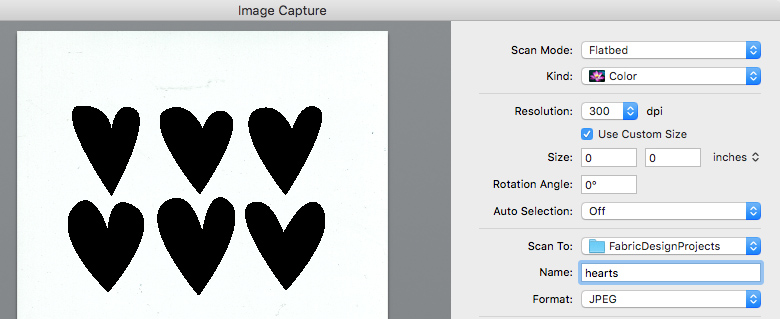
To start this design, I cut the hearts out of black paper, taped them on a white background and scanned them. I set the scanner to capture 300 dpi, because I hadn’t yet decided what size to make them and that gives me some flexibility. I like the wonky quality of handcut hearts vs something I drew digitally, so that’s why I did it this way.
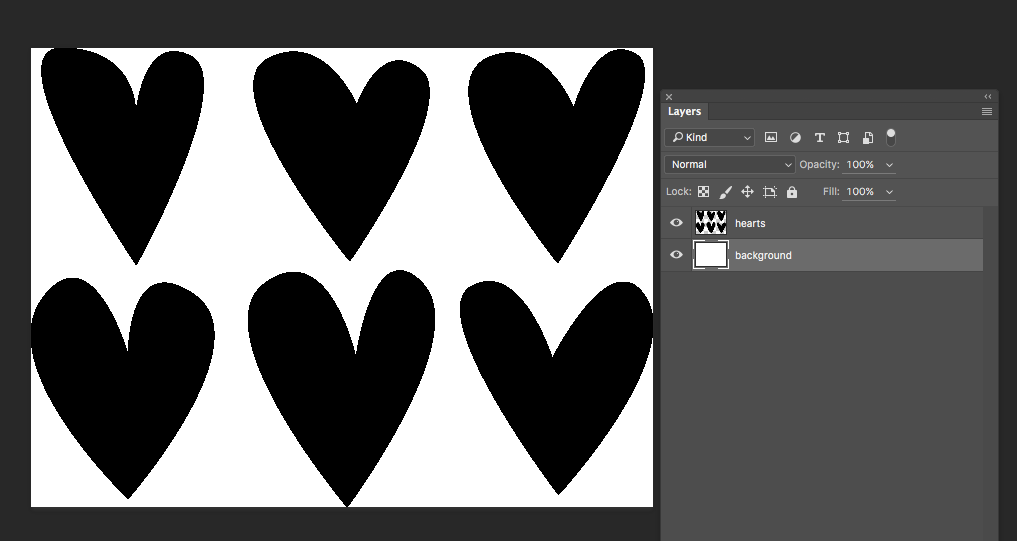
I opened the scan in Photoshop and adjusted the contrast a little bit to make sure the hearts were crisp and black. Then I selected the white background with the Magic Wand tool and deleted it, so that my hearts were on a layer all by themselves and I could add in a separate white background layer.
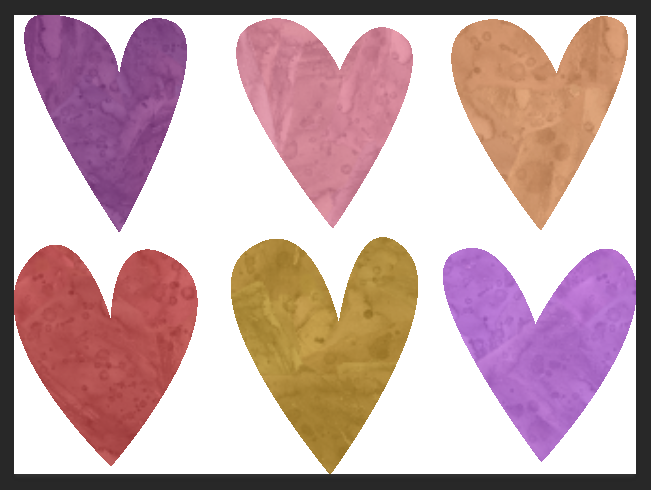
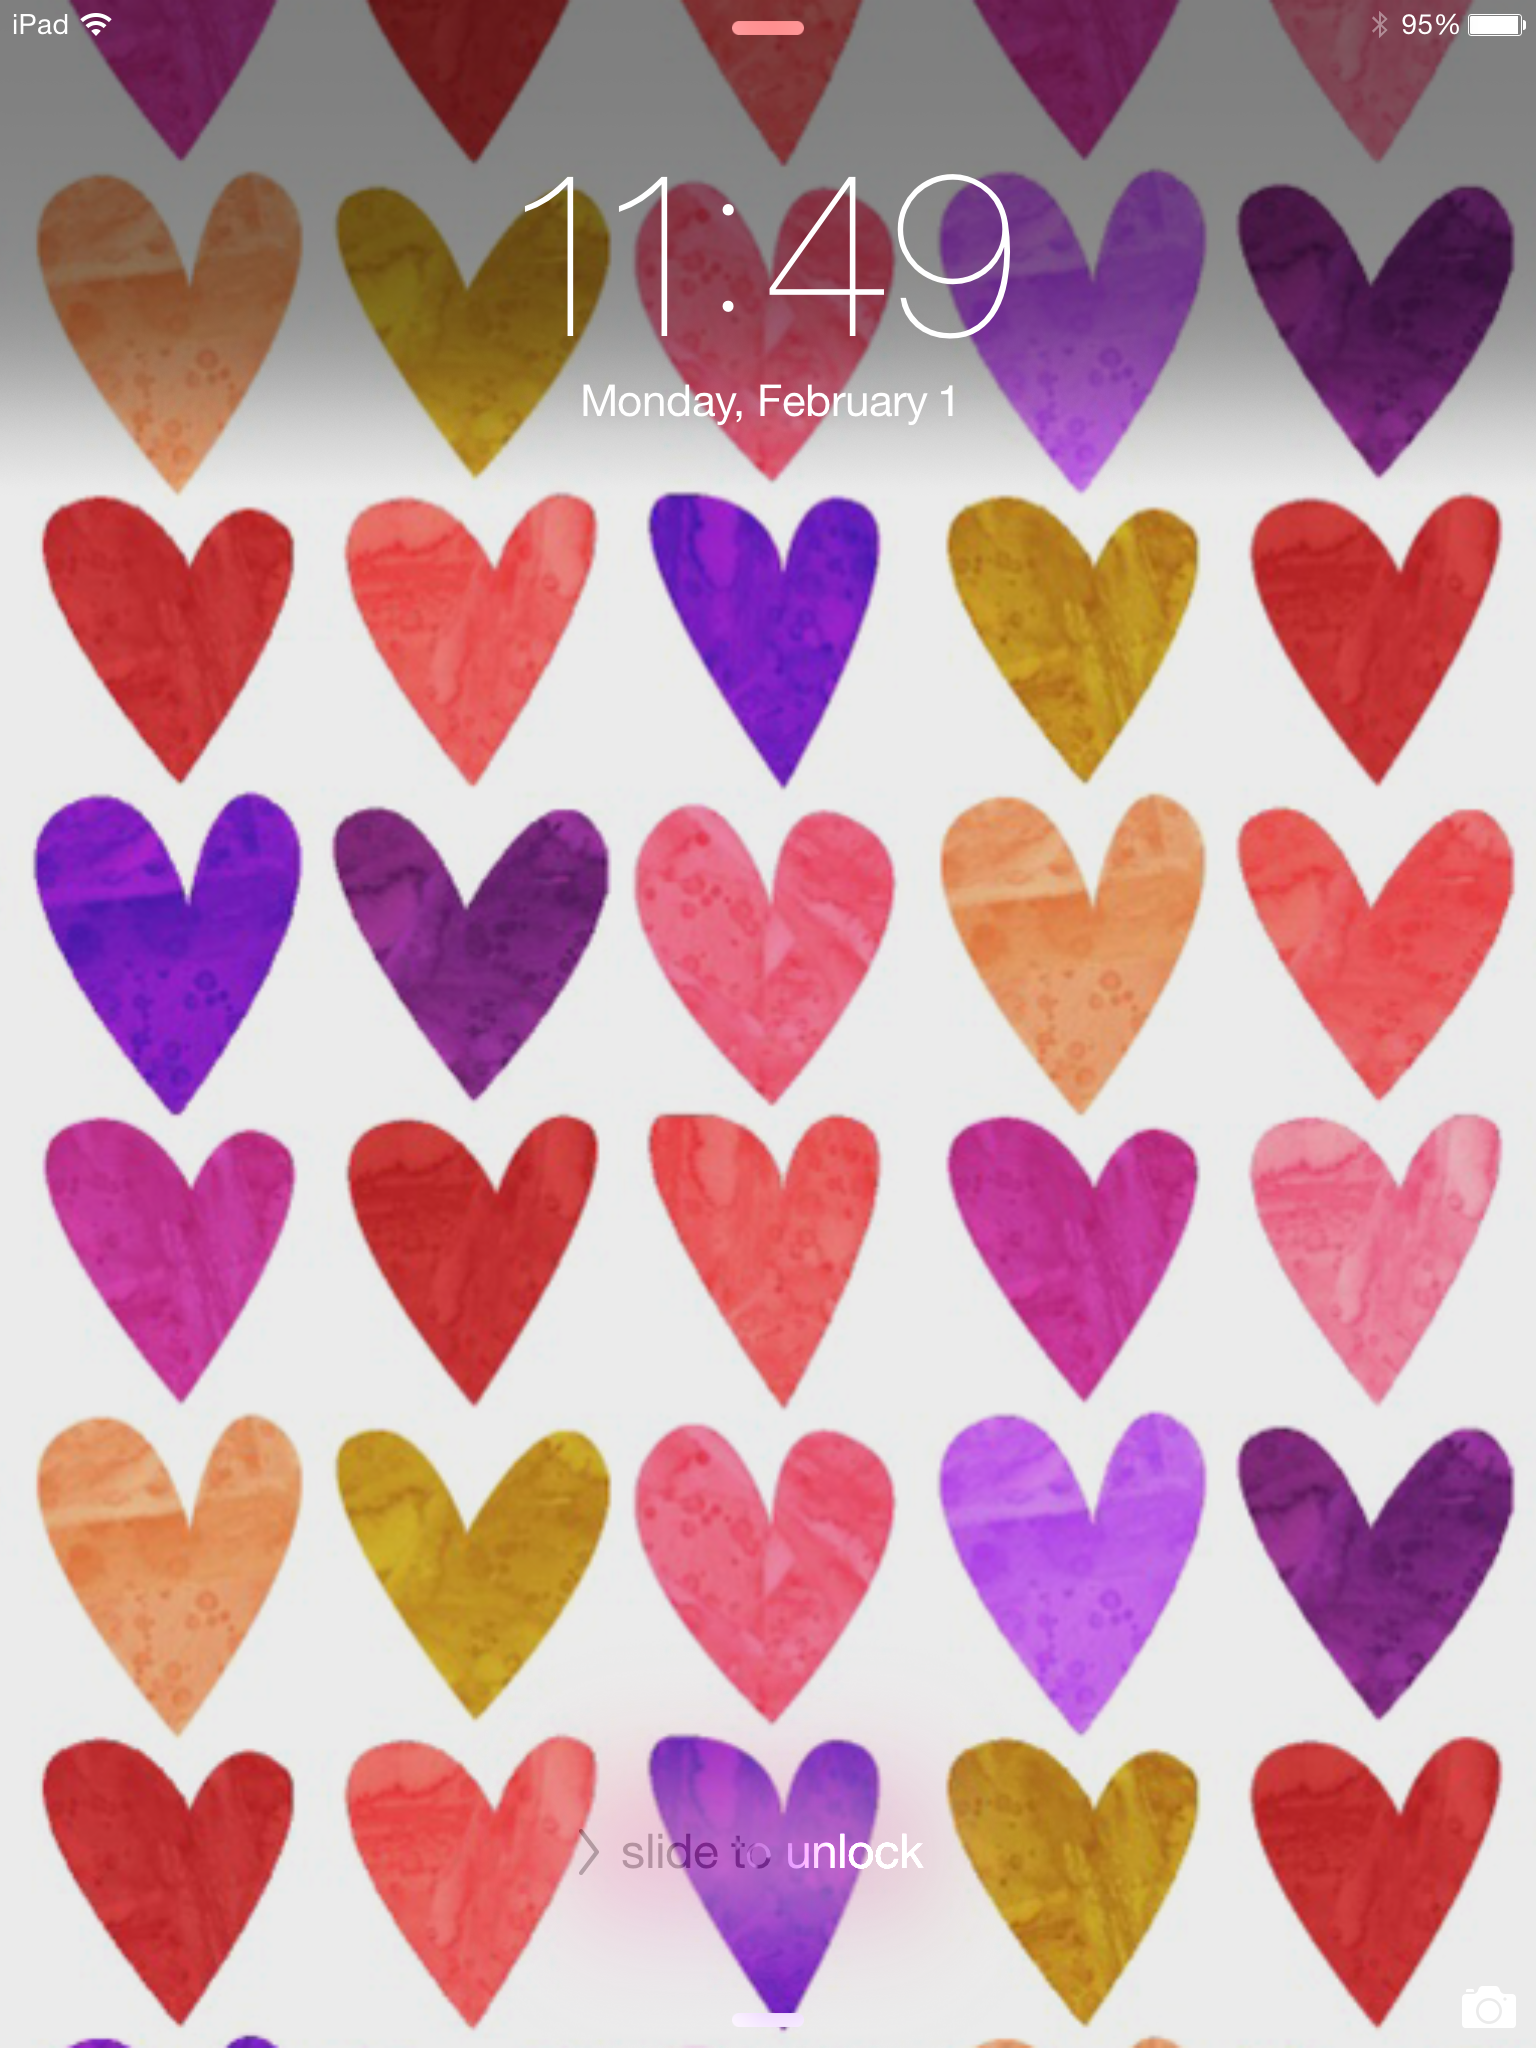
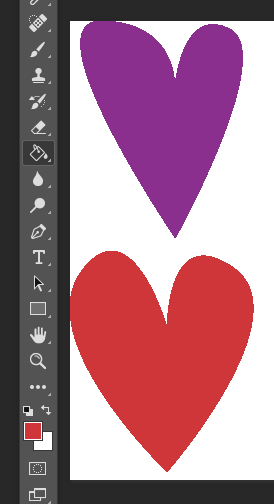 Next I colored the hearts using the Paint Bucket tool. I chose pinks, purples, red and gold for my design. Choose the Paint Bucket tool, choose a color from the palette and then click on each of the hearts to paint it.
Adding the Paint Texture
You could actually stop here and this would be a good design all on its own, but I wanted to add something special to this design: a watercolor paint texture.
I created my own paint texture as a separate file. I painted with watery black craft paint on a piece of watercolor paper, let it dry and scanned it. I built up several layers of the same scanned paint and created a seamless paint texture. (You wouldn’t necessarily need to make a seamless texture for this project, but I wanted to reuse this paint later, so it was worth that little bit of extra effort.)
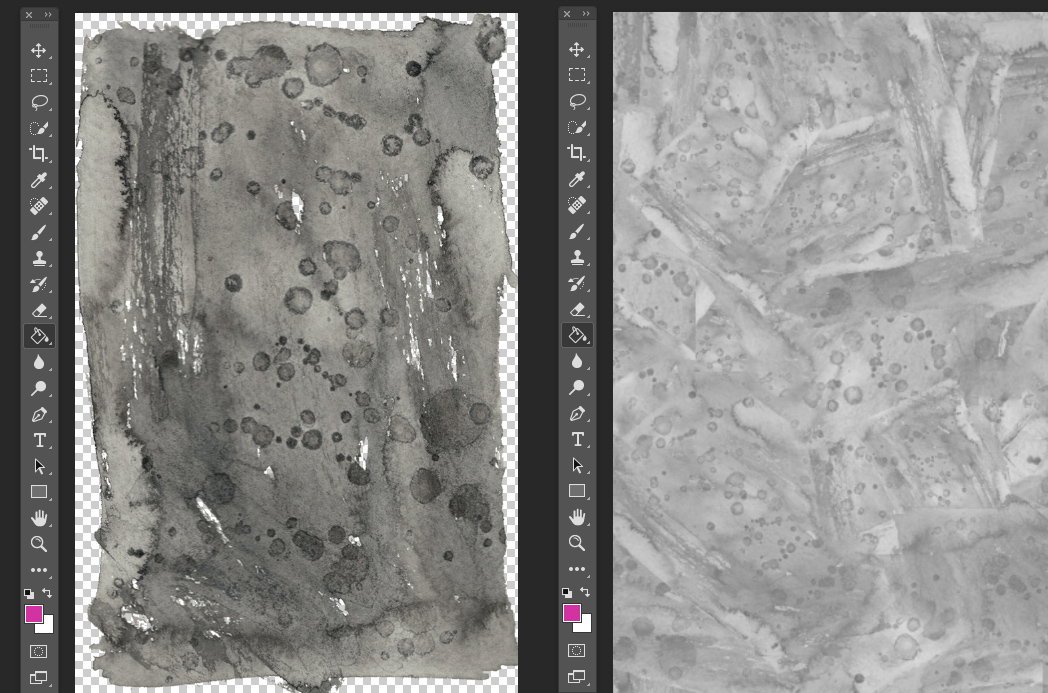
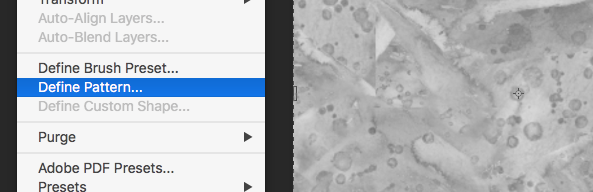
Then I turned this painted texture into something I can use as a Layer Overlay. To do that, I select the whole image and then choose from the menus: Edit -> Define Pattern.
Now switch back to the file with the hearts design. Select the hearts layer, then choose Layer -> Layer Style -> Pattern Overlay from the menu and it will bring up a dialog box with some settings you can adjust.
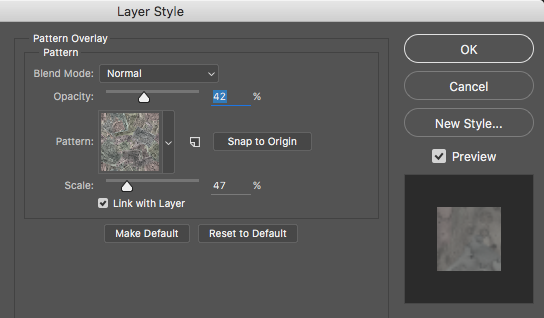
You can choose the pattern by clicking the tiny arrow to the right of the pattern swatch box and it will bring up a palette of patterns, including that paint texture you just defined. I adjusted the opacity and made my pattern partly transparent because I wanted the colors to show through. You can also adjust the scale of the pattern. When you click OK, you will see the new pattern overlay, which I think looks pretty cool.
Options for finishing
- You could stop right here, save and have a repeat ready to upload to Spoonflower to make fabric or wrapping paper. You might want to check the crop (to make sure you have even spacing around the outside of the hearts) and remember that we scanned at higher resolution than we needed, so think about the finished size you would like and adjust the size of this file. (For example, I chose Image ->Image Size and resized this to 4 inches wide at 150 dpi, so I know exactly the size it will print when I upload it.)
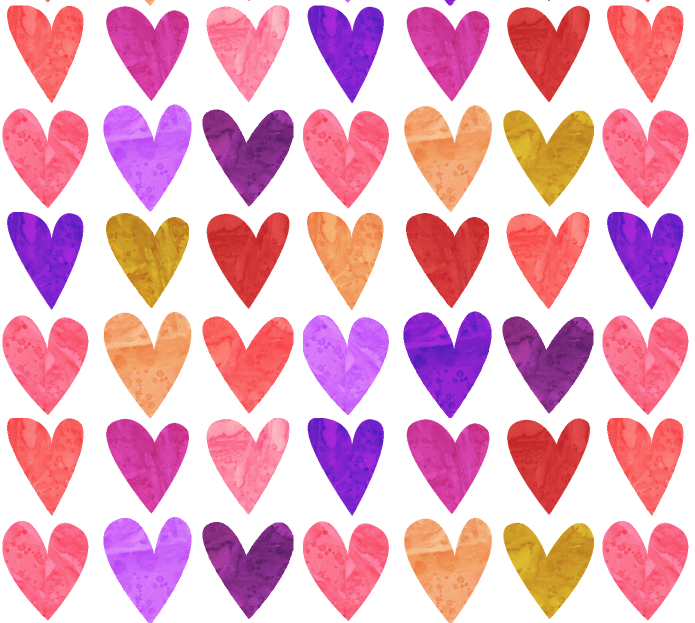
- Make wallpaper for your iPad! I thought it would be fun to make a pattern that I could upload to my iPad and use as a wallpaper background pattern.
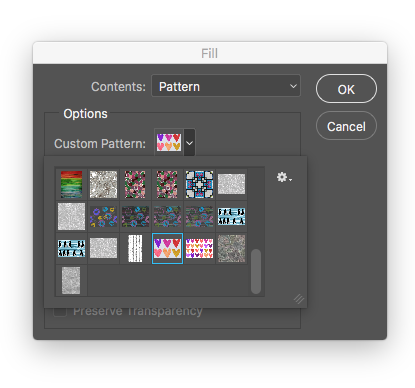
To make an image to fit your iPad, you want a larger image that is filled with several repeats. First I selected my single repeat of the hearts design and chose Edit -> Define Pattern from the menu. This is another way to use that same tool we used to create the paint texture.
Now create a new file that is about 2000 pixels on a side. Select the whole canvas and choose Edit -> Fill. The Fill dialog box will pop up. Choose Pattern from the top menu dropdown and the same pattern selection box will pop up, click the tiny down arrow and your new heart repeat will be one of the options.
Save your new file. There are several ways to get this image to your iPad. Email it to yourself and then save the image to your camera roll out of the email. If you have a Mac, you can use AirDrop. If you have another kind of tablet, just use whatever method you use to transfer other files to your device (ie sync).
I had a few minutes while I’m waiting for my printer to warm up, wandered over to your post, and bam! Super helpful! Especially the part about making a watercolor layer. Thanks, Becka!
Yay! Glad it was helpful.