

Want to listen instead of reading?
A few months ago I ran across an article talking about Kraftex paper. If you’ve never heard of it, it’s like a heavy flexible paper, which feels a little like a cross between paper and leather. It comes in an unwashed version, which is stiffer like watercolor paper, and a washed version which has some flexibility and almost a drape, like fabric. I mentioned in my newsletter that I was super curious about it and a staff member from C&T Publishing reached out and offered to send me some samples to play with. I jumped at the chance!
Because I believe in transparency, I want to say that C&T didn’t ask me to review, post or promote anything in exchange for the samples. This is not a sponsored or paid post.
I’m dedicating some time this summer to both trying new things in my studio and practicing some new-to-me skills, so this morning I pulled out some of the washed Kraftex paper and decided to make a small notebook. I’ve been expanding my art practice to include more paper arts because I have found that it helps make my work more accessible when I am trying to do community projects. Fabric, and the tools needed to work with it, can be cost prohibitive and feel challenging for beginners, but paper is everywhere.

I started by tearing down some sheets of paper to make the pages for my book. This is some lightweight drawing paper and I made strips that were 3×11 inches. Tearing down pages was something I learned in a coptic sketchbook class I took recently from the MN Center for Book Arts. And although that seems like kind of a silly thing to want to practice, getting a consistent edge really does take some practice. I really love the look of a torn edge, so it’s something I want to get better at. It took just one large sheet of paper to tear down into smaller sheets for my notebook.

I cut the cover out of a piece of Kraftex paper with my rotary cutter and a ruler. This is the washed version in a color they call “Natural”. I loved how this one really looks like leather. It is about 1mm thick and very flexible. I really chose the size of my book to maximize the use of a piece of this Kraftex paper. It comes in 8.5 x 11 sheets or rolls, so I cut a strip 3×11 inches for the cover too. I folded each page and the cover in half to make a finished book that’s about 3×5.5 inches. The kraftex took a fold nicely and didn’t crack or warp like thick papers sometimes do. I think the Kraftex is going to make the perfect cover. It’s heavy enough to feel like a cover but not stiff or bulky.
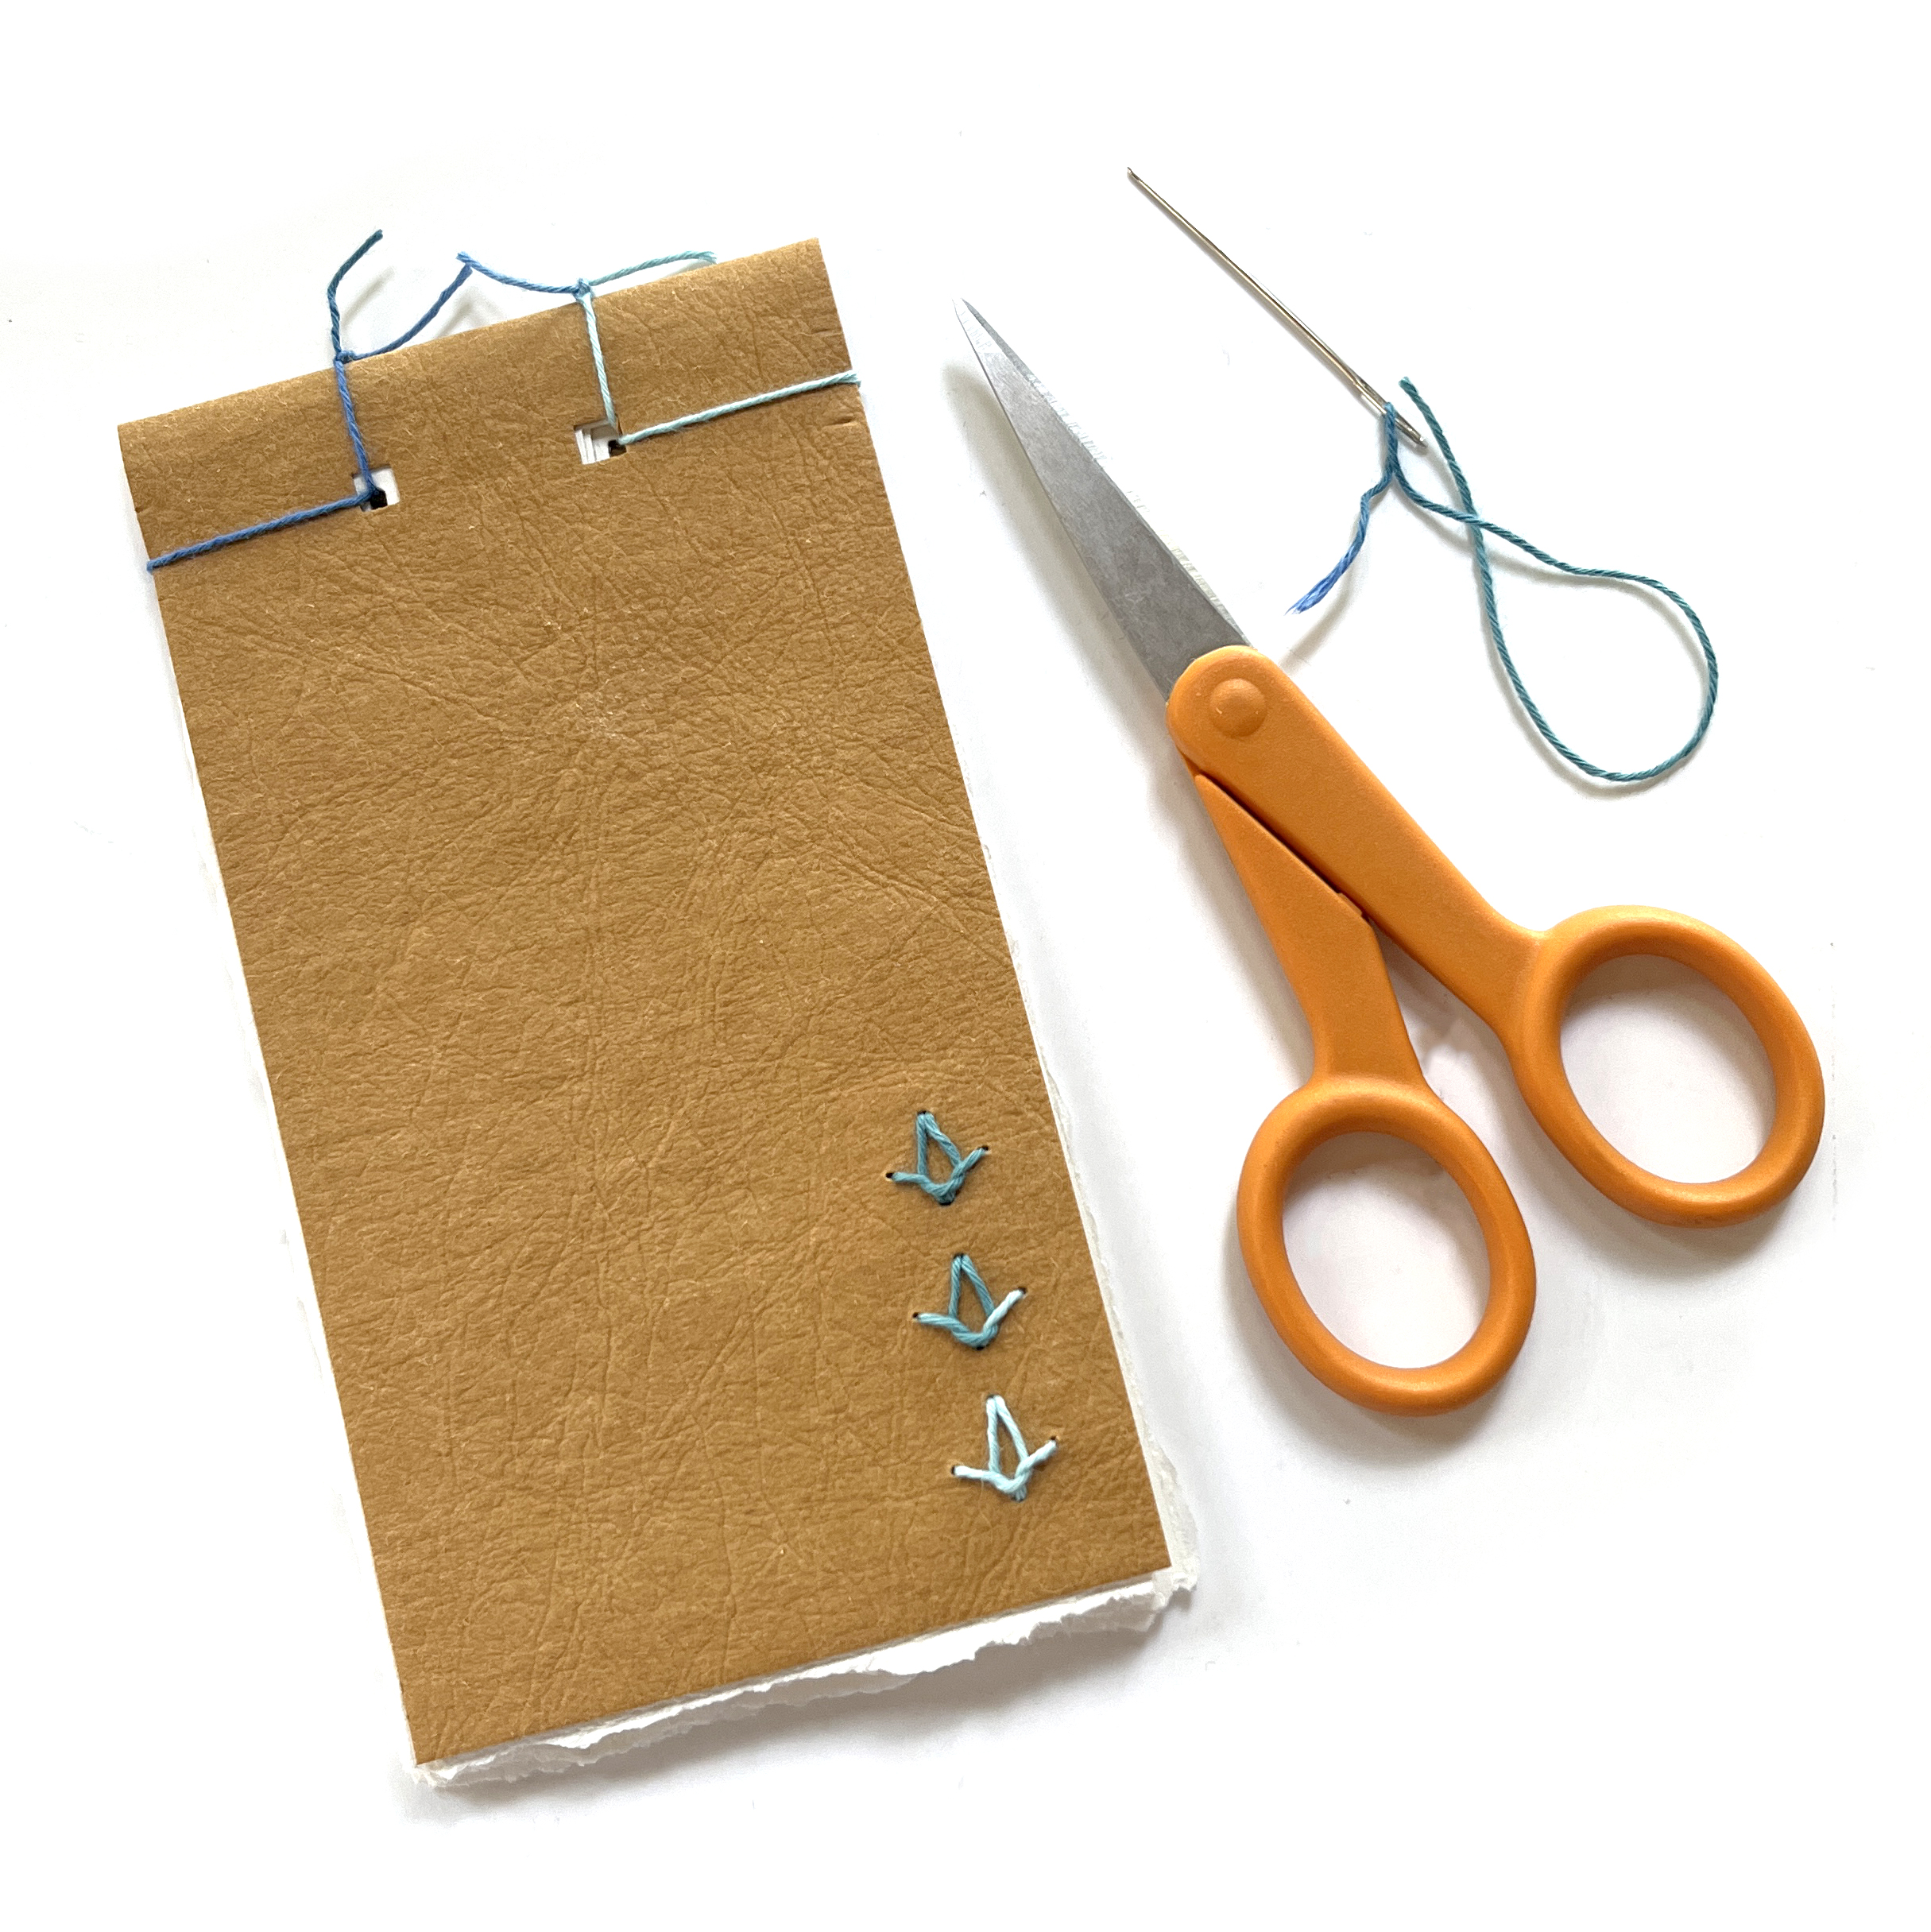
I decided to use a decorative paper punch to create the holes so I could bind the book together. It was relatively easy to punch, but I should have made myself a jig so it was easier to line up the holes in the pages and cover. Something to remember for next time. This kind of a “ledger” binding just needs two holes near the folded edge and then you stitch and tie a sturdy thread through them.
I used a variegated cotton sashiko thread to bind the book together mostly because it was the first thing that caught my eye. Sashiko thread is like a very thin cotton cord and it worked just fine for this.

I thought it would be fun to add a little bit of something to the cover, so I used the same thread to stitch a couple of embroidery stitches. I punched the holes with an awl before I stitched because I didn’t want to crease the paper trying to punch the needle through it.

I have so many ideas for this! For my next project I want to try something with a little origami folding. There’s a technique to fold thicker papers where you get the paper wet before you fold it and I am really curious to see how that works with this and if I can make something interesting and three dimensional. Kraftex is also dyeable, so I am absolutely going to try shibori dyeing a couple of sheets. If you want to play with some, I think the best source for Kraftex is through C&T’s website. They have some great variety packs so you can get a bunch of sheets in different colors and they have dozens of free tutorials if you want to do a specific project.
This is very inspiring. I need to keep patient notes. Most people use regular notebooks. Of course *I* have to go and get particular! This would be a great way for me to have a small notebook of forms. I love this combined with the Spoonflower wallpaper cover idea!
This absolutely looks line fun! Something to add to my list of things I want to do!