20 January, 2015

Upcoming Classes: Digitizing Lecture

2015-02-24T23:33:45-06:00Classes & Teaching, Out & About, Spoonflower & Fabric Design|Comments Off on Upcoming Classes: Digitizing Lecture

Screen Shot 2015-01-08 at 4.22.33 PMIt’s the month for classes for me.  Another fun class you can come to is a panel discussion called “Digitizing for Dollars” that I will be participating in on January 29 at 6:30 pm at NE Bank Community Room in Minneapolis.  It is presented by WARM (Women’s Art Resources of MN).  Several panelists will be talking about digitizing your original art and selling it online.  I will be talking about Spoonflower and using your original art to make fabric.  The other panelists will be talking about things like making patterns, digital prints and putting your artwork on objects (totes and coffee mugs).  I have worked with this group before and there is always great discussion and good questions, so I am looking forward to it.  (The event is free for WARM members, $5 if you come as a guest of a WARM member or $10 for the public.)

14 January, 2015

Upcoming Classes: Intro to Etsy and Intro to Fabric Design

2015-02-24T23:41:38-06:00Classes & Teaching, UpcomingClasses|Comments Off on Upcoming Classes: Intro to Etsy and Intro to Fabric Design

I am teaching two classes for the Dakota County Libraries this month.  They are a little outside of the Minneapolis area but they are free classes (funded by a State Arts Legacy Grant) so it might be worth the drive.

First up is “A Taste of Digital Fabric Design” on January 22 at 6 pm at Wescott Library.  You can register here.  (It’s free, but we like to know who’s coming.)

This class is like the “get your toes wet” experience for designing your own fabric and printing it through Spoonflower.  We will make a collaborative design in class and I will show you all of the steps to get it printed: scanning, resizing and setting resolution, uploading, repeats and so forth.  You don’t need to bring anything – it’s presented demonstration style so you can take lots of notes and follow along without your laptop.  I hope it will be just the right amount of information to get you started and give you confidence to try your first design and not so much technical stuff that you will fee lost and overwhelmed.  After class, I will order some of our collaboratively designed fabric and I will mail you a swatch of it so you can see it in person.  If you have ever wanted to try your hand at making a custom fabric, this is the class to get you started.

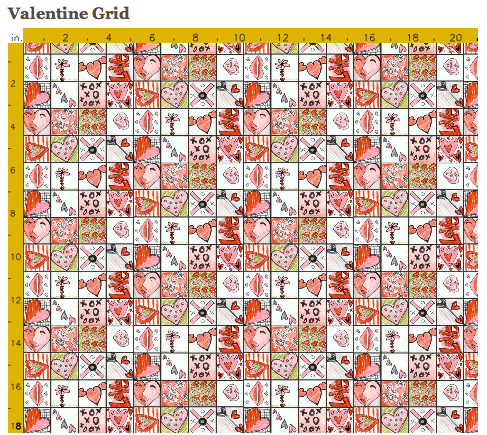
Here is a sample of a fabric we made in another class.

Valentine Grid repeat at Spoonflower. Collaborative class project.

Valentine Grid repeat at Spoonflower. Collaborative class project.

On January 26th, it is “Etsy Behind the Scenes” at the Farmington Library at 6:00.  You can register here.

This class is a tour behind the scenes of running an Etsy shop.  Not just tips and tricks, but I log in and take you on a live tour of what my shop looks like from the seller’s perspective.  I will show you how to use the built in tools and talk about options and ways you can run your shop.  I have had an etsy shop for more than 9 years, so I will give you a wealth of ideas from what I have learned:  what works, time savers and time wasters, Etsy vocabulary and more.  If you are on the fence about opening a shop or you have one and aren’t sure what to do next, I think you will find something in this class to help you.

I hope to see you there!


1 December, 2014

Infinity Scarves

2014-12-01T16:36:04-06:00Gallery Exhibitions, Sewing & Design, Spoonflower & Fabric Design|2 Comments

infinityscarves

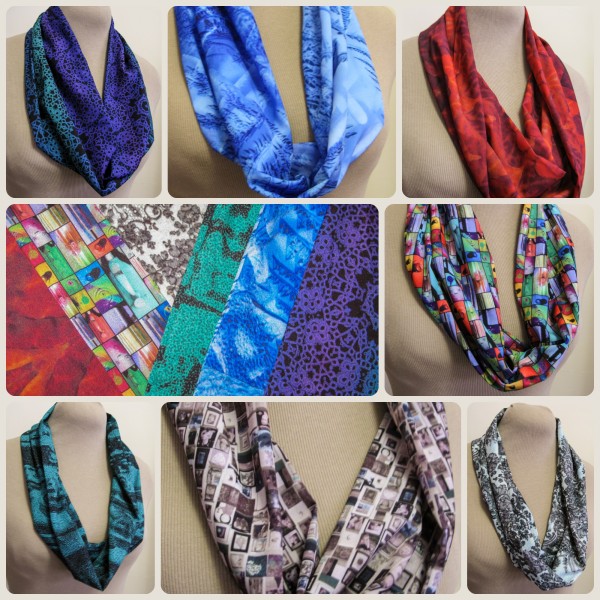
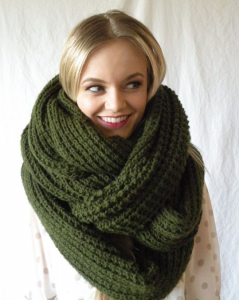
I am getting all kinds of new things ready for the show I am doing at the American Craft Council Library on December 13.  So excited!  This is the first large collection of my digital prints that I will have for sale.  Last week I finished the cowl scarves.  I know that the “giant infinity scarf” is a major trend, but I just don’t think they are that flattering.

(stock photo)

(stock photo)

These are made with a more simple and elegant kind of silhouette.  More like a necklace.  These are all made from polyester crepe, which is soft and lightweight and drapey and the colors are vibrant and gorgeous.  I haven’t used this fabric before and I am in love.  Each design also has a story:

square

15 October, 2014

Faux Batik: The Big Reveal

2016-03-16T09:48:50-05:00Spoonflower & Fabric Design|4 Comments

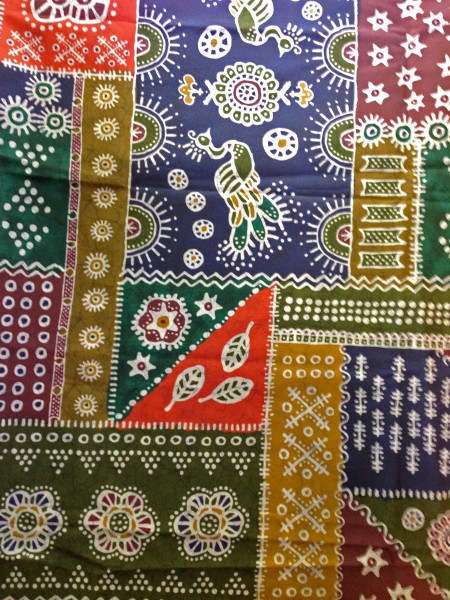
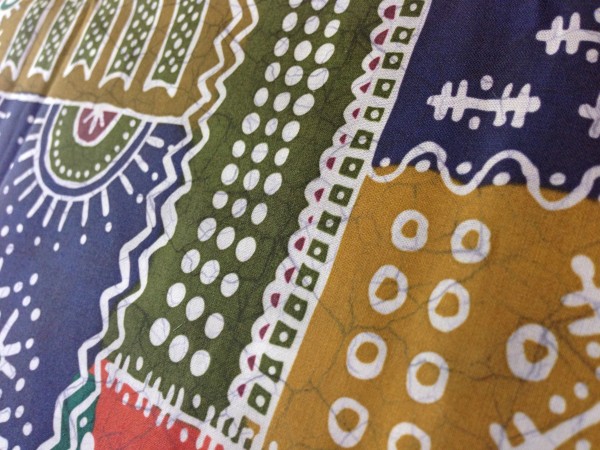
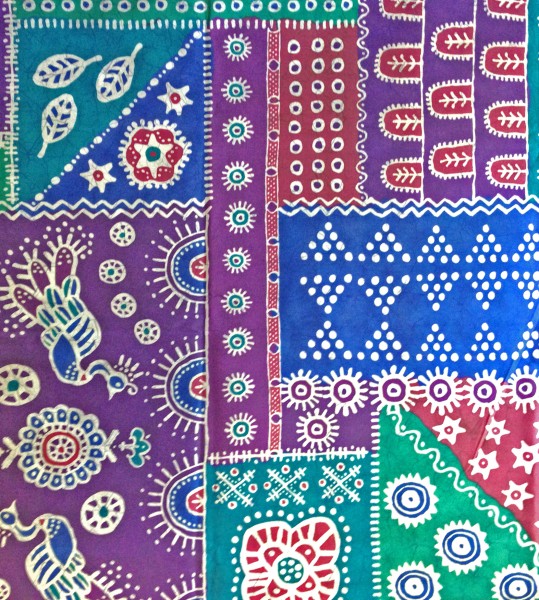
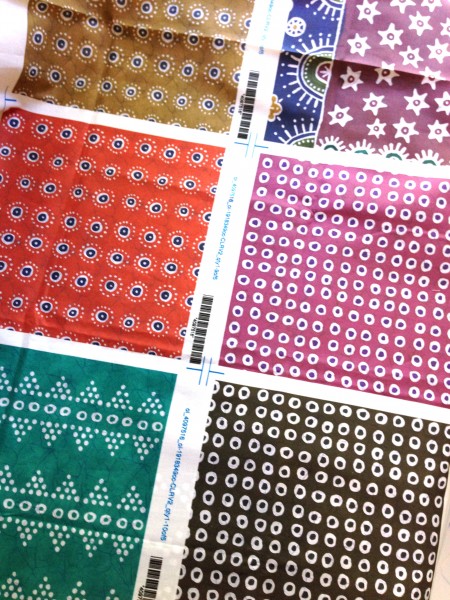
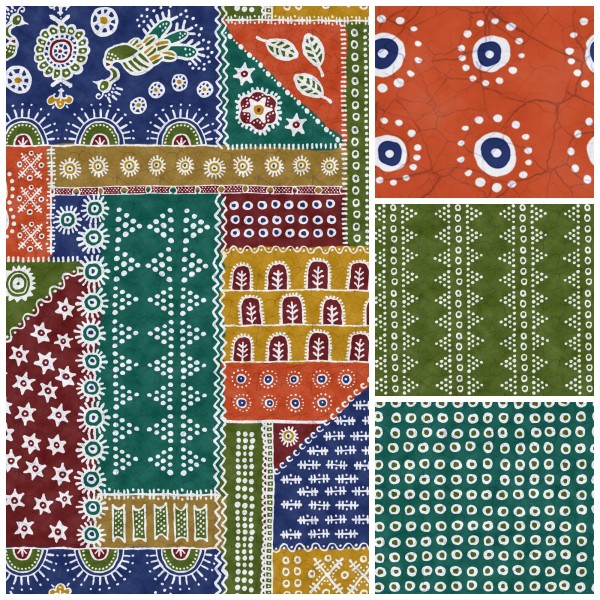
I got the faux batik samples in the mail yesterday and I am so thrilled.  They look awesome.  These are all printed on the basic cotton which is a nice middle weight basic fabric.  I didn’t wash or press the fabric yet, this is just what it looks like out of the envelope.

Here is the original colorway.

Photo Oct 15, 4 13 07 PM

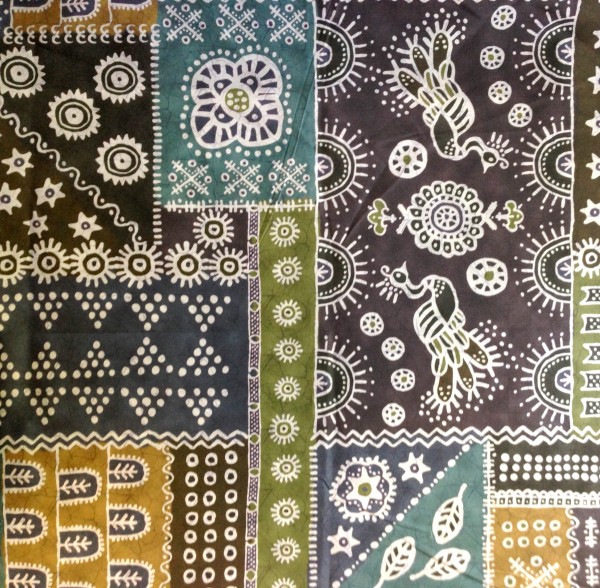
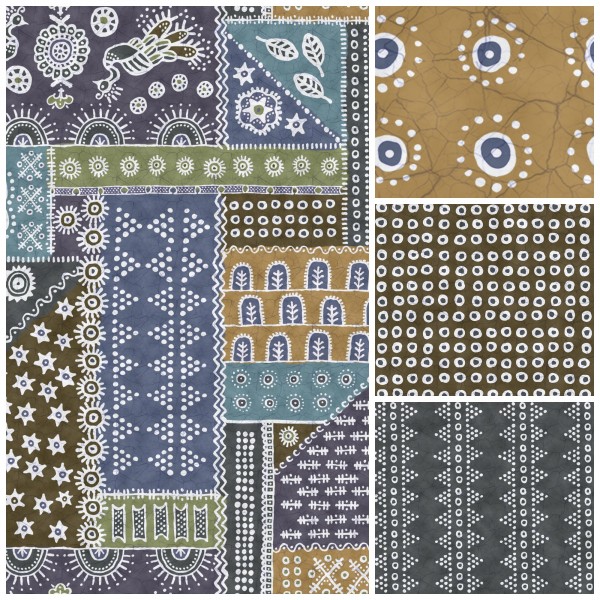
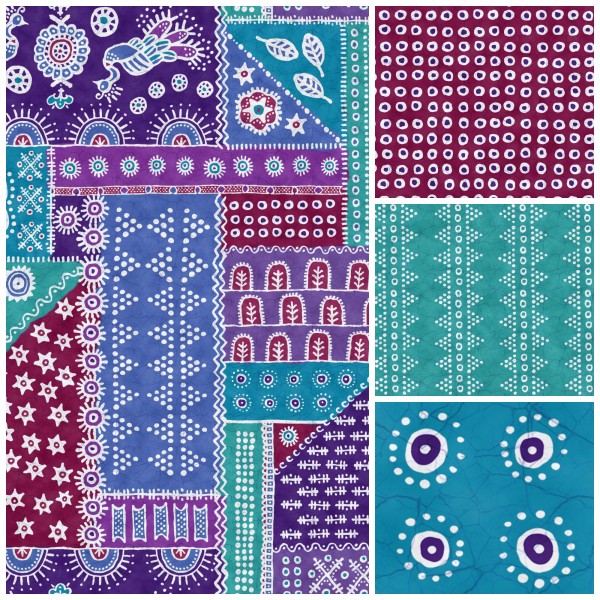
Photo Oct 15, 4 13 13 PMAnd a couple of alternate colorways…  (The color in these following two isn’t quite right in the photos because the light wasn’t cooperative, but they look good in person.)

Photo Oct 15, 4 14 06 PM

Photo Oct 15, 4 13 38 PM

I also made a set of coordinating prints for each of the colorways.

Photo Oct 15, 4 14 44 PMearthcoolswarmWhat do you think?  Which colorway is your favorite?  Although I love the warm colors I started with, I am also really loving the neutrals and I think that’s the one I might print to make a t-shirt.

More in this series: Part One • Part TwoPart ThreePart FourPart FivePart Six

batikPin

6 October, 2014

Digital Design Tutorial: Part Six

2014-10-06T19:07:43-05:00Spoonflower & Fabric Design, Tutorials|Comments Off on Digital Design Tutorial: Part Six

Part six of our faux batik journey takes us back to Photoshop.

I have all of the motifs for my faux batik laid out, I have my color palette chosen, so now it’s time to put the finishing touches on my design.  This next bit might seem like a little bit of over-the-top, but I want to add a little bit of subtlety to this design, which is why I am going to go back into Photoshop before I add the final colors.

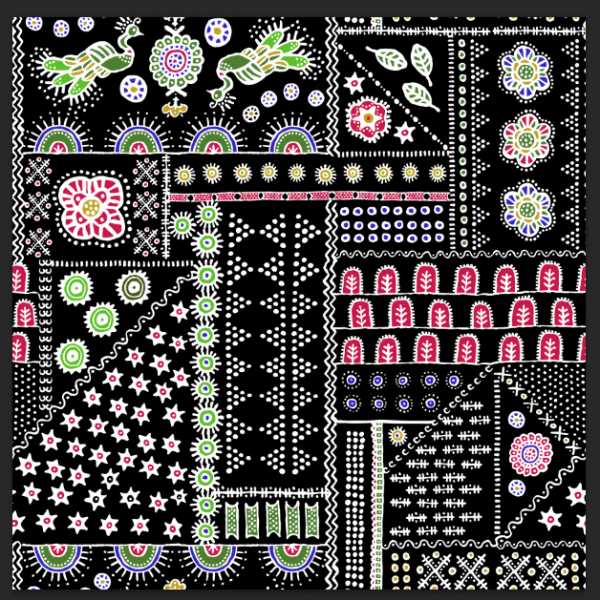
First I hide the colored background layer that I put in to help me lay out my design and I replace it with just basic black in my Illustrator file.  This is going to make it really easy to do the design cleanup next.  I export it, using the edges of my artboard or canvas to crop the design (getting rid of all the bits I left hanging off the edges).  It looks something like this.
Screen Shot 2014-10-06 at 5.58.44 PM

My first task is to make the edges of the design seamless.  Since I have very organic shapes, the lines and shapes at the right side of the tile aren’t going to exactly match up with the things on the left side of the tile.  But I want to make everything match up so there aren’t little flaws in the design when I repeat it.  Photoshop has a tool called “Offset” that will wrap the design around and match up those outside edges so you can do the touchup work.
Screen Shot 2014-10-06 at 6.08.32 PM
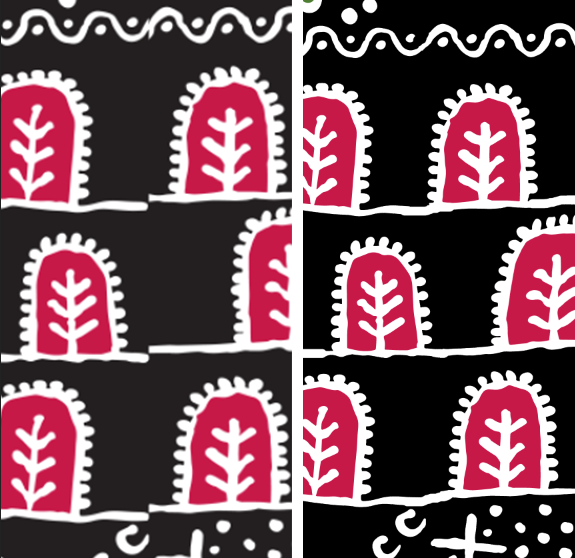
Here is one section of that matched up edge. I separated the black background from the other parts of the design and put them on two different layers.  Then, I used a paintbrush and the eraser tool to carefully erase a little bit and redraw these lines to they seem to be one continuous line.  I did this along the sides and top/bottom of the design and now I have a seamlessly repeating tile.

Now I want to add the background colors back in.  I could have used the color blocks that I set up in Illustrator, but I wanted the edges where the colors meet to be a little less like a quilt block with straight lines and have a little more painterly quality.  I also chose 7 colors for my colorway, where my mockup had only 5.  Leaving my white batik shapes as the top layer and the black as the bottom, I added a layer in between for each of the colors in my colorway.  I used a big paintbrush with a little bit of a soft edge to paint in the background colors where I wanted them in my design.  Using a paintbrush allowed me to let things bleed a little outside the lines and to keep the more organic look to match my batik shapes.  By putting each color on it’s own layer, it was easy to tweak the colors if it ended up that I didn’t like one of those colors I chose for my colorway and it will be really easy to make another colorway of this design this way (which I am planning to do!)
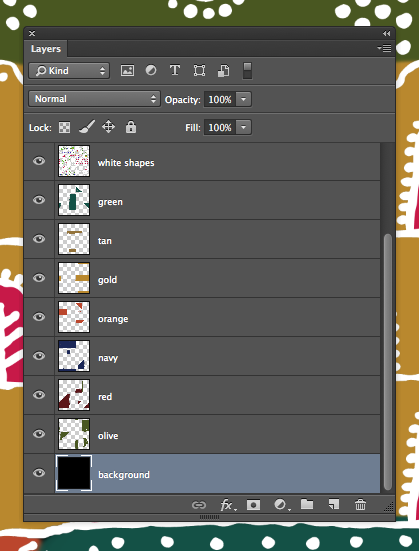
Screen Shot 2014-10-06 at 6.12.55 PM

Finally, my white layer had some of those placeholder colors in it that I used to fill in some of the shapes (like the arch shapes above).  To make those fit my colorway, I used a tool called Select Color Range which lets me click on a color and it selects that color anywhere it sees it on the screen all at once.  So I could click the placeholder red and replace it with the red from my colorway.

Here are the finished colors painted in.
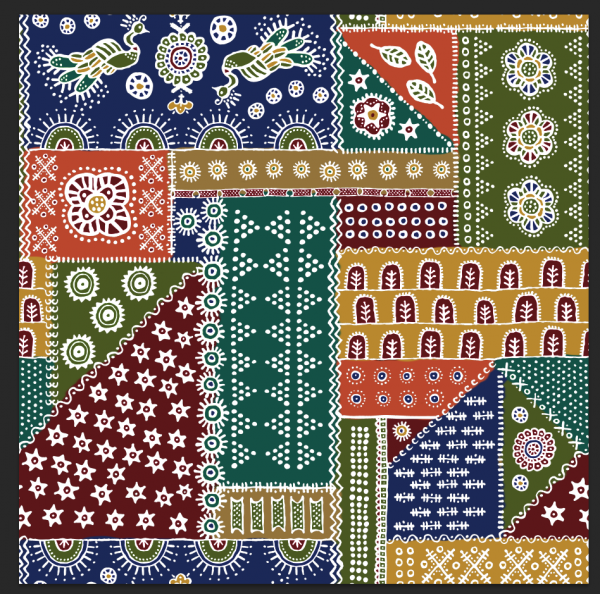
Screen Shot 2014-10-06 at 6.19.47 PM

It took a couple of tries to get everything to feel like it was balanced and to make sure that I didn’t have any colors too crowded together.  The next little bit of subtlety I wanted to add was a little bit of a hand-painted or hand-dyed effect, to make the background colors look less flat and even and perfect.  I tried a bunch of different techniques to achieve this: painting with different brushes, playing with opacity and flow, but they were all a little too heavy-handed.  Finally I found the effect I wanted.  I added a layer on top of all of this with a filter called “Clouds” in a contrasty dark and light.
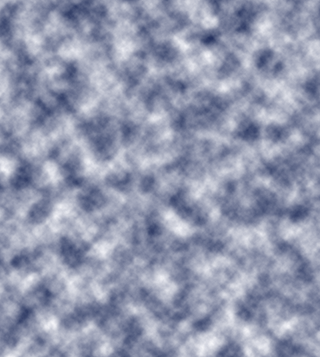
Screen Shot 2014-10-06 at 6.23.36 PMThen I made this clouds layer adjust the luminosity of the design instead of just layering on top. Luminosity is like the light shining through piece of paper, but it gave my just the effect I was going for: areas of lights and darks, without changing the colors of my design and making them muddy grey or washed out.  Here you can see that effect:
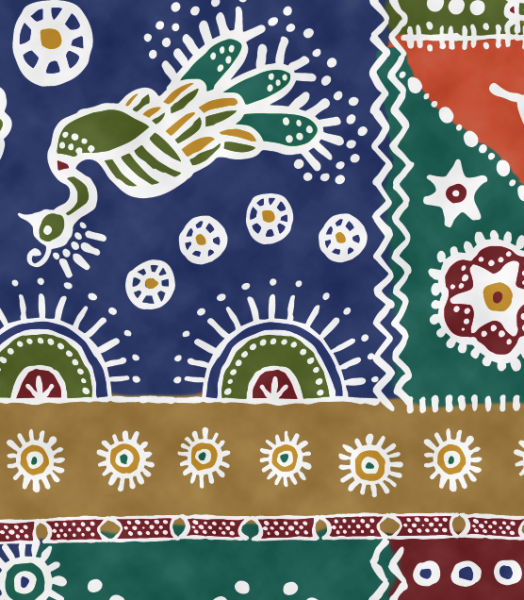
Screen Shot 2014-10-06 at 6.27.19 PM


One last effect and my batik is finished.  For the last subtlety to really make this look like a batik, I wanted to add the distinctive crackled look that you get when working with wax.  It took a lot of experimenting, but a photograph of a piece of marble gave me just the right pattern of cracks.  I made this photo into a seamless repeat as well and added it as one more transparent layer on top of the design.
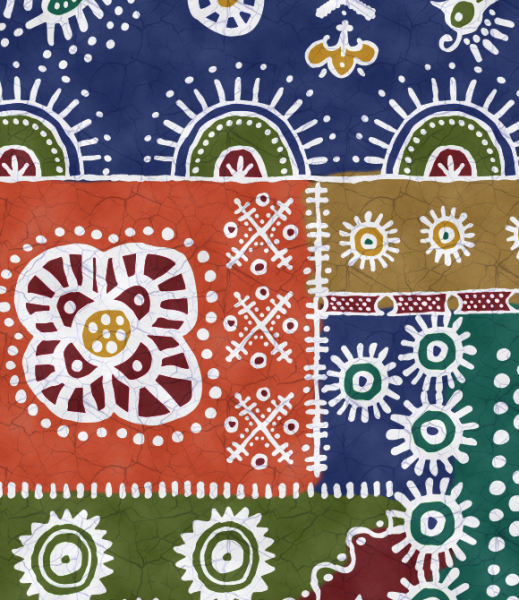
Screen Shot 2014-10-06 at 6.37.11 PM


I have ordered a yard of this fabric to be printed and in a couple of weeks we will revisit the tutorial and see how it turned out!

 

29 September, 2014

Digital Design Tutorial: Faux Batik Part Four

2016-03-16T09:47:16-05:00Spoonflower & Fabric Design, Tutorials|Comments Off on Digital Design Tutorial: Faux Batik Part Four

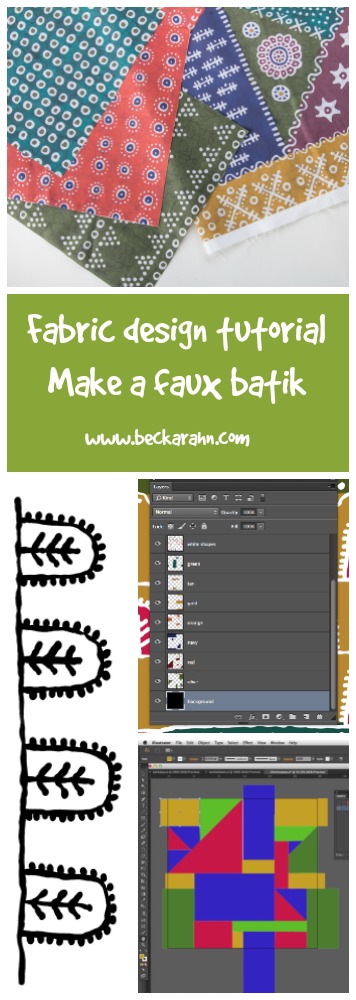
Part Four of my batik-behind-the-scenes series takes us to the fun part: starting to put it all together.

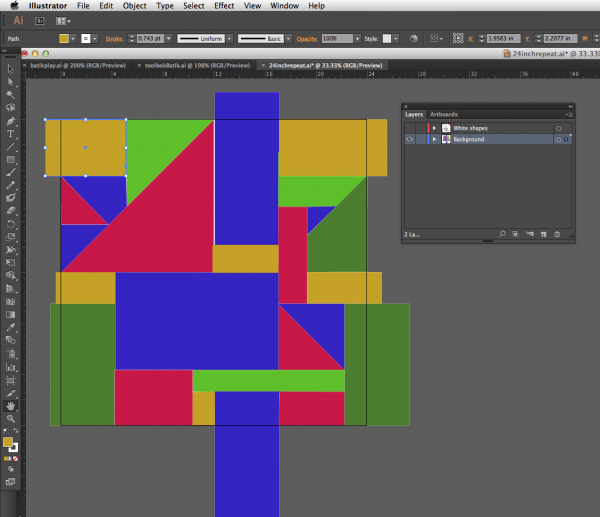
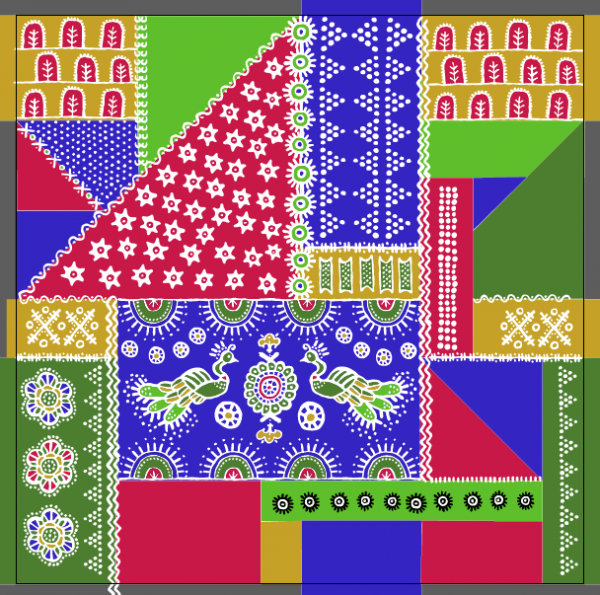
It’s time to start laying out my canvas for putting together all of the elements into a whole design.  I decided to think about this as two layers: the background colors and the batik designs.  I wanted a large repeat area so I made a new canvas 24 x 24 inches.  The original faux batik design I was inspired by worked almost like a stripe pattern with bands of designs that went across the width of the fabric.  I decided I would like something a little less directional and more versatile than a stripe, so I decided to lay out a “crazy quilt” kind of background made up of squares and triangles.  I made this background as a layer all by itself to act as a guide for where to place my designs.

Screen Shot 2014-09-29 at 11.55.21 AM

The shapes that extend off the edges of the 24 inch square “tile” are my reminder to myself that those blocks are going to help make this design more seamless.  If you look at the large green rectangles on the bottom corners, I want that color to continue across the edges of the design, so when you repeat and put these tiles next to each other, those two green blocks will connect up and look like one larger green block.  Make sense?  This makes it harder to see the edges of my tile.

Screen Shot 2014-09-29 at 12.45.06 PM

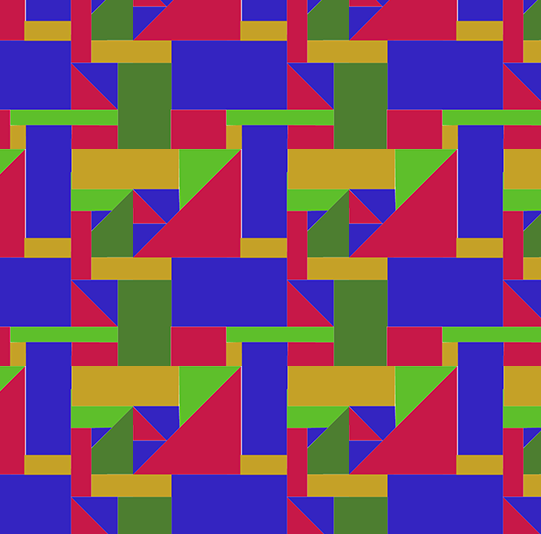
Here’s what it looks like when I tile it.  I see that I still have a pretty obvious line going along the right edges of the blue shapes.  I think I can fix that later with some color work, so I am going to leave it alone for now.

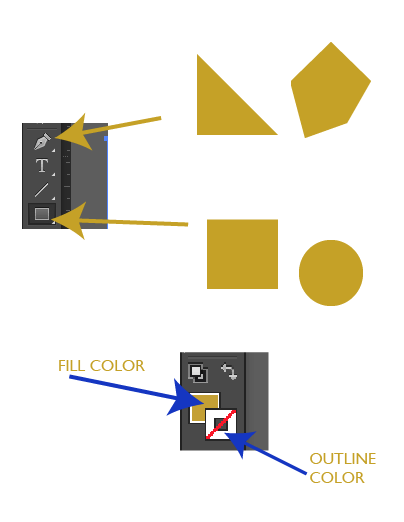
How did I make the shapes for the background?  There are two main tools in Illustrator for making these kinds of shapes:  the pen and the “pre-defined shape” tool.  You can draw more free-form shapes with the pen and the shape tool lets you just click and drag to make rectangles and circles.

Screen Shot 2014-09-29 at 12.02.13 PM

The colors I chose to lay out this design in are just placeholders.  I picked 5 contrasting colors so that I could see my shapes easily and to work out a rough color balance, but these aren’t the colors I am going to use for my final design.  I am going to talk about how to pick those colors in Part Five. You can see the color you have currently selected by looking at the palette.  The solid square shows the fill color and the open box is the outline.  My shapes don’t have an outline, so I have the “not” red line showing in that section above.

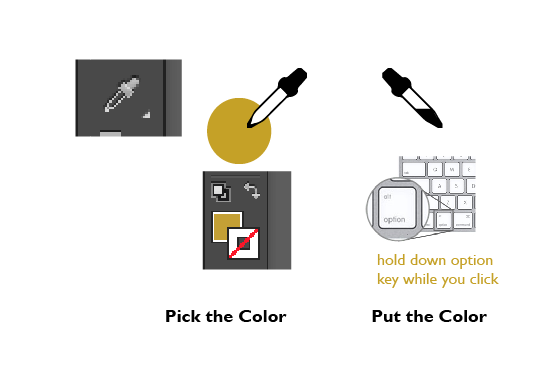
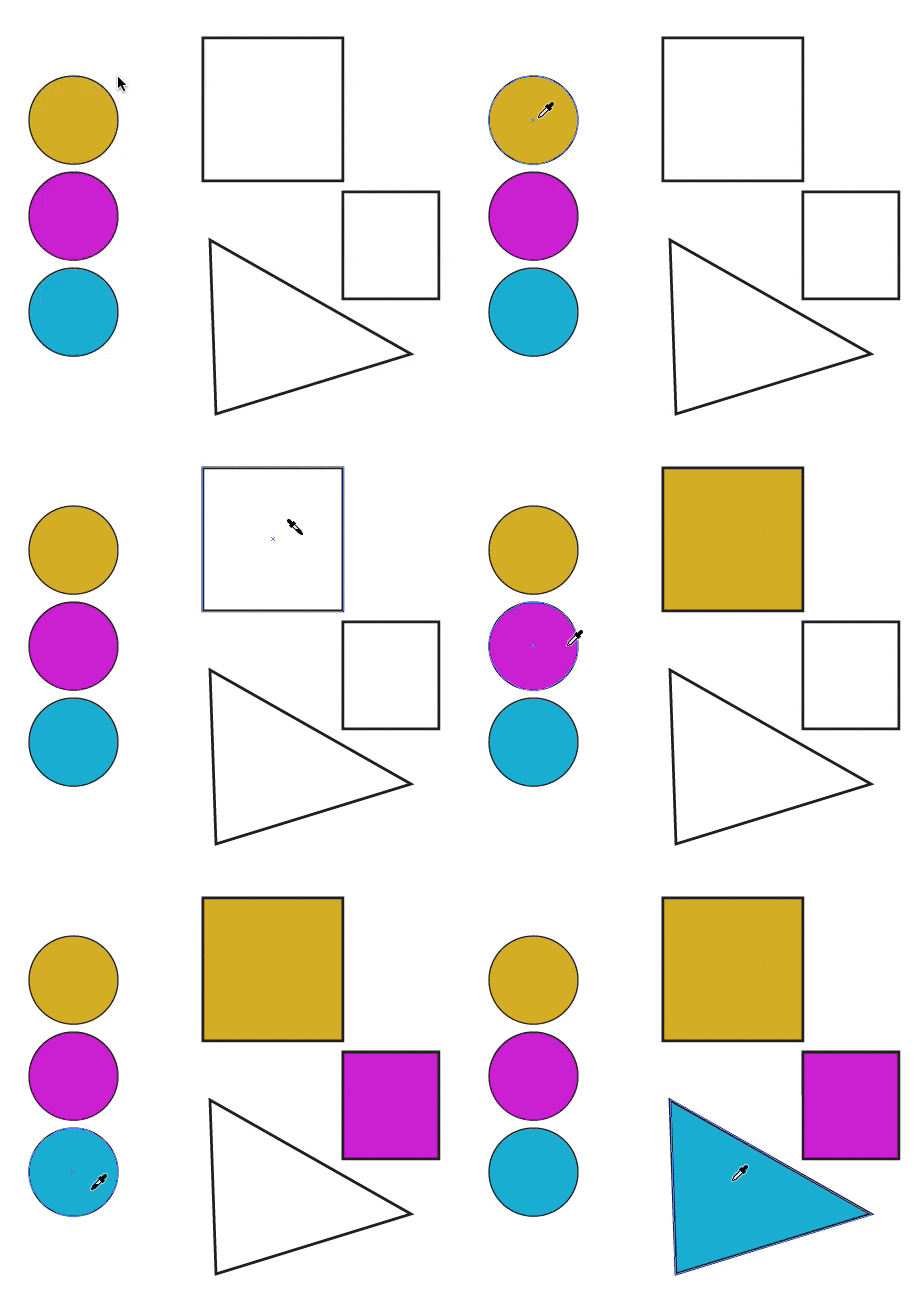
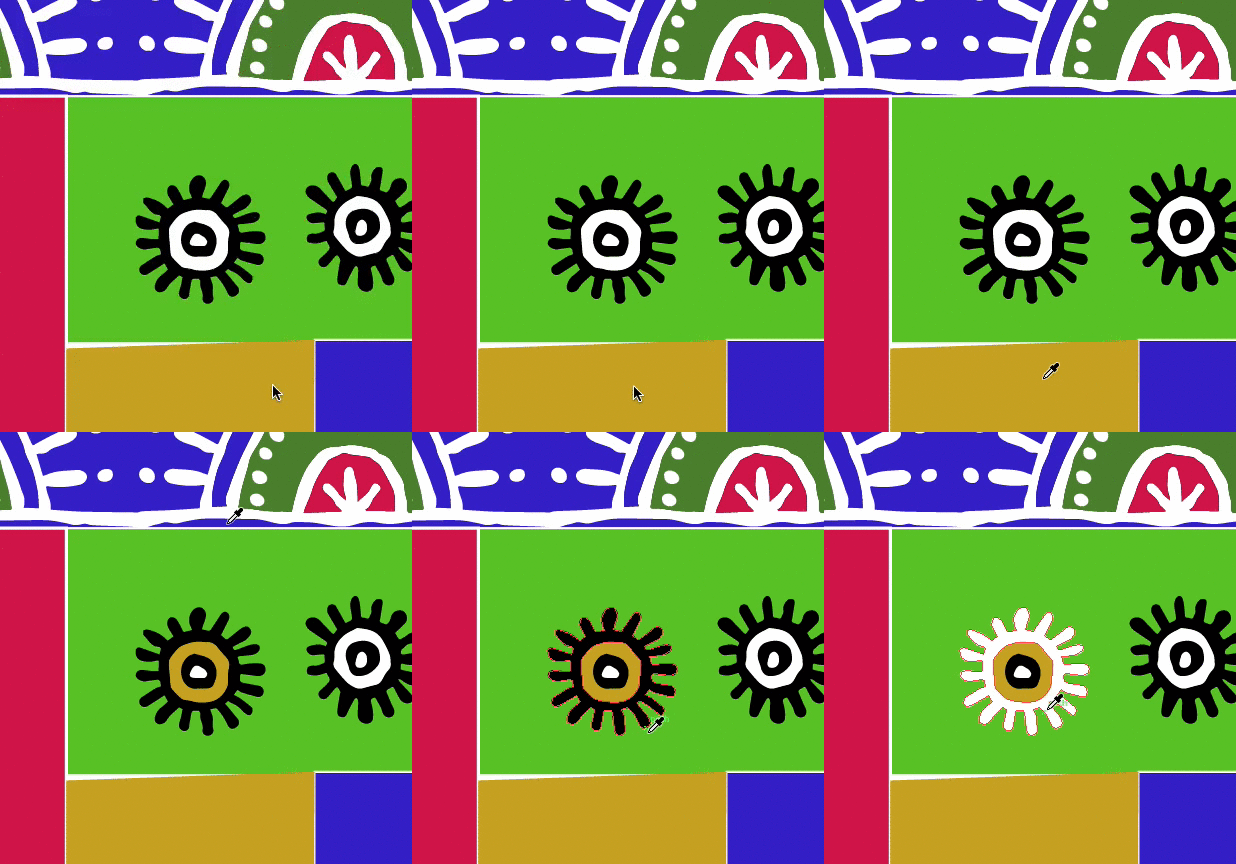
The easiest way to pick and choose colors is to use the eyedropper tool.  This tool has two “modes” that I am going to call “Pick” and “Push”.  Pick chooses a color from anywhere that you click.  So I can click the blue anywhere on the page and that will be the color that shows up in the palette.  Push you get to by holding down the option key while you are using the eyedropper.  The icon will flip around and now anytime you click it will push that color you have selected to the shape you click on.

Screen Shot 2014-09-29 at 12.27.18 PM

I made a little animated graphic to show you how this works.  First I pick it with the regular eyedropper and then hold down option and push it to the next shape.

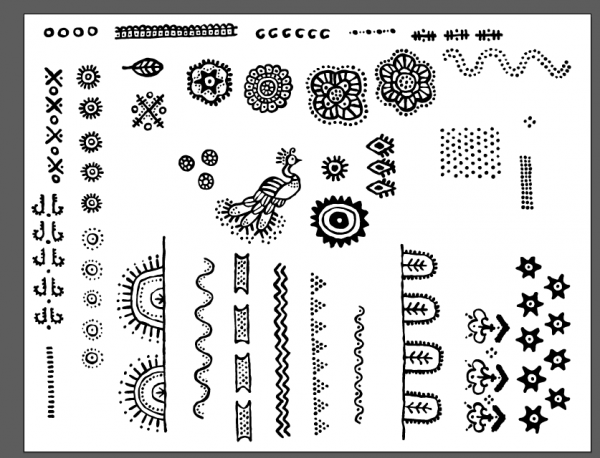
eyedropperOnce I have my background all laid out, I lock the layer so that I can’t accidentally select or change something (I can unlock it later).  Now I can go on to placing my batik shapes into a new layer on top.  I already converted all of my shapes into vectors and I have them all in a “toolbox” document.  I use this to copy and paste into my design document.  This way I always have a copy of the original shape that I can go back to and I can pop back and forth between the two documents.  I decide which shape I want to fill, then I choose something from my toolbox, copy and paste it over.

Screen Shot 2014-09-29 at 1.02.50 PM

I rotate and resize it.  Sometimes I need to select and make more copies of a motif or I delete a bit that’s not working.  Once I have them placed and filling the area I want them to be in, then I use the same eyedropper trick to color them.  Choose the color I want and then push it into each section of the design.

colorit5


Here’s as much as I have finished so far.  Just so you don’t think this is a fast process, this much has probably taken me about 6 hours.

Screen Shot 2014-09-29 at 12.59.44 PM


More in this series: Part One • Part TwoPart ThreePart FourPart FivePart Six

batikPin

Go to Top