

This tutorial comes to you via an email I received. This seemed like the kind of question that would make a great tutorial.
I love the patterns that I’ve created using Adobe Capture and I can see them in my library when I use Photoshop. What I’m having problems with is making the Adobe Capture patterns into a seamless repeat to upload into Spoonflower. I have been able to upload my image into Spoonflower and it looks good as a swatch, a quarter yard; however, the full yard you can see that the pattern is not seamless. I can’t find any video or blog info on how to do a step by step to make these beautiful Adobe Capture patterns into fabric. — Shirley
What’s Capture?
Adobe Capture is an app for your phone or tablet. You can “capture” colorways or patterns in the app using your device’s camera and they are loaded directly into Adobe Photoshop or Illustrator in the Libraries tab. Once they are in the Libraries, you can use them in your Photoshop or Illustrator designs. Here is a great tutorial & description from Adobe for a little more about how Libraries work.
For this tutorial, I am going to talk specifically about the workflow of taking a Pattern that you create in Adobe Capture and how to upload it to Spoonflower to make a fabric design.
Create the pattern
 First, you need to create a pattern in Adobe Capture and save it to your Library.
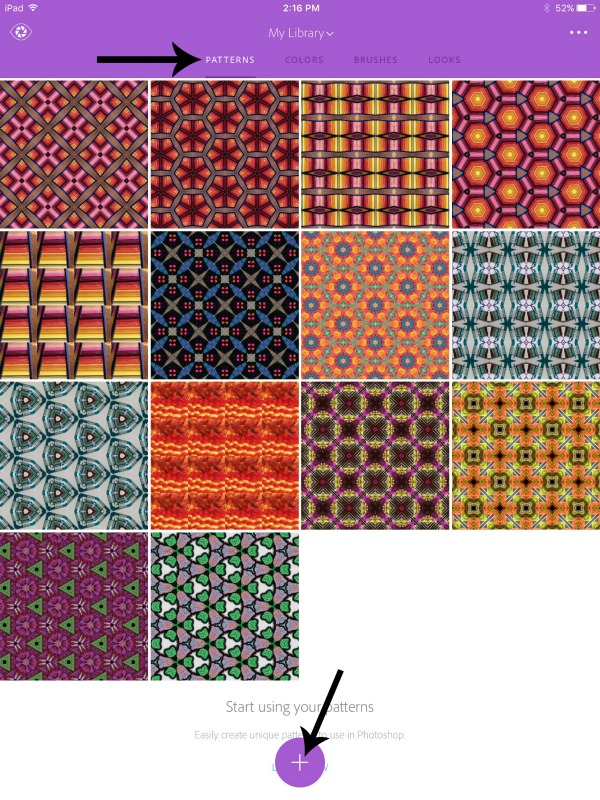
Launch Adobe Capture and make sure you are signed in to your Adobe account. Choose the Patterns tab at the top of the screen. Then tap the + button at the bottom to add a new Pattern.
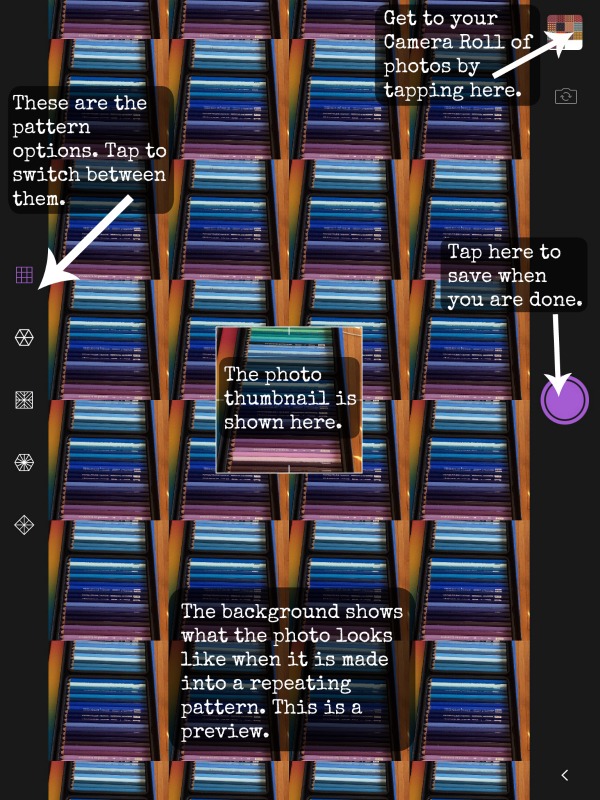
Use the built in camera to capture an image or you can choose something you have saved to your Camera Roll by tapping the thumbnail in the top right. Along the left side of this screen, you see the different pattern repeat types you can choose. Each one crops out a section of the image and repeats it by mirroring and rotating it. When you have the pattern you like, then save it by tapping the purple button.
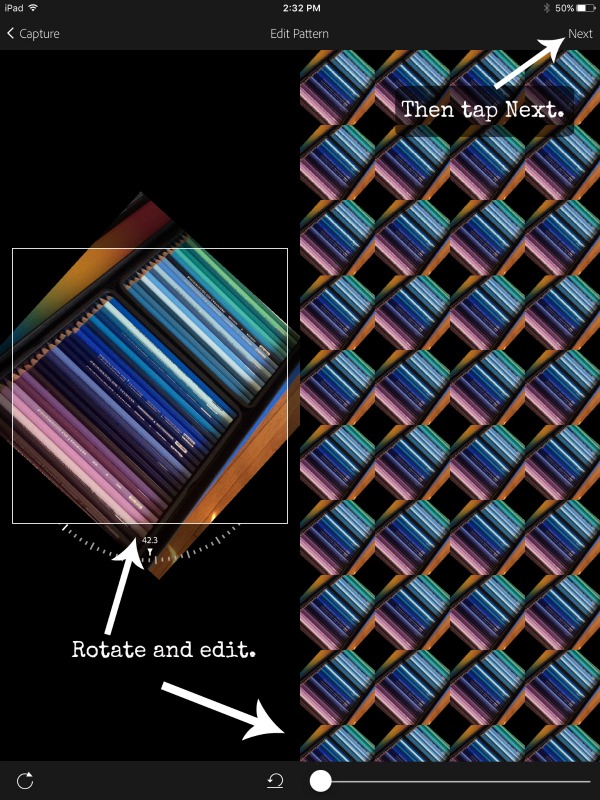
Next you will come to the Edit Pattern screen. You can change the angle and some blending on your photo. Once you are happy, tap the Next button at the top right.
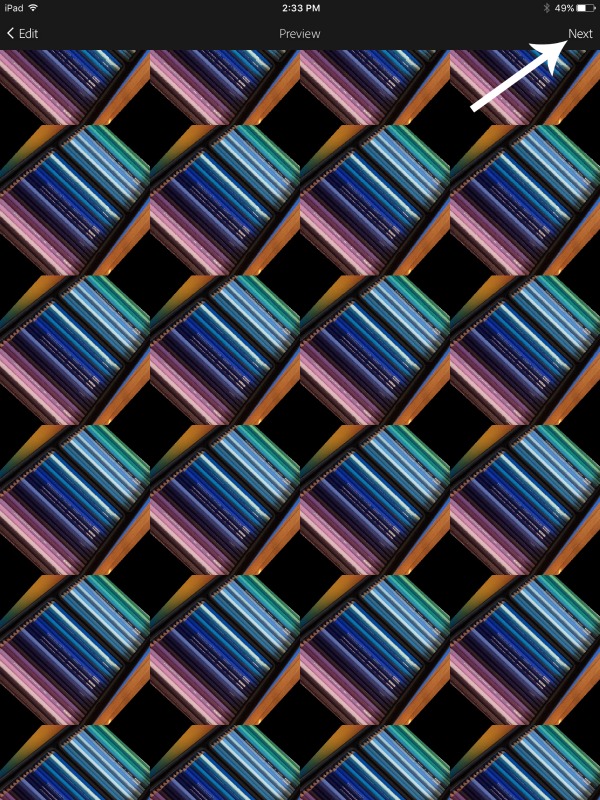
Then you will get a Preview screen so you can see what your pattern would look like filling up the whole screen. Cool. Tap Next at the top right.
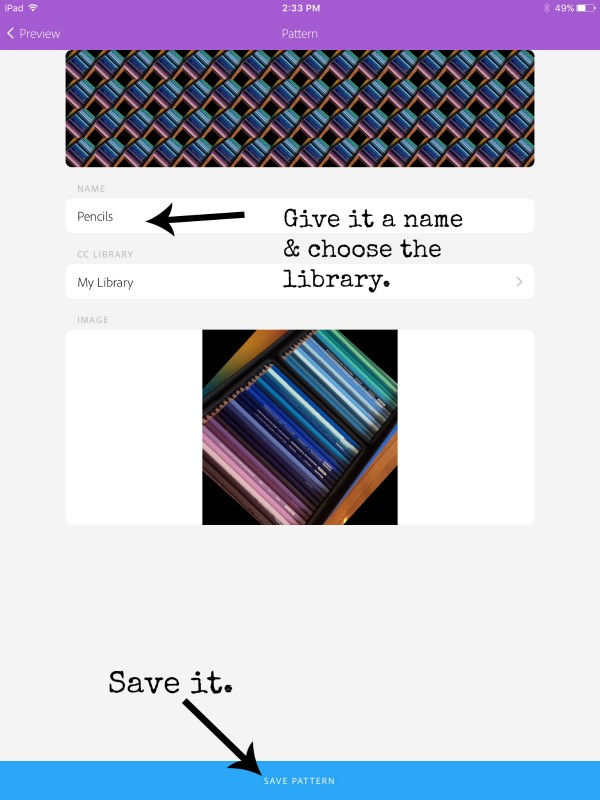
Finally save it to your Libraries. You can give it a new name and choose the Library you want to save it into in the dropdown. Then tap Save Pattern.
Finding your Pattern in Photoshop
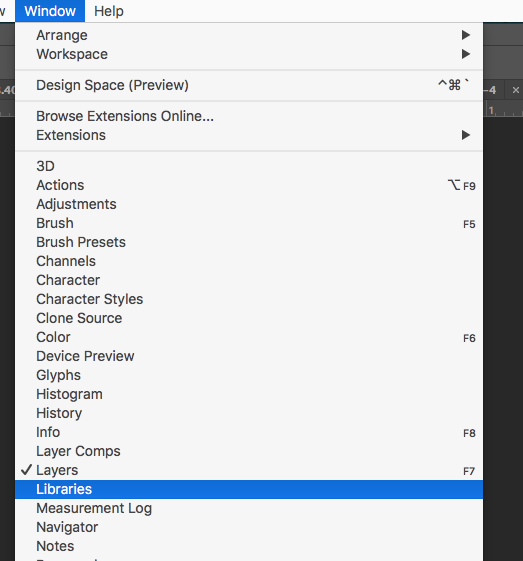
Here’s the cool part. When I open Photoshop, this pattern is going to pop up there automatically. Look for a palette that is called Libraries. It is often not open by default, so you will need to go under the Window menu and find Libraries to open it up.
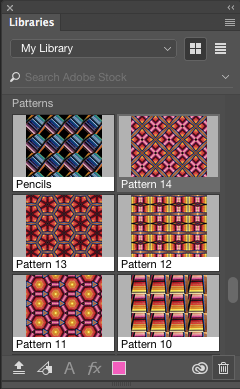
Within that Libraries palette, scroll down until you see Patterns and there you will see the Pencils pattern I just made. (Sometimes they take a few seconds to pop over there depending on your wifi speed. Be patient.)
So why do we have to go to Photoshop? Can’t we just upload that pattern from Capture somehow? The pattern isn’t actually a file you can upload directly to Spoonflower, although that would be really handy. It only exists in the Pattern palette until we fill a canvas and turn it into a .jpg. Think of it like a knitting pattern. Until you take the pattern and knit a sweater from it, you can’t wear the sweater. Until you apply the Pattern to something, you can’t use it at Spoonflower.
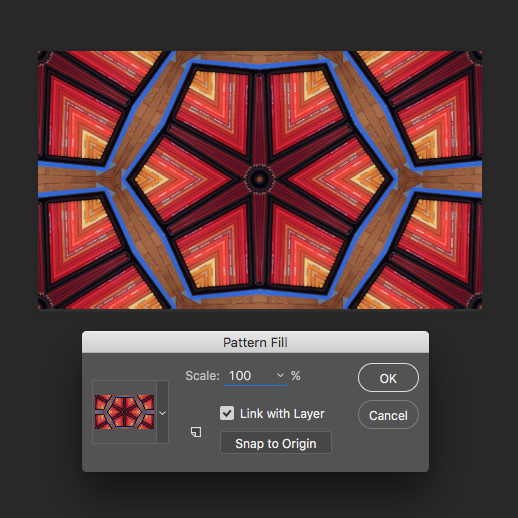
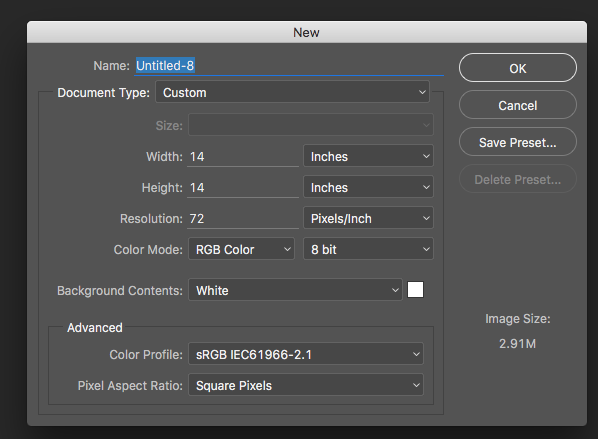
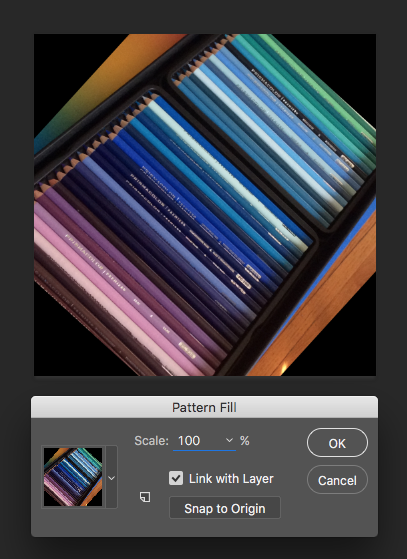
Make a new blank file by choosing File -> New. I made mine 14×14 inches at 72 ppi. I will explain why I chose that size in a minute. Then I click the pattern in the Libraries palette and it will fill the canvas with that pattern.
A Pattern Fill dialogue box will pop up asking what scale you want to fill your canvas. Enter 100% in the scale box and click OK. Why 100%? Because I want to make this the largest it can possibly get. It’s super easy to scale it down in Spoonflower, but I want to save it the biggest I can get it so I have the most options for using it. Now that we’ve filled something with the pattern, we can save this and upload it to Spoonflower.
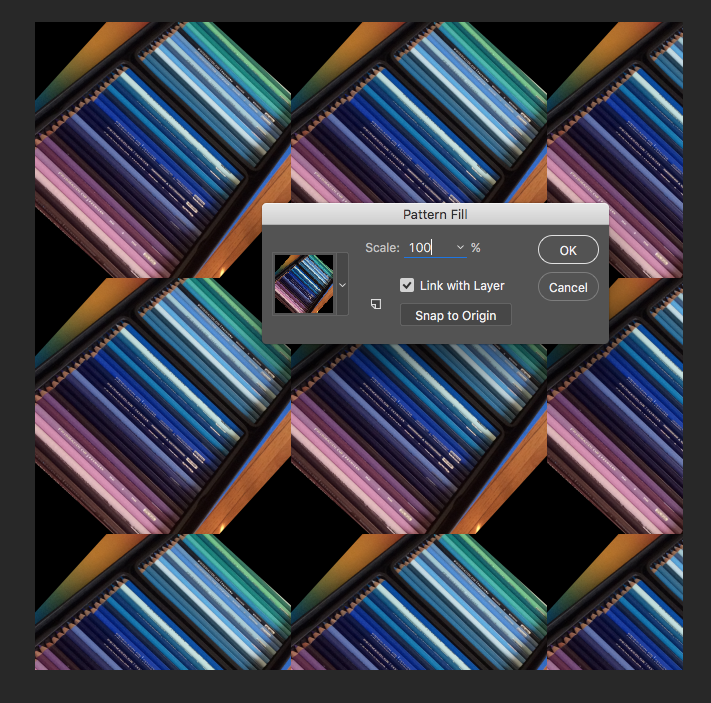
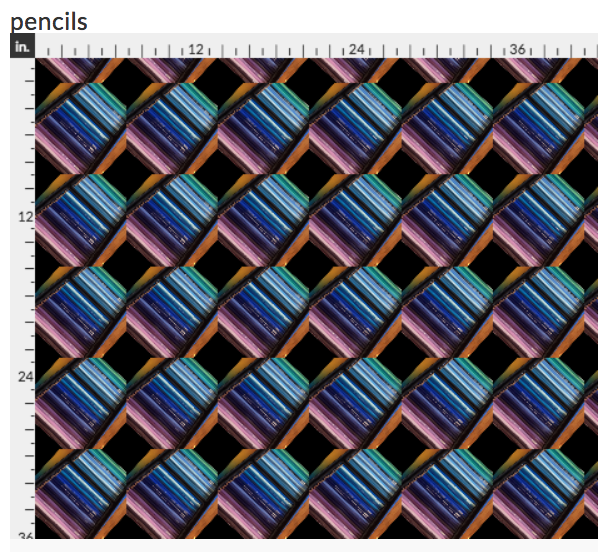
But first, I want you to take a look at this image. I think, based on Shirley’s email that we saw at the top of the post, this was the step that is tripping her up. If I upload this right now to Spoonflower, it’s not going to be seamless. You are going to see a flaw. If you look at the left and right sides of the image, you can see that they wouldn’t match up. There is a half an image on the right side, but no half image on the left to match it to. Here’s what it would look like if I uploaded it right now.
That’s not the same thing we saw on the Preview screen up above. Why? The repeating pattern tile that Adobe Capture creates is a set size and that size is not 14×14 inches. Photoshop filled the 14 inch canvas exactly as we asked, but to fill it, it used about 2 1/2 repeats by 2 1/2 repeats of our tile. I picked a 14 inch canvas so I could show you this example, but there is a better size to make your canvas.
Making One Repeat
To make it seamless on Spoonflower, we need to upload one repeat, not 2 1/2 repeats like we made in that example file.
So how do you make it so you have just one repeat? That took me a little sleuthing and I couldn’t find this spec published anywhere so I had to go in to Photoshop and figure it out. (ie Lots of trial and error and zooming in looking at pixels. You can imagine this step.) Disclaimer: I couldn’t find this information actually published anywhere, so this is the results of my experiments. I may be off by a pixel or so but I think this is accurate.

For each of the different repeat styles you can choose in Adobe Capture, it creates a pattern tile that is an exact size. I made the chart (shown above) that tells you what those sizes are. For some of the patterns, the tile is square and for some it is a rectangle. The size you see on the chart represents the size of one repeat at 100% scale.
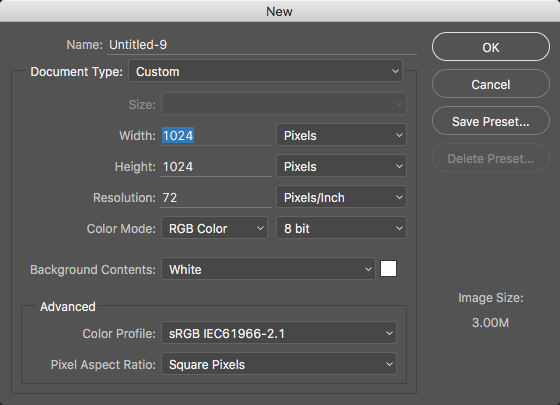
Making one repeat is pretty straightforward once you know the size. Create a new file by going to File -> New and fill in the size of a single repeat from the chart.
If you don’t remember what repeat style you chose, there isn’t a really good way to tell which is which. A good rule of thumb is that if you can see hexagons in your design anywhere, it was very likely one of the rectangle (1330×772) designs.
Now choose the Pattern by clicking on it from the Libraries palette and set it to fill at 100% scale. Now I have one repeat.
Save this file as a .jpg and upload it to Spoonflower. Choose the basic repeat style. Now the uploaded design at Spoonflower looks just like the Preview we saw on the iPad screen.
The preview we are looking at in the image above is 1 yard of fabric, which means this repeating element is pretty big (almost 7 inches). If you want to scale it down, just click the smaller button under the Design Size section until you like the scale.
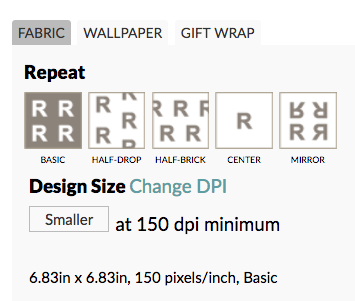

I clicked the “smaller” button a bunch of times and this shows a repeat size of about 2.5 inches on a yard of fabric. Perfect!
Thanks, Shirley, for a great question! If you have a question you’d like me to write a tutorial about, just ask! I love getting ideas from you.
Becka, thanks so much for this!! I can’t wait to try it! Your usual excellent job. Eileen.
Thank you for this tutorial! I can’t imagine how long it took to figure that out!
I have one question related to Adobe capture as well…
When I first went to Illustrator and went to the Libraries panel to try and get to all of my Capture color themes, etc., I could not see them even though I was logged in to both the desktop app and Illustrator. The only way I was able to see my Capture libraries was to “invite”myself to see them. Once I accepted the invitation, I could see and use them. Seem like I should just be able to see it all…
Also, I would like to manipulate (combine swatches to create new color groups)the color themes that I have from Capture. I have only been able to do this within a document. Is there a way to do this in the desktop app?
Thanks!
Amy
Thanks Amy! It didn’t actually take too long to figure it out. I have gotten good at spotting and cropping repeats. :)
I don’t know about the permission/library thing but you made it work. I suspect it is a security thing between the app and the desktop versions and that once you invite/accept once it will probably never pop up again.
Also pretty sure that the only way to edit those color groups is in a document. The app is not very sophisticated. It really only has one job. Capture it. It doesn’t do much else. You should be able to save the color groups though once you have them set up in a document and then it will put them in a user library so you can use them again from other documents. Try this video: https://helpx.adobe.com/illustrator/how-to/color-groups.html