


Designing stuffed toys with muslin mockups
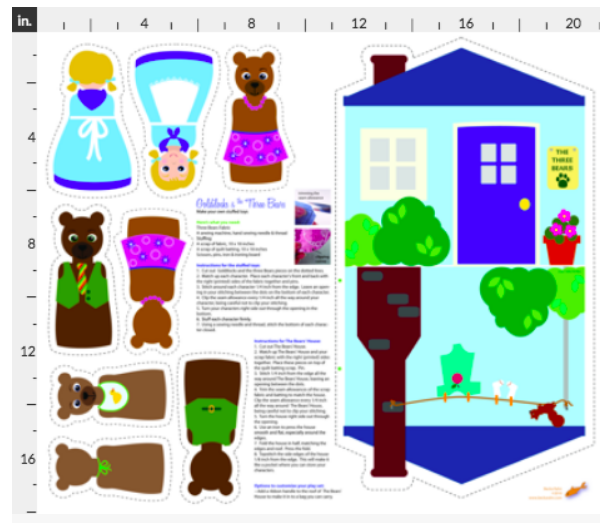
The Spoonflower design challenge this week was a cut-and-sew project that fit on a fat quarter. I love designing these kind of things. Some of my very first Spoonflower designs were sets of stuffed toys (Goldilocks and the 3 Bears, Red Riding Hood) where you could make all of the little characters as dolls or finger puppets and then they had their house which was a bag to store them all in. All of the pieces fit on a fat quarter and you just cut them out and sewed them together. The way this design challenge was set up you could make a cut-and-sew anything. Many people made stuffed animal toys, but you could do things bags, headbands or bibs as long as they fit on that 21×18 inch rectangle.
I struggled with this one a little bit. I was going to re-do a sheep stuffed toy pattern that I had in my Etsy shop years and years ago. I thought it would be easy to convert since I had already pattern tested it. But I just wasn’t excited about it and it’s a little fiddly to sew together.
Then I thought about a conversation I had with my friend Megan, who owns a local yarn and fabric store called Knit & Bolt. For a class I was teaching, I interviewed Megan about trends she saw in fabrics – what sells, what doesn’t sell, what do people come in looking for. One of the things that came up was cut-and-sew panels like these. They are popular at her shop, but one of the things she noticed about them is that although they seem like a really great beginner project for new stitchers, often the actual sewing parts are really difficult. She had an example of a cute cowboy doll, but the neck and arms were very skinny, which made it hard to turn right side out and stuff. The way that other parts attached to the body was complex. The shapes that you needed to sew were tight curves, which can be challenging for a beginner.
So I decided that I wanted to design something that was actually a beginner sewing project. Of course I came up with this pretty close to the deadline for the challenge (because don’t you always do your best work on a deadline?) So I thought about it and decided to rework some artwork I had already drawn.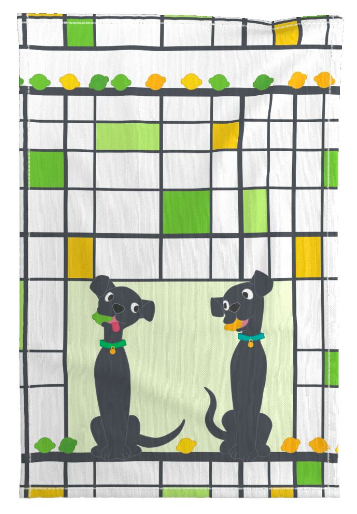
I drew these labradors for another design challenge entry for tea towels. They were inspired by a photo of a pair of mid-century ceramic statues of little black and white dogs. I thought they were really cute and it would be fun to rework them for a different kind of cut-and-sew design.
The best part is that they are really simple shapes, so they would be easy to stitch. I removed their tails and redrew them so that they were part of the artwork on the back of the dog. No skinny bits to stuff and sew. I added a wide seam allowance around each piece. The instructions say to sew with a 1/4 inch seam allowance, but I made my border a bit wider than that so there was a little room for wobbles in the sewing line. By making the seam allowance in the same color as all of the outlines in the art, you won’t see a white “gap” at the edges if your sewing isn’t quite perfect – the color will go all the way into the seam. There are still a few curves around the ears but they should be accomplishable for a novice stitcher. Then because I think that it’s always fun for your stuffed toys to be able to do something, I used the rest of the fat quarter to make reversible bandanas for the dogs, which you just fold in half, stitch the edge and then fray it out to make a fringe.

I didn’t have time to actually get these guys printed and tested before I had to turn in my design challenge entry, but I didn’t want to post something that was completely untested. So I made a muslin mockup. Because I drew this original design in Illustrator, I just converted my shapes into a line drawing and printed it out.
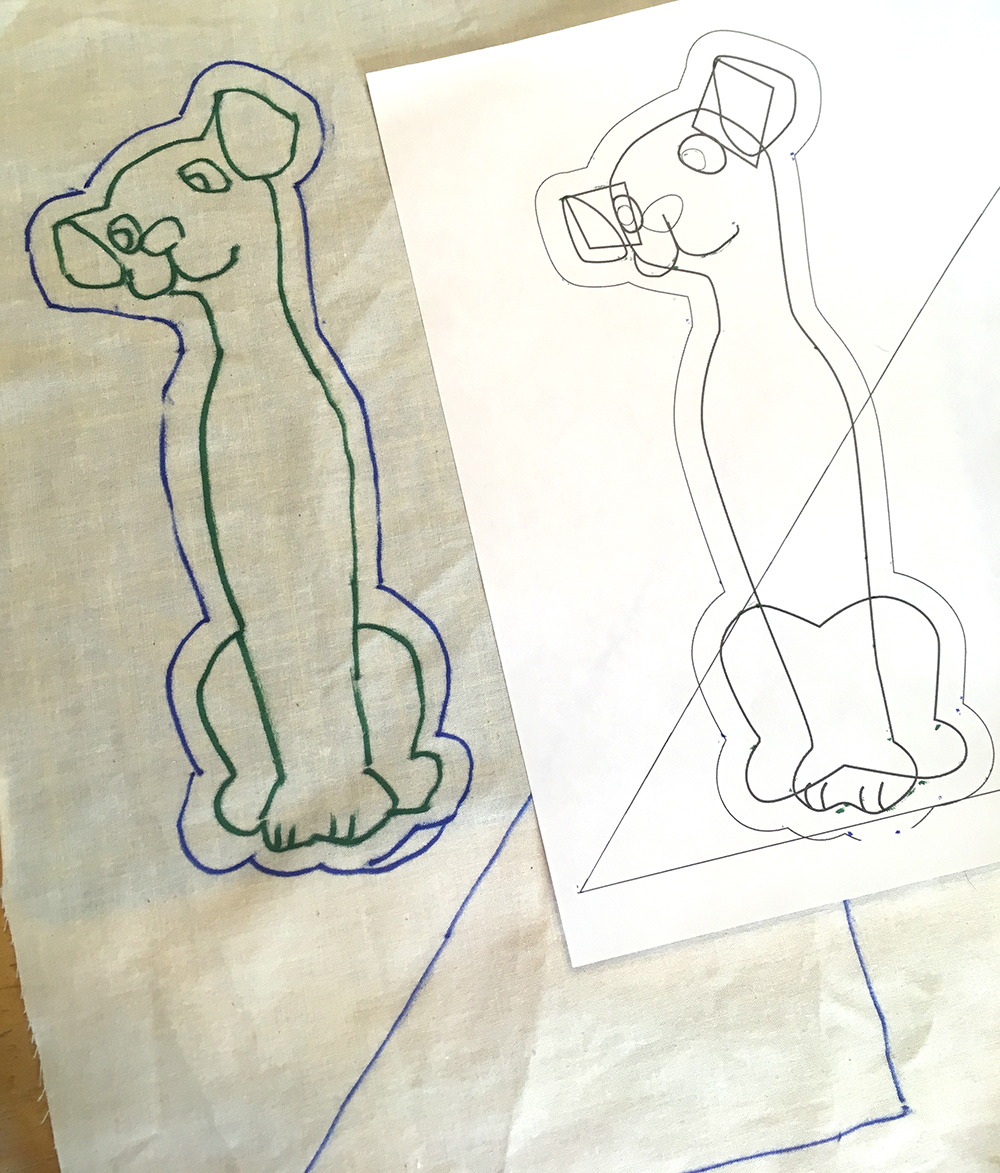
I taped the line drawing up to a bright window and traced my lines on to a piece of muslin with a sharpie. Then I could cut and sew a sample to scale and make sure everything worked out just right. Super fast prototyping! I can’t wait to get the finished printed sample so I can make up some with the final design, but this was enough for me to make sure everything worked and fit together.

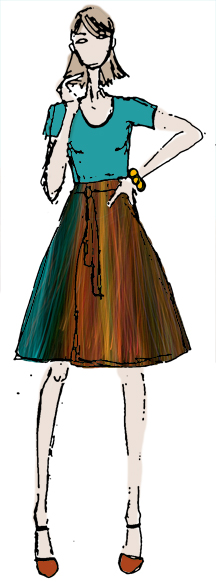 I spend so much of my time behind a computer screen that it is hard to show “behind the scenes” shots of what I do. And I know that people love to see works in progress. I do too. So I made this video which shows my process in about 3 minutes. I captured it in 2 sessions and sped it up 1500%. This is a wrap skirt that I designed that should be one of the ones for sale at the American Craft Council show I am participating in. I just finished it so I haven’t seen the fabric in person yet.