


Want to listen instead of reading?
Many people have an annual tradition of taking a holiday photo of their family. But many years ago we decided that there wasn’t much very interesting about a photos of us and our assorted dogs year after year, so we have an annual tradition of taking a Halloween photo. My husband and I met doing summer theater. When I was 17, I wanted to be a costumer when I grew up. So we started taking Halloween photos. At first it was just us and the costumes that I made for us to go to a Halloween party. But then we started to think about how we could stage something more entertaining. This was the first planned photo.
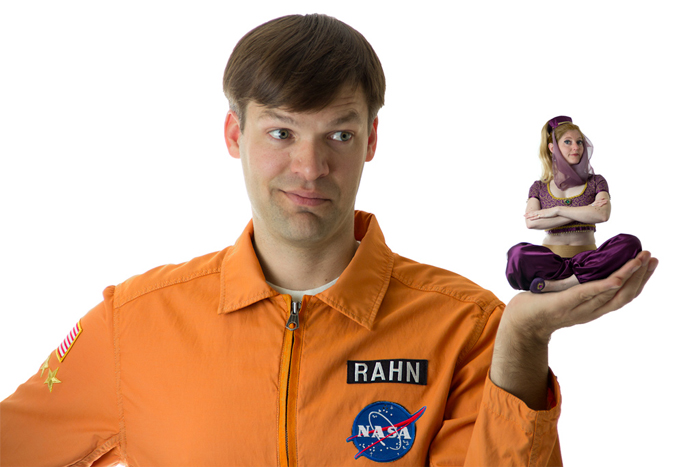
This one we took in a borrowed photo studio with some borrowed equipment. The genie costume I had made years before. The “flight suit” was a thrifted jacket I dyed orange. We’ve been taking a photo every year pretty much for the last 17 years. I start planning in about July every year, keeping an eye out for costume bits and props. The theme of the year is top secret until Halloween day.
This year was the year for Star Wars. We had talked about Star Wars before but had never come up with the perfect characters or scene to do. Until I looked at Andy and realized that he suddenly was an old guy with a beard and perfect to play Obi Wan.
Several people asked “how do you do that?!” so I thought it would be fun to write a “Making of…” post this year. So this is your spoiler alert warning if you don’t want to know the behind the scenes secrets.
We have a few rules when we do Halloween photos. It must be both of us. It must be 90% “in camera” which means we aren’t just green screen photoing us into a stock background. So we started our Star Wars scene by creating the background of the shot as a miniature. We’ve done miniatures before as backgrounds and they are really fun.
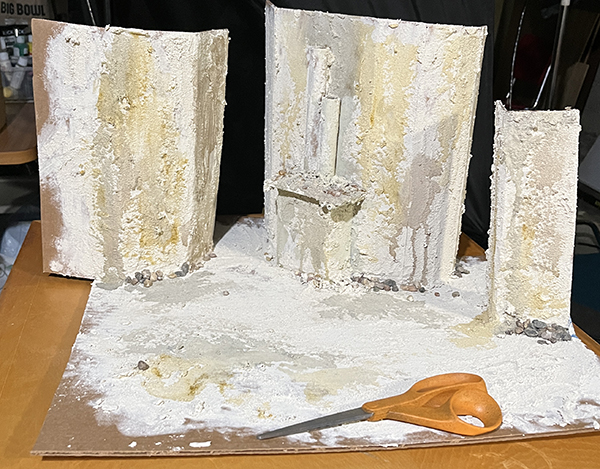
We constructed some buildings out of corrugated cardboard, aquarium gravel and leftover tile grout. I left the scissors in this photo so you can get an idea of scale. We looked at lots of photos of the “These aren’t the droids” scene to see what the background looked like in that photo. We let this dry for a few days and then I painted some grunge with watered down acrylic paints. We added some Storm Trooper action figures to the scene, which we rubbed down with sandpaper and rolled around in some backyard dirt so that they were a little bit less new and shiny. Finally we made some free-standing set pieces because we aren’t exactly sure where we’d need them to be in the scene so we wanted to be able to move them around. In the movie you can see lots of antennae towers and that’s what we were going for with these.
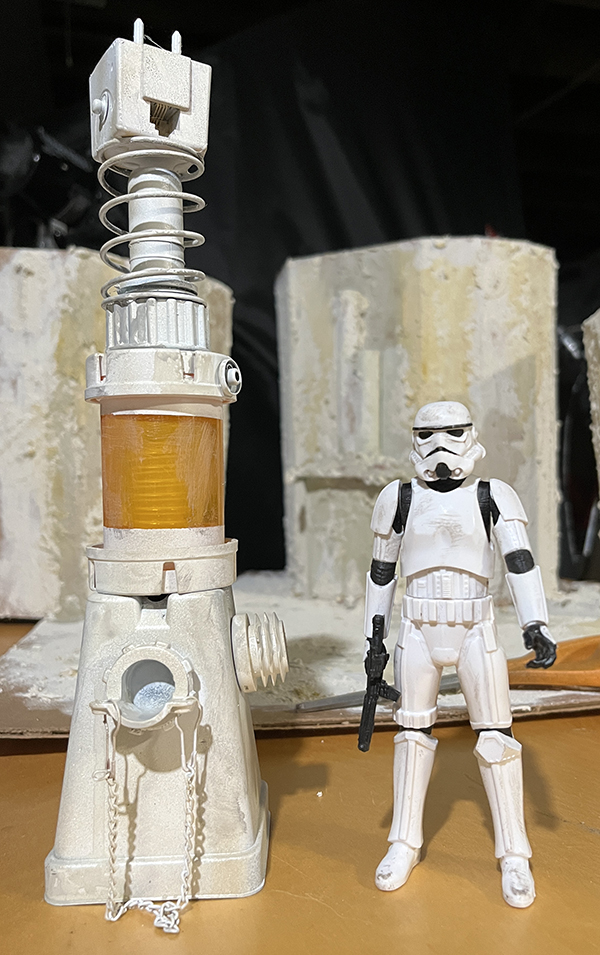
This tower was made from the junk drawer: plant pot, plumbing bits, jewelry chain, safety pins, prescription bottles, snaps, telephone plug. They were stuck together with some E6000 and then spray painted. We shot the background and Storm Troopers as one shot after we did the photo of us, so we could get the angle and the Storm Troopers exactly in the places we needed them to be. We tried several things in the far distance to fill in the gaps between the buildings and actually ended up using Andy’s gauze “robe” from his costume that I stood and held behind the shot.
The first photo we took was us. We’ve learned a lot doing these for so many years. We first shoot a whole bunch of test shots with us just in plain clothes so we can adjust the light and how we are sitting and all of that before we are in costume. We use a remote trigger for the camera that is triggered by a sound. In this case, I stomped on the floor and that would trigger the shutter.
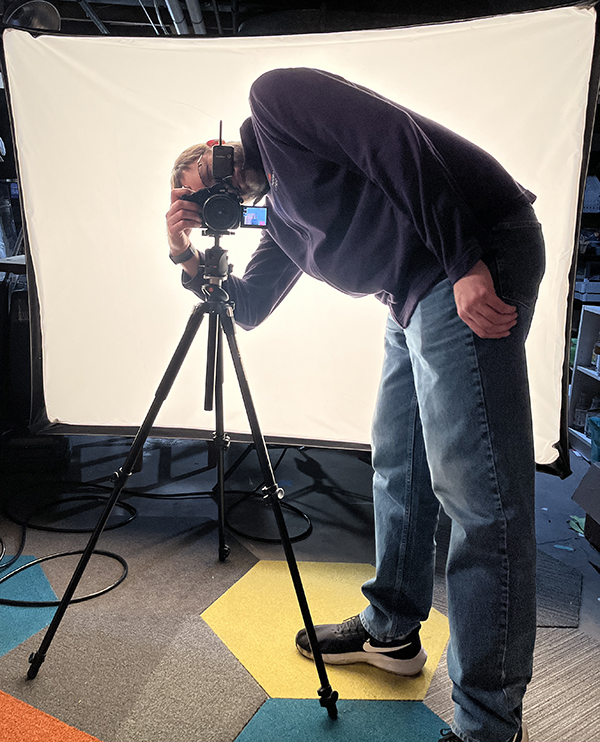
Here’s a photo of my view sitting in the “speeder” looking at the camera. The big box behind Andy is our big studio strobe light. This was a hand-me-down gift from a friend who was downsizing his photo studio. We have another smaller one that was off to the left side and there’s a big white reflector on the right. We shot us and Stanley against a big sheet of white paper so we could insert us into the background scene easily. Once the lights are set we get into costume. We coach each other about what we want to get in the shot: where to look, what’s the story we are trying to tell, who needs to sit up taller or lean back. It usually takes a few dozen photos before we find the one we both like. We shot Stanley in the same place, but by himself because he was way too excited to sit still in a shot with us. He is not normally allowed in the basement and he got about 12 treats for sitting and looking the right direction, so he thought it was the greatest day ever. He totally didn’t care that he was wearing a silly gold vest.
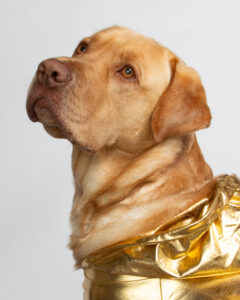
The costumes are always all about giving the idea we need with the simplest solution. Stanley’s C3PO was a gold lame hoodie I found on Amazon. I was looking for a ski hood but this popped up in search results and it was too funny all by itself. My costume is a bathrobe and the same wig we used to do the Dread Pirate Roberts from a couple of years ago, but with a terrible shag cut thanks to my sewing scissors. Andy is wearing a cloak that I’ve had for probably 30 years. We used it for Leonardo DaVinci in a previous year. The robe underneath is a piece of gauze fabric (which we reused as a background) and a brown t-shirt. The grey beard is his own. We have what we call the “Prop Shop” which is a built in workbench in our basement that is full of props, wigs, costume pieces, and curtains. So we pull things from there for many photos.
The funniest thing to me about this set of costumes was the number of people that thought I had cut my hair into Luke’s terrible shag. Yikes! I told my hairdresser this and when she got done laughing, she said “I would never let you leave my salon like that”.
We layered the photo of us and Stanley over the background photo. We try not to need to Photoshop much. We clean up little things so the layers blend together and erase stray fuzz and the inevitable dog hair. We adjusted the color of Andy’s cloak a little bit because it photographed a little too orange.
For the first time this year we used a tiny bit of AI to add to this photo: the windshield of the speeder. We talked and talked about how to photograph something that looked like the windshield because it needed to be in the photo. We had a clear ball ornament that we thought about adding to the background scene, but we weren’t sure how to make the reflections and transparency look right. We scrounged for a plastic something we could use for a windshield, like the plastic cover for a window well, but they were a couple hundred dollars, which was way too much for a photo effect. So we decided to try Photoshop’s “generative fill” where you select a part of the image and tell it what to fill in the space. We drew an oval and it took a couple dozen tries, but I think the prompt “dirty transparent glass dome” was what finally gave us something that worked.
We usually leave the photo up on the computer and tweak it for the last few days before Halloween. Adjusting the light or the colors and whatnot. It’s very collaborative. And so much fun.
“Here’s a photo of me sitting in the “speeder” looking at the camera. The big box behind Andy is our big studio strobe light.” Is this the picture of Andy? I don’t see the one of you in the “speeder,” unless it’s in the tiny viewfinder. :-)
You can see me on the camera screen. :)