

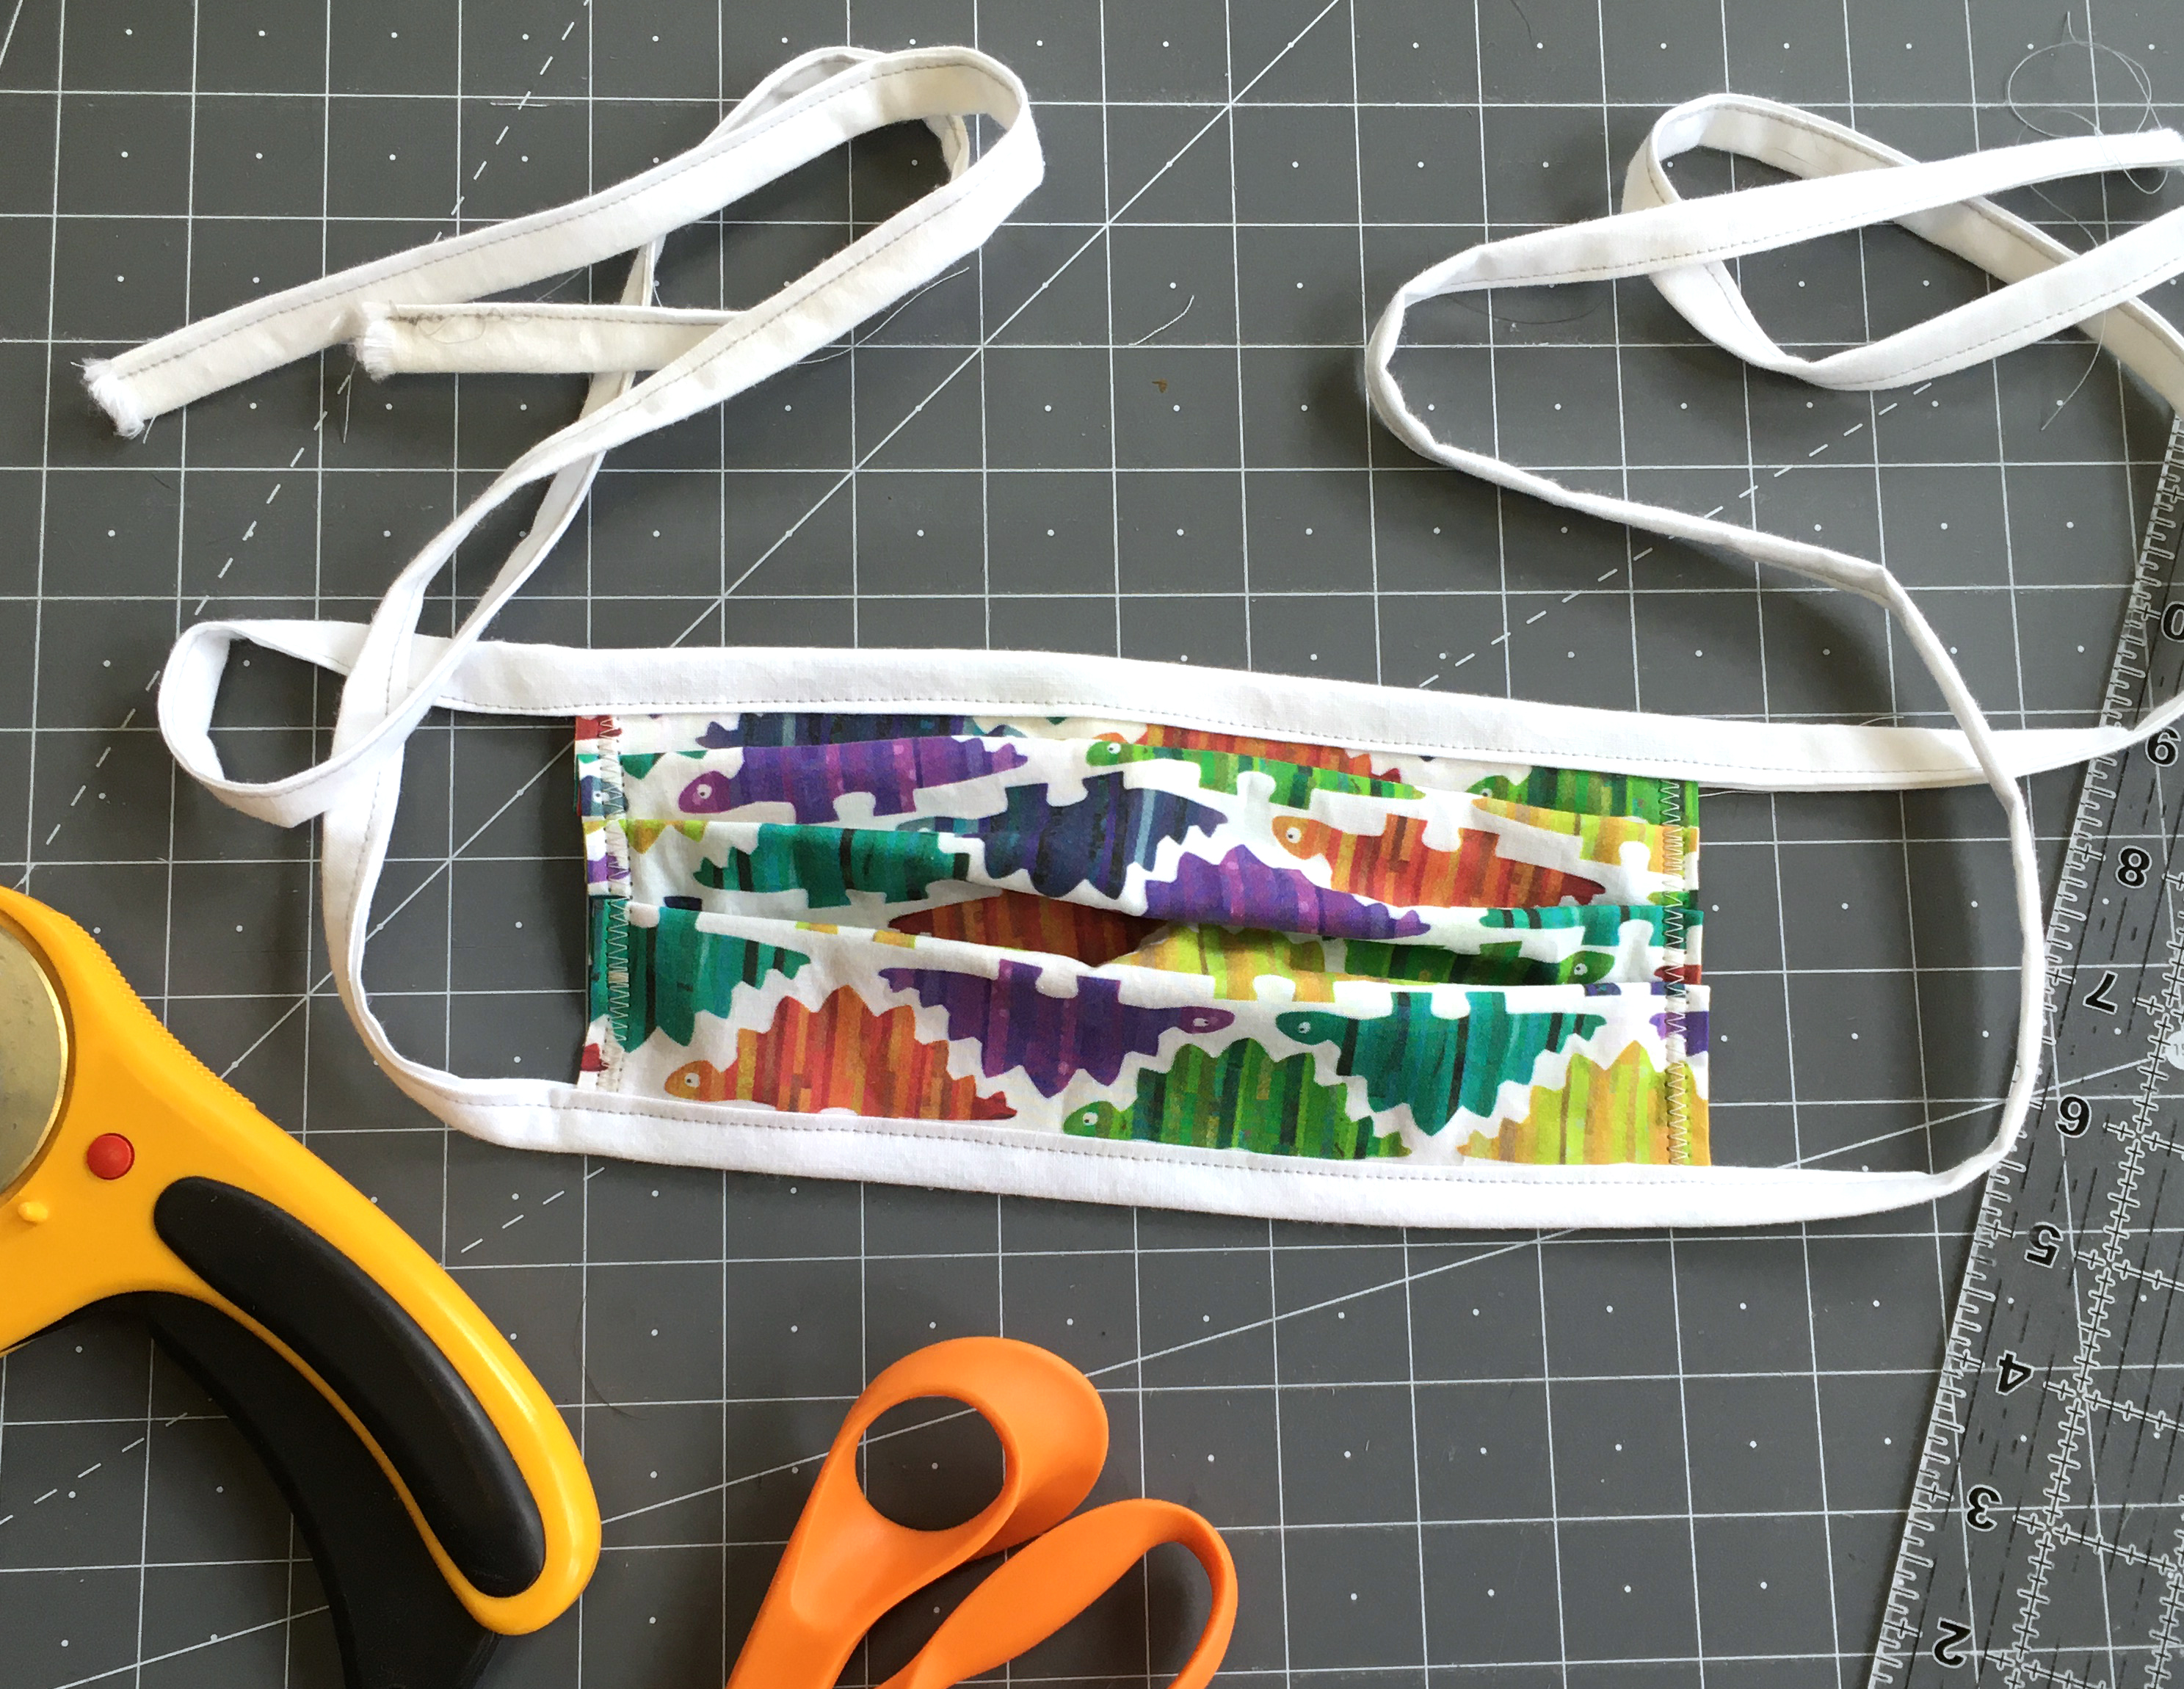
I posted a tutorial for working with a bias tape maker today on my social media channels (I will post that again below) and got a bunch of questions about how I was making masks and what pattern to use. So here is what I have been making. This is a version that is based on one that was posted by Fairview Health (associated with the University of MN). I have simplified the sewing instructions they provided because I saw a simpler and cleaner way to construct them. I am not going to provide a step-by-step tutorial here, but I will give you the basics.
Cut two rectangles that are 9 inches by 7 inches. They recommended using 2 different fabrics so you can easily tell the inside and outside of the mask if you need to take it off and put it back on.
Place the rectangles right sides together and stitch just the short sides, using about a 1/4 inch seam allowance. Turn right side out and press flat.
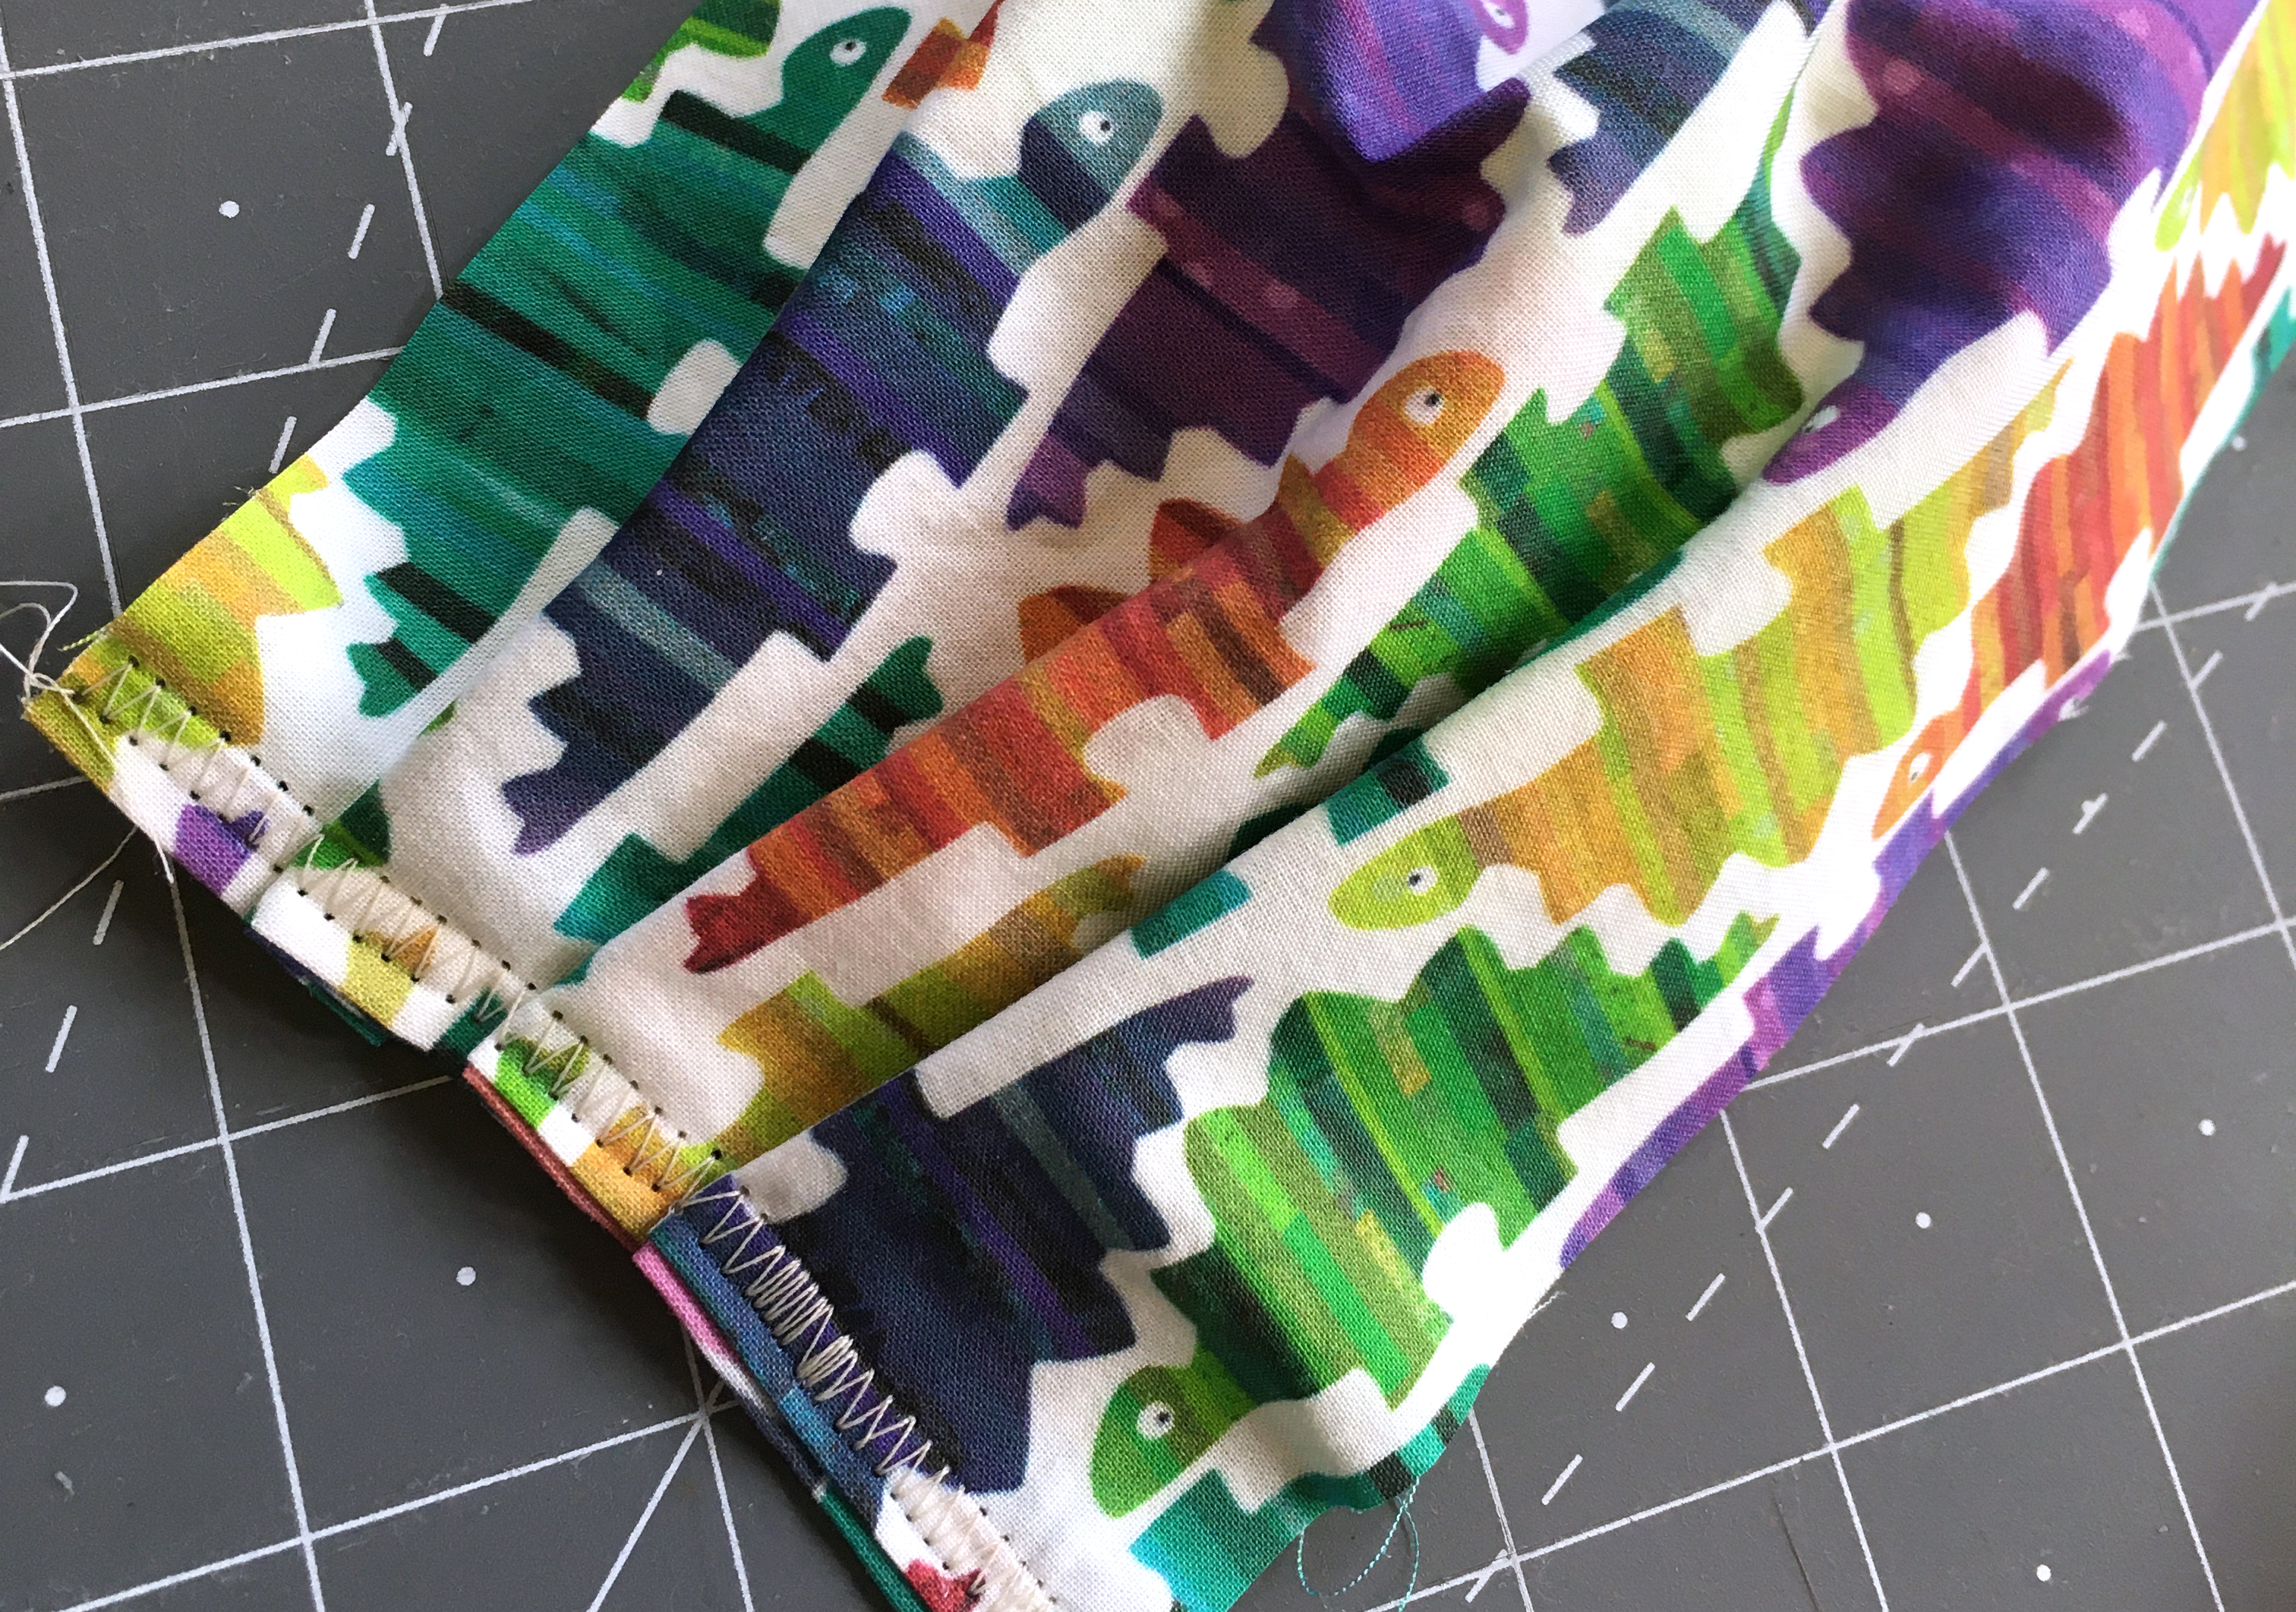
Make three tuck pleats about 1/2 inch each along each short edge of the rectangle. You can pin these. (I have a lot of practice at this kind of thing, so I just eyeballed them.) I used a wide zig-zag stitch to then stitch over the pleats about 1/4 from the edge. This is thick, so don’t force your machine or you will break needles at this step. Do this on each short edge. It doesn’t matter which way you pleat, as long as the pleats go the same way on each end.
Cut two strips of fabric to make ties. I use the full width of a piece of 45″ super soft muslin, cut 2 inches high. (I fold the fabric in half, matching the selvedge edges and cut it all the way across.) A 45″ fabric is a great length to make ties.
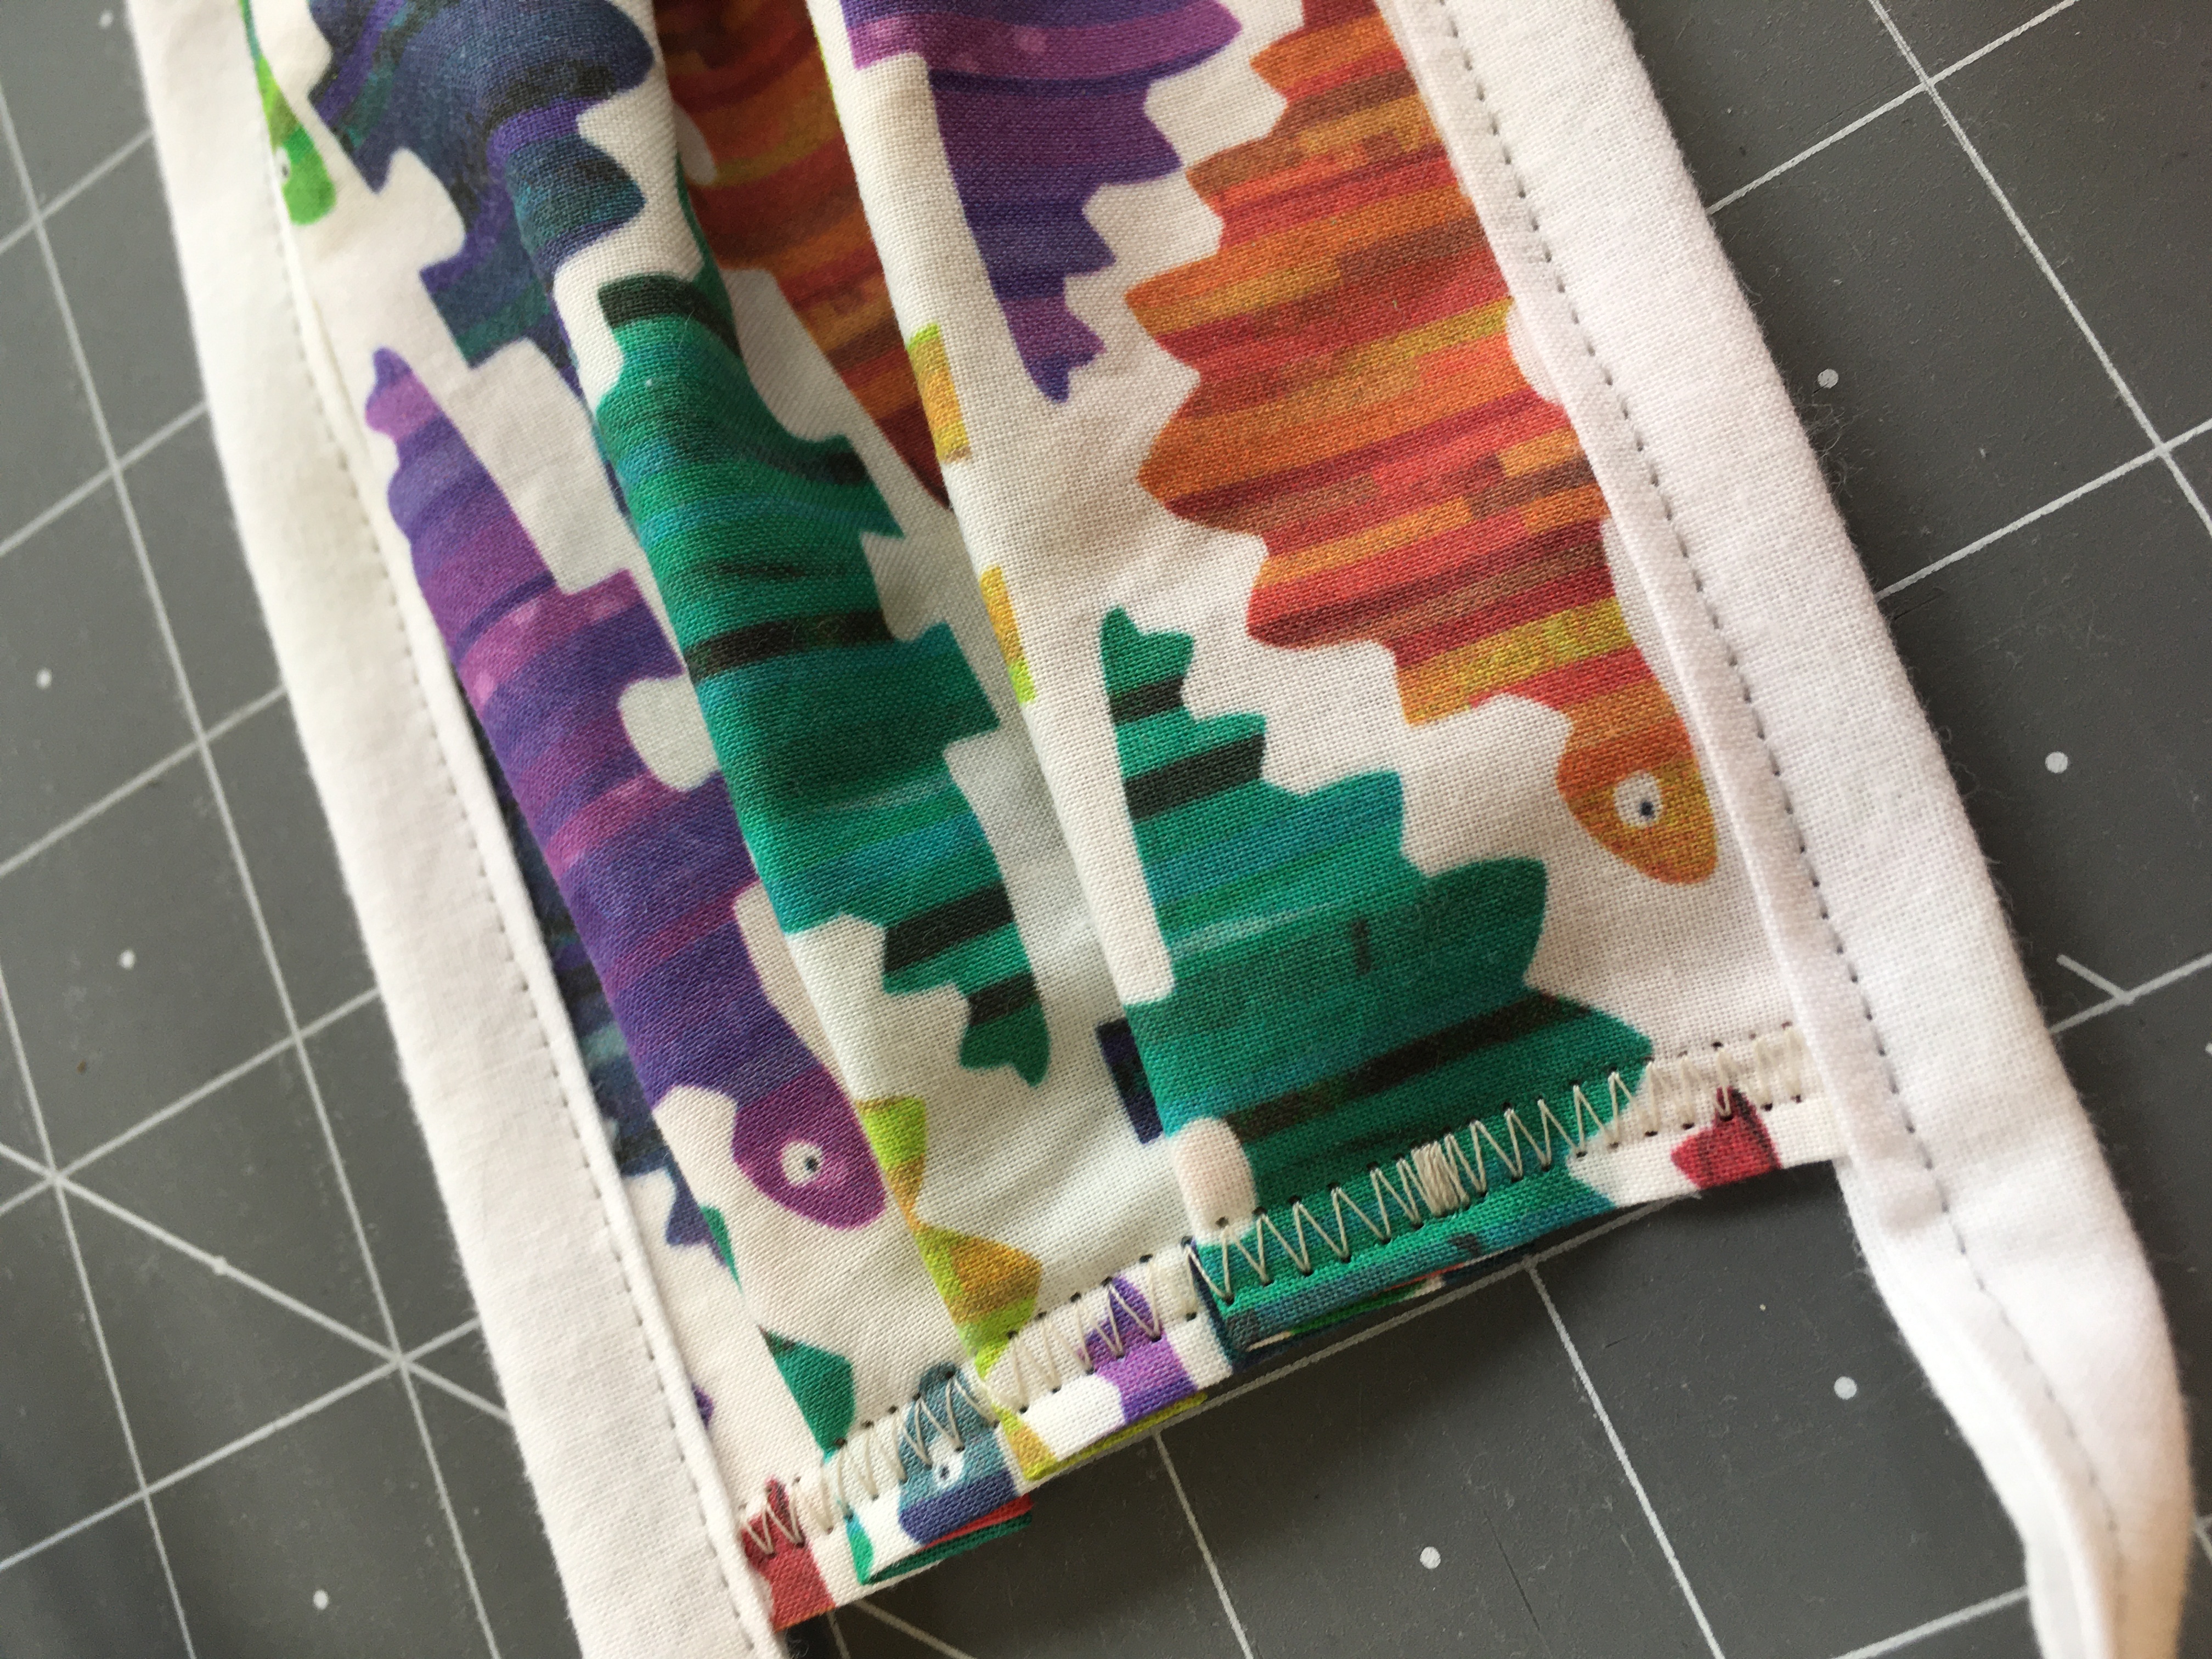 Use a 1 inch bias tape maker to press the long edges of your strips (see video below). Fold the strips in half (the short way) to find the center and pin that to the center of one long edge of the mask. Starting at the end of the tie strip, fold in half the long way (matching the folded edges) and stitch close to the fold. When you get to the mask (pinned to the center of the strip), slide the mask raw edge inside the folded strip and keep stitching all the way to the end of the tie. Repeat for the other long edge of the mask. You don’t need to worry about finishing the short ends of the ties, because they are the fabric selvedge, they won’t fray. These are reversible (top to bottom and inside outside)
If you’d like a wire/pipecleaner to help fit it to the top of the nose, that would be very easy to insert at the center as you are stitching the tie strips.
What fabric base do you use from Spoonflower for these? Thank you!
Honestly anything I had around. I don’t keep a lot of fabric stash. These were petal cotton, basic cotton and some quilting type fabric I had.
I WISH I had thought of these tips when I was sewing masks. It would have taken less time.