In March there is a month-long Instagram event called “March Meet the Maker”, started by Joanne Hawker. Each day there is a prompt like “brand” or “product story” or “tasks” and you post something about your small creative business that fits that prompt and tell your story. I have participated for a number of years, but this year I just couldn’t get very excited about it. Maybe the prompts were just too much the same as things I feel like I’ve said before. Maybe it was a little too product focused for me this year and I feel like my maker story is more than products. I’m not sure. So I decided that I would follow that up by doing a series here on my blog of “A Day in the Life” and talk about what my week is like.
One of my goals this year was to write more blog posts and it always seems to fall to the bottom of the priority list, so for the next week I am carving out a little time to check that goal off my list. People ask me very often “how do you do it all?” so here’s a little peek at how that happens.
Tuesday.
 I got up and drank a very large cup of tea. Breakfast Assam is my favorite. Then I say “Good Morning” to Stanley, my yellow lab. This is a funny game he invented where he grabs a toy and marches round and round gurgle-growling his happy song while you say “Good Morning Stanley!” and scritch his ears. It’s part of his morning routine.
I then had breakfast and worked out. I never in a million years would have thought that working out would be a regular thing I did, but I have realized that I have hit the age where if I don’t do something with this beautiful body of mine it stages an all-out mutiny. And if I don’t do it right away in the morning, I will procrastinate all day and never get around to it.
Organization & communication
My art day starts by cleaning off my desk. I am messy when I work and I like to work that way. But I have discovered that it helps to start the day with a little less chaos. I do a round of checking and answering quick emails. Today was a solicitation to move my online classes to a new platform (no thanks), an email trying to get me to pay for some kind of marketing program (no thanks), the Zoom link for my class this afternoon and a notice that UPS will be delivering something when I am in the middle of teaching that class live on Zoom (arghh). I also popped in to all of my social media to see if there were comments to respond to or messages.
Class prep
I am teaching a Modern Blackwork embroidery class for Dakota County Libraries this afternoon. We do a virtual class program where I put together materials kits which they mail out and then we all get together on Zoom for the class. I love teaching online classes because people really have so much more flexibility to be able to take it from anywhere and make it work for them. And embroidery is so much better when you can see my hands close up on that overhead camera. I spent about an hour rounding up some photos, video and some other resources for class. I don’t usually do that the day of class, but I had a crazy week last week.
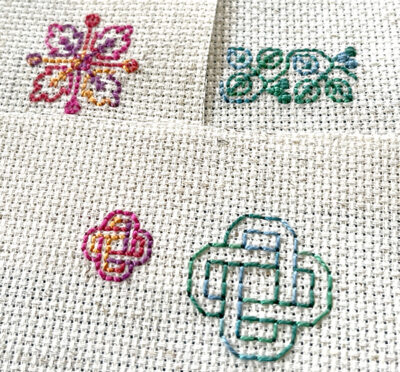 I stitched up the samples for this class a couple of weeks ago while I was listening to another meeting. I love when I can get a couple of things done at once because making samples takes up a lot of my days. When I made class kits, I also make one for myself and so I have a basket I will pull out with my class kit and I’ll be all ready to go.
Making some content
Once I had all of the class prepped, then I started to write this blog post. I also ran some updates on my website. I do all of my website work myself. I’ve taught myself how to do all of it, because I wanted to be able to update it whenever I want or need to. I know so many artists who haven’t updated their websites in literally years because they have to rely on someone “techhie” to do it for them.
 Class setup & lunch
I teach many of my classes from my studio on Zoom. I have an articulated arm that is attached to my desk that holds my webcam and my overhead camera. (I wrote a whole blog post about my setup) I have a vinyl mat I put down on my desk surface because it is a bright red and white vintage formica table and it’s distracting on camera. Today is pretty overcast so I will pull out my extra light to make sure my desk surface is brightly lit. I’ll take a few minutes and make some brief class notes about things I don’t want to forget to mention and sketch out a rough timeline so I can make sure we are staying on schedule. I also have a whole checklist of devices to silence, shut down extra apps running on my computer and so on. Today I will put a post-it note on the door to let the UPS guy know that I am in class on camera because there is something I have to sign for.
Teaching class
I love teaching for Dakota County Library because my students are always so awesome. This was a two hour class and I think we had a lot of fun. When I first started teaching virtual classes I was really thrown off by everyone turning their cameras off. It’s really challenging to teach to an entire panel of black rectangles with no feedback. But I have gotten so used to it now that I don’t even really notice anymore. Today’s class was an unusual bit of chaos. My husband and I both work at home usually, but he had a meeting to go to today, so the labrador decided he was lonely and pushed into my studio just before class started. He was a very good boy but he kept scratching and wiggling the table and my whole camera setup. He has allergies and this time of year with spring mold is terrible. I kept poking him under the table with my toe while I was trying to carry on teaching. Then out of nowhere my camera crashed and my video froze. In 4 years of teaching with Dakota County, this is the first time that’s happened! I got it back up and running in about 3 minutes, but it was unexpected. After class I usually take a half an hour to just zone out. I make a cup of tea and read a book. It takes a lot of work to keep up the engagement and energy of a class when you have blank screens on the other side. No complaints! I don’t need anyone to have their video on, but I just know I need a few minutes to recharge after a class. Then I take a few minutes to put away the class pieces; I’m teaching this one again in a couple of weeks so I’ll need the samples and materials again. Then I post a photo and a thank you to my students on Instagram and check any emails that came up while I was teaching.
Drooling
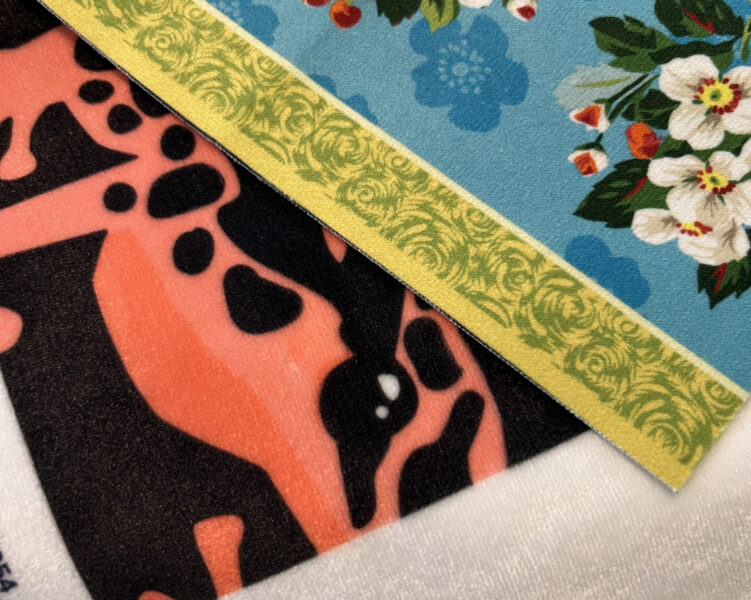
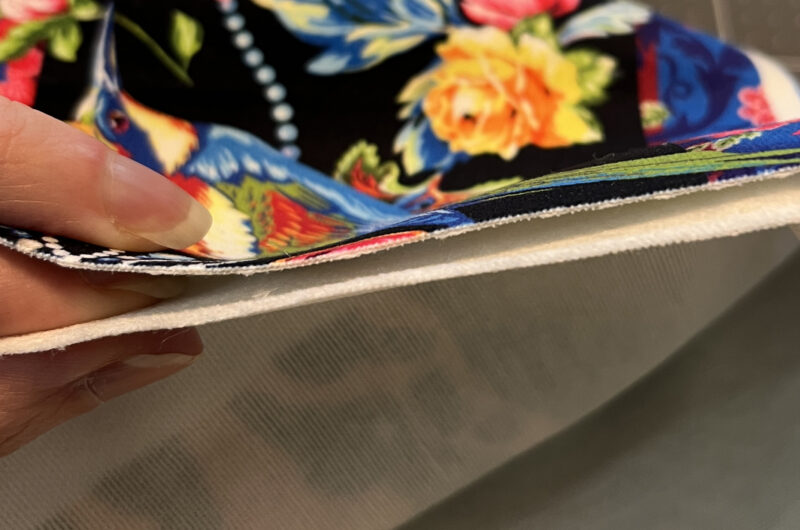
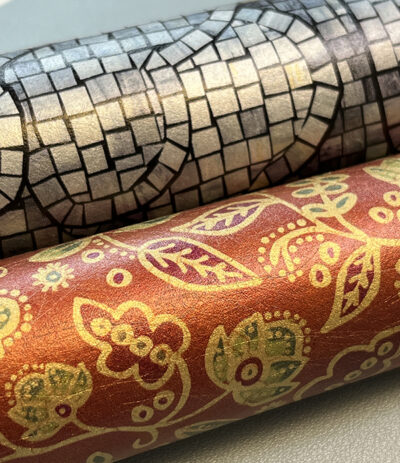 While I was teaching I got two samples of Spoonflower’s new metallic wallpaper delivered; that was the UPS package. I seriously want to drop everything and make a couple of books covered with this new paper. It’s seriously gorgeous. I can’t wait to try it, but I have other things that have deadlines.
Etsy Orders
Next is a check-in on the Etsy shop. I usually make a post office run everyday about 4:00 if I have orders to ship out. Today I was skunked. Nothing to mail.
Class launch
I didn’t have time to get to it earlier today, but the rest of my work day will be spent launching my new Strawberry Needlebooks class on my website. The live Zoom version of the class starts next week, but I also offer an on-demand version on my website that’s pre-recorded. I have it all put together except turning on the registration page, so that’s what I’ll do next. I collected emails from people who wanted to be notified when the class launched so I’ll send that out too.
Sadly, my newsletter got absolutely trashed last week by blacklisting. I use a shared server to send the newsletter email and someone sent a whole bunch of spam from it at some point, which meant that it is blacklisted everywhere and probably more than half of my emails went into spam filters or never made it to inboxes. You should see all of the spam reports and block notifications I got. And there’s absolutely nothing I can do to fix that. I’ll be honest and say it’s pretty devastating when that happens and I am beginning to realize that it’s going to keep happening with this particular email service. I was counting on the newsletter for more class registrations and hardly anyone got the email. So I’ll also make some social media posts and take photos for some more to post later in the week promoting the launch of the on-demand class. Researching a new email provider is on my agenda for later in the week.


 Lunch & art drop off