

Etsy is rolling out a whole new look for your shop in a couple of weeks. I will admit to some initial grumbling myself and thinking “now I have to redesign everything”, but I actually like the new design quite a bit. I think it was time for a refresh and I think it will make it more appealing to buyers in the long run. I know Etsy has put together some templates with Canva to help you create a new shop banner, but I have never used it and the idea of learning another new platform/software wasn’t really appealing. I also, to be quite honest, hate something that makes you log in and give them information before you ever even see what it’s about. Sorry, Canva.
So I thought I would put together a tutorial in PicMonkey, which I use here a lot, requires no logging in and I think is also really simple to use. If you want just a single photo as a banner, you can upload it right to Etsy and reposition it live in the browser. For these three banner ideas, I have taken the photos and ideas just a little step further so you need to do a little design before you upload it.
Etsy Banner Version One: Just a Photo (with a little branding)
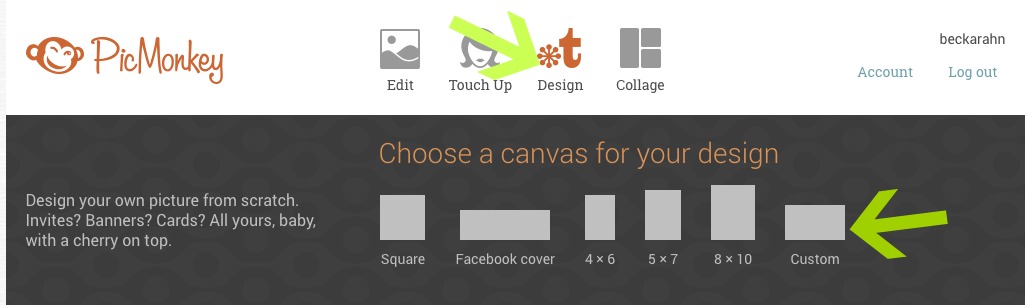
Go to PicMonkey.com and choose Design -> Custom from the menu at the top.
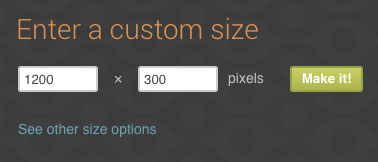
A set of boxes will pop up and ask you for the size. The new Etsy banner has a minimum size of 1200 x 300 pixels.
Now you have a blank canvas that is the right size.
I started by adding a canvas color to this blank canvas. PicMonkey has sets of tools you can choose from that appear down the left side of the screen. Choose the Basic Edits tool set (it’s the top one that looks like a crop box) and then choose Canvas Color just to the right. Don’t forget to hit apply.

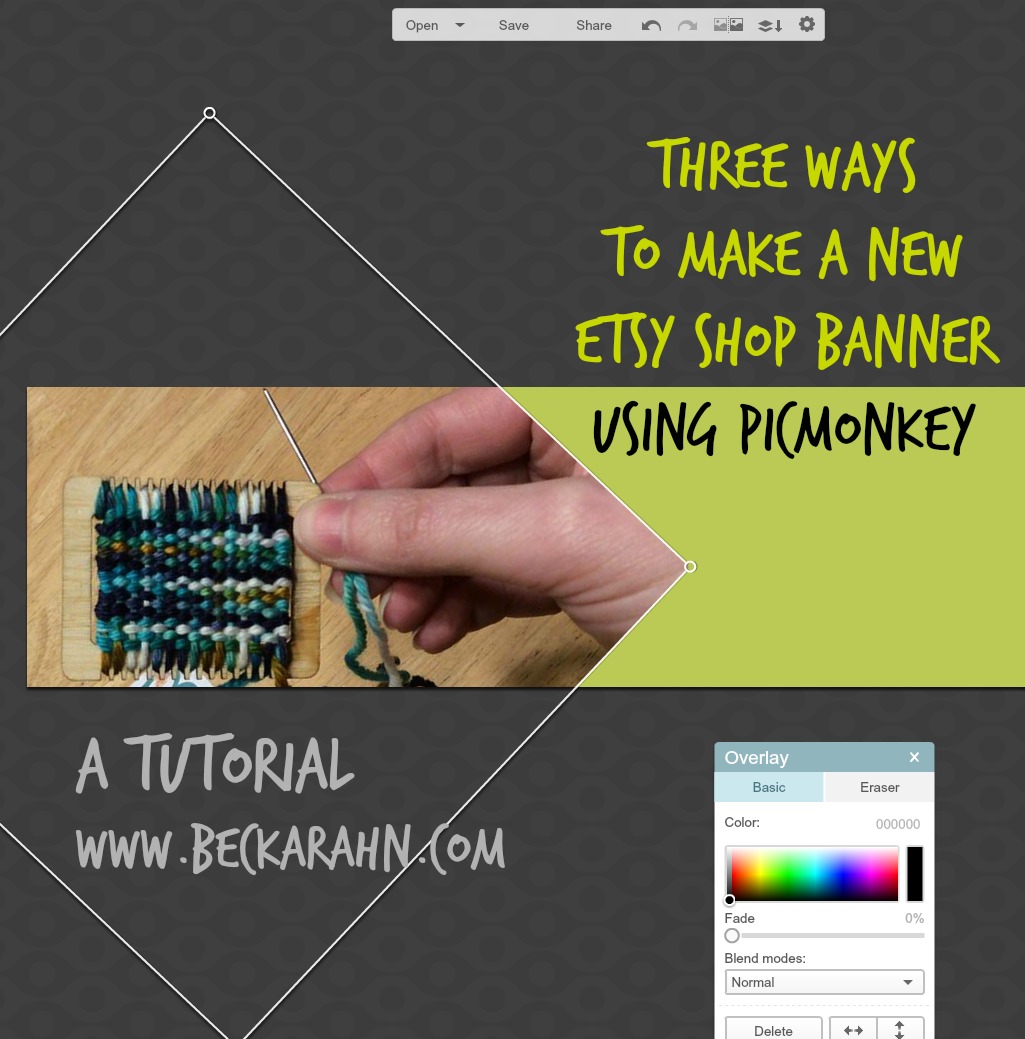
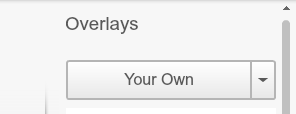
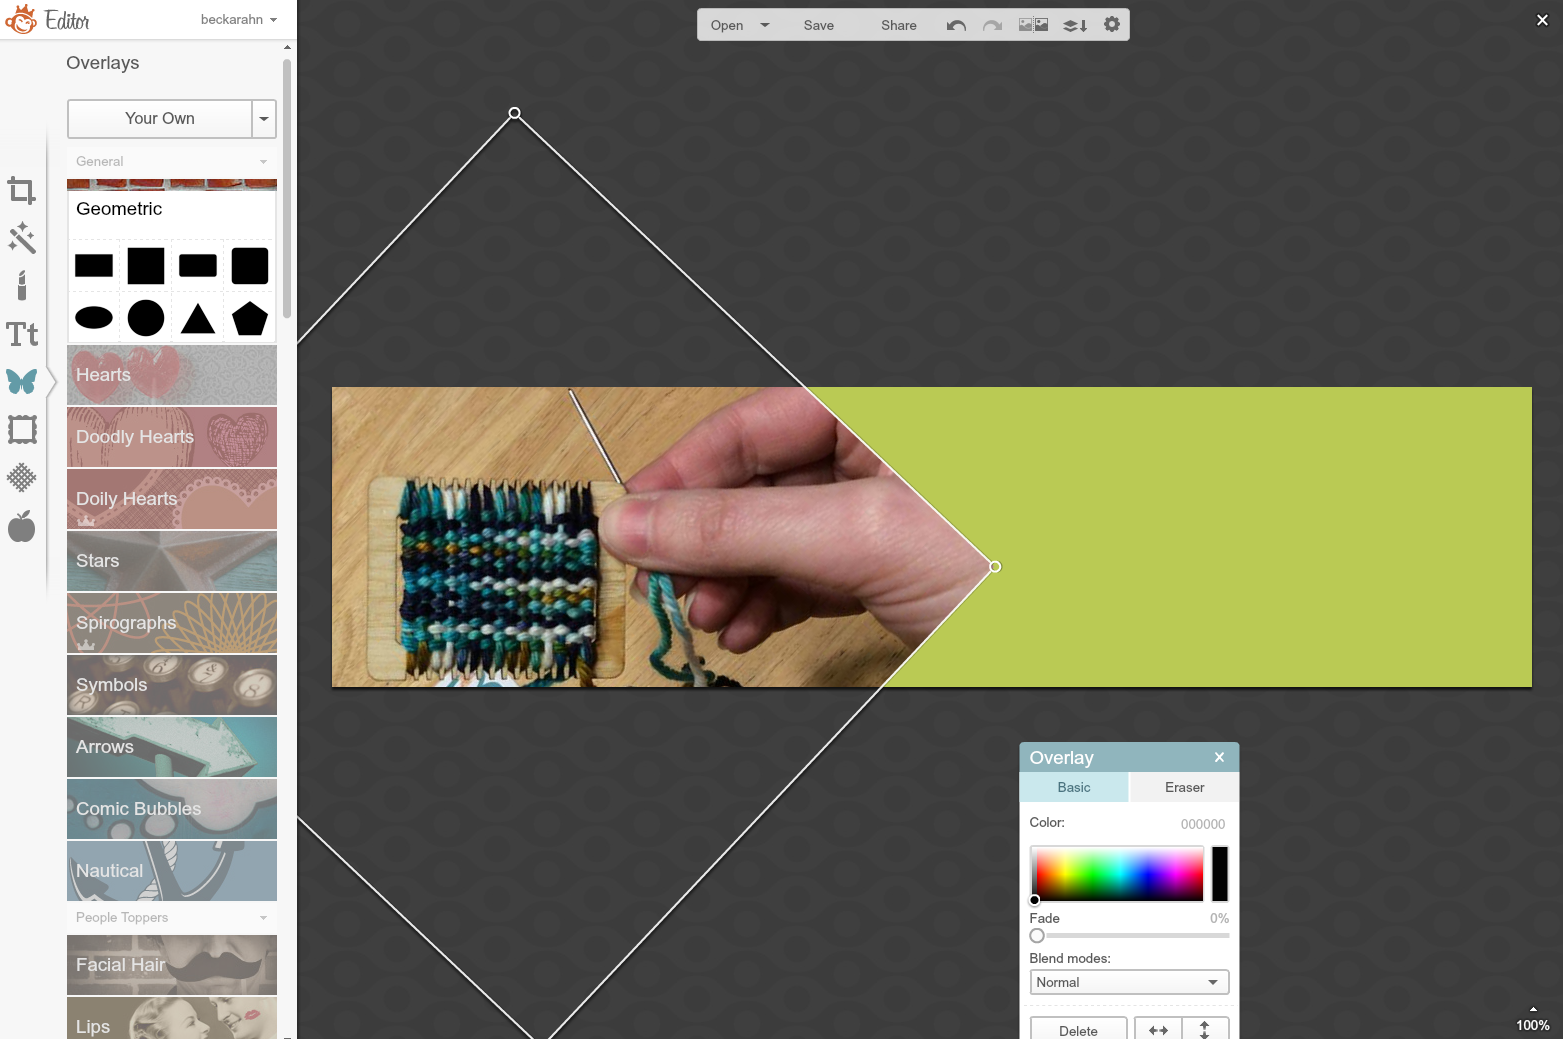
I chose one of the colors that is in my “brand” color palette. This banner is an opportunity for me to personalize my Etsy shop, so I want to tie it in to my branding. I’m going to add a photograph on top of this, because I think that this new banner style really lends itself to photos. To add a photo, choose the Overlays Tool Set from the left sidebar, which has an icon that looks like a butterfly. And then pick Your Own from that dropdown menu at the very top. I chose the photo I wanted and PicMonkey placed it on my canvas. I used the corner toggles on the photo to make it a little larger and the rotate tool (a knob on the top center of the photo) to turn it 45 degrees, which makes an interesting chevron shape against my background.
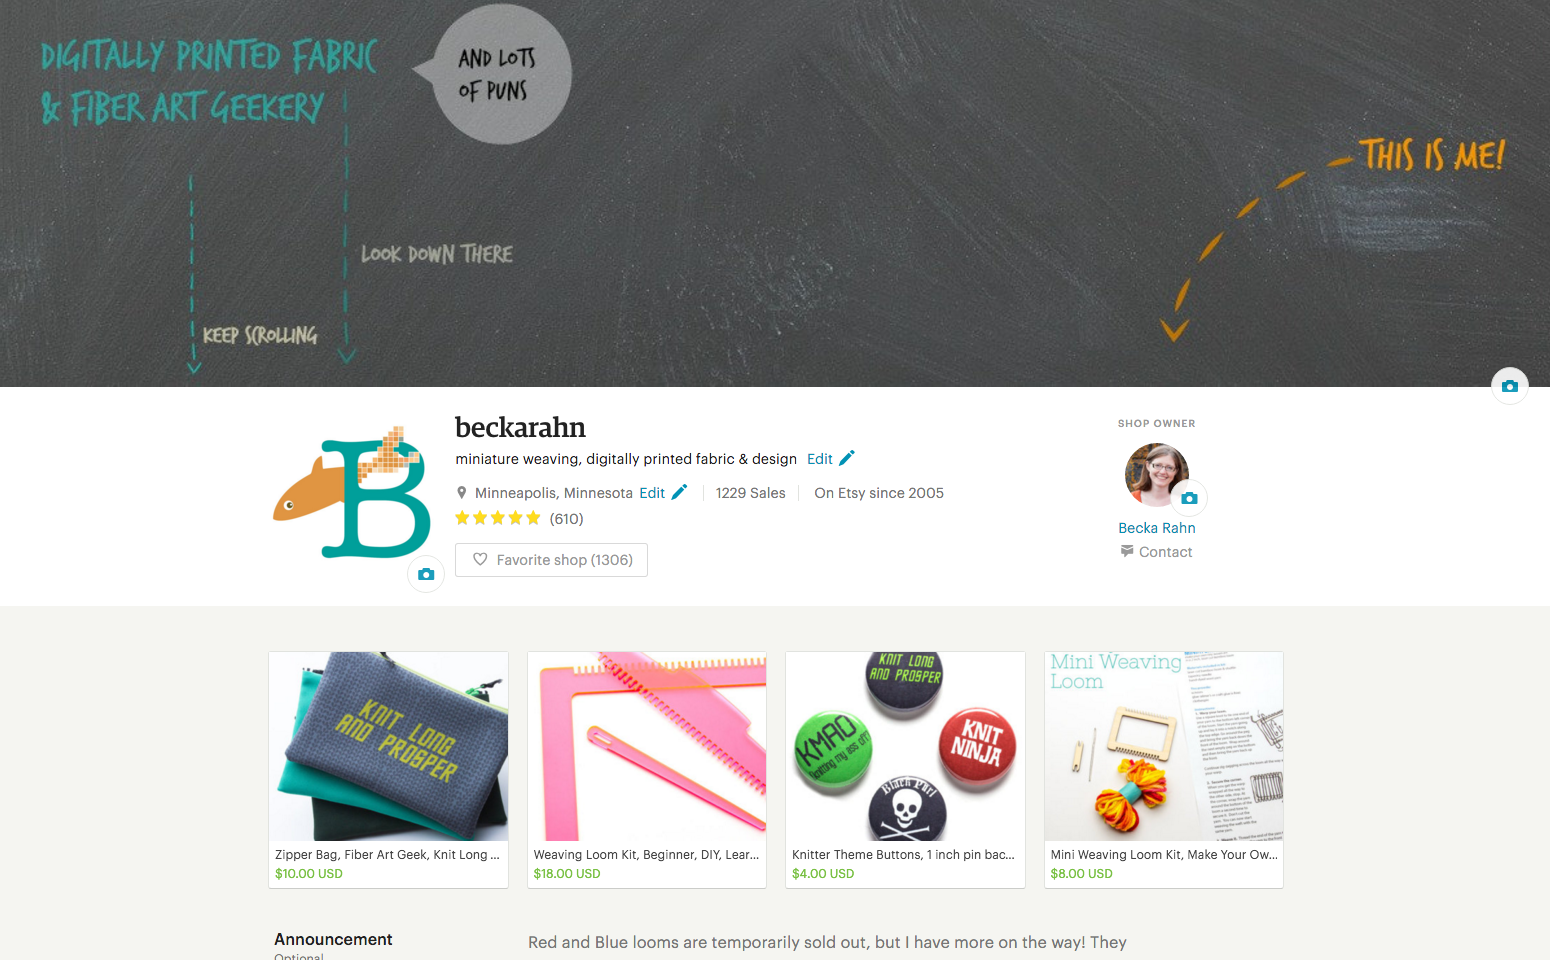
I saved this file and uploaded it to my Etsy shop. Here’s what that simple banner looks like in my new shop homepage.

Etsy Banner Version Two: Not a Photo
Maybe you don’t have a photo that you think really represents your shop very well and you would rather have something a little more graphic. Here’s an idea for that. Start the same way by choosing Design -> Custom and sizing it to 1200 x 300.
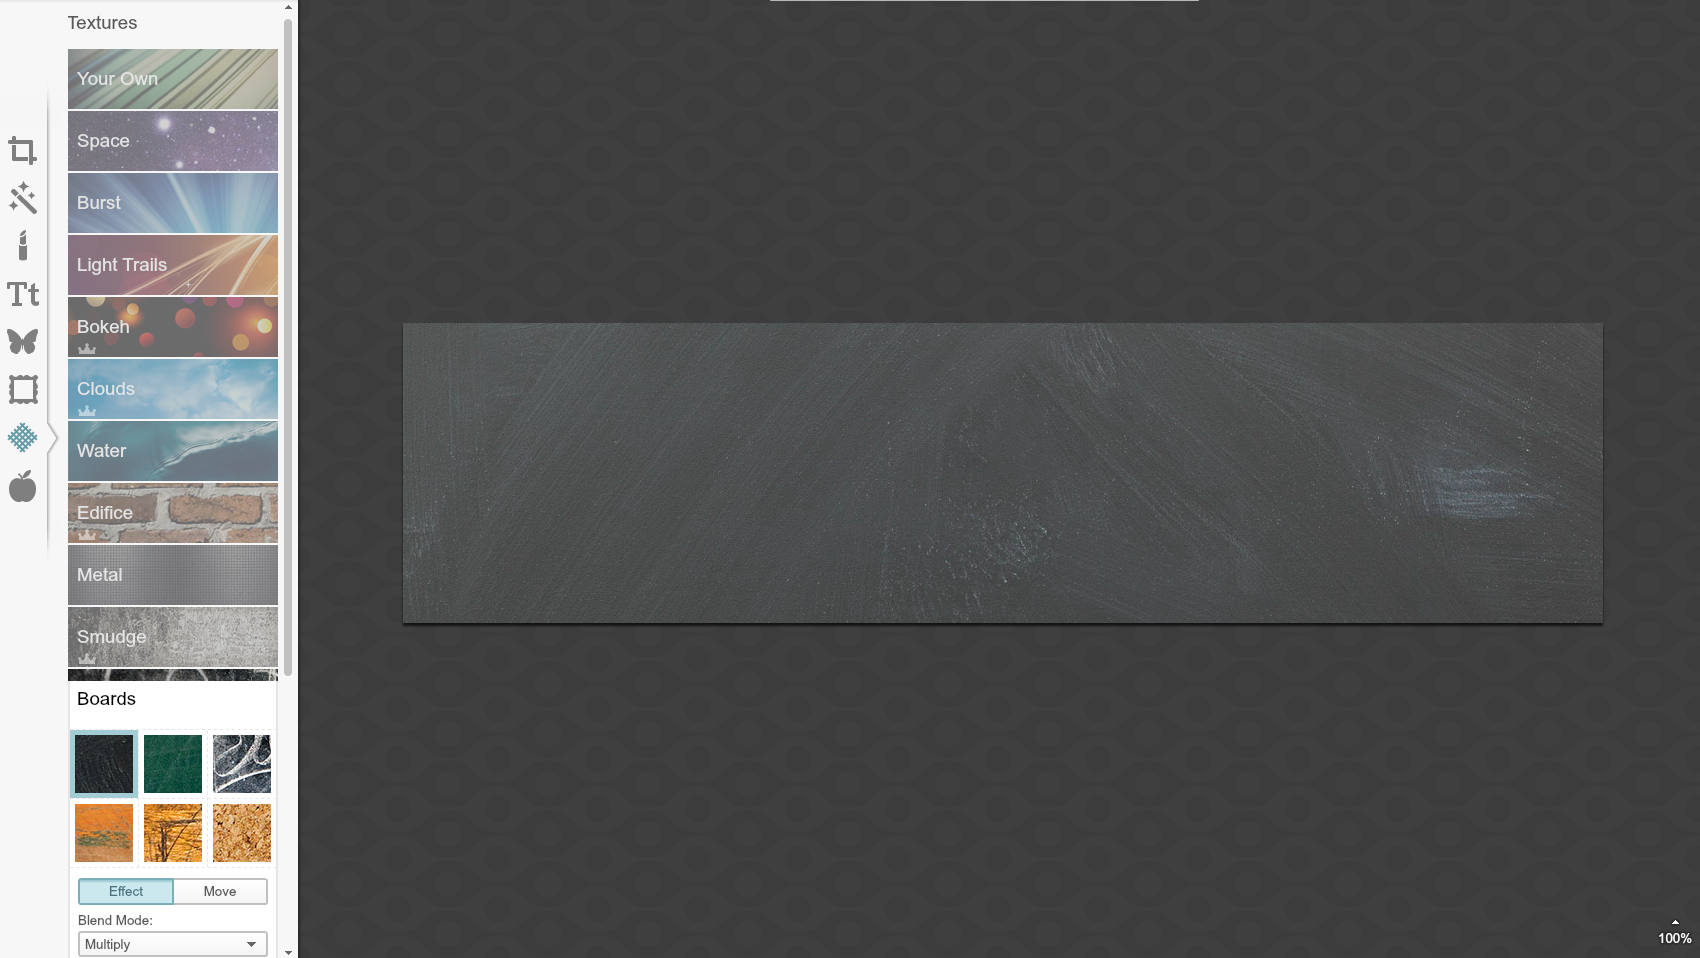
Instead of adding a canvas color, we will add a textured background. Choose the Textures Tool Set from the left sidebar. The icon looks like a diagonal grid. For this example, I picked the Boards textures from the list and added a chalkboard texture to my canvas. Be sure to click Apply.
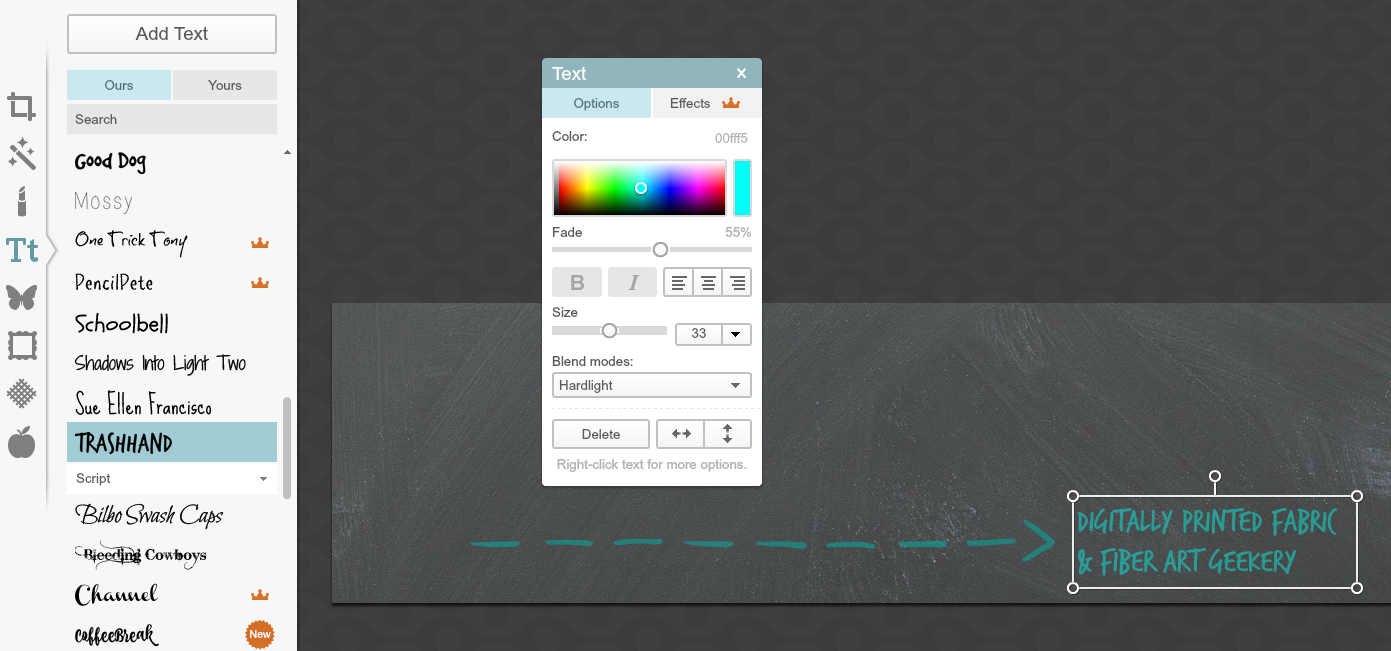
For this version, I thought I might want to add some text to this design that talks about what’s in my shop. First I went to the Overlays Tool Set and picked an arrow from the Dashed & Lined options. Then I added Text with the Text Tool (Tt icon) in the left sidebar.
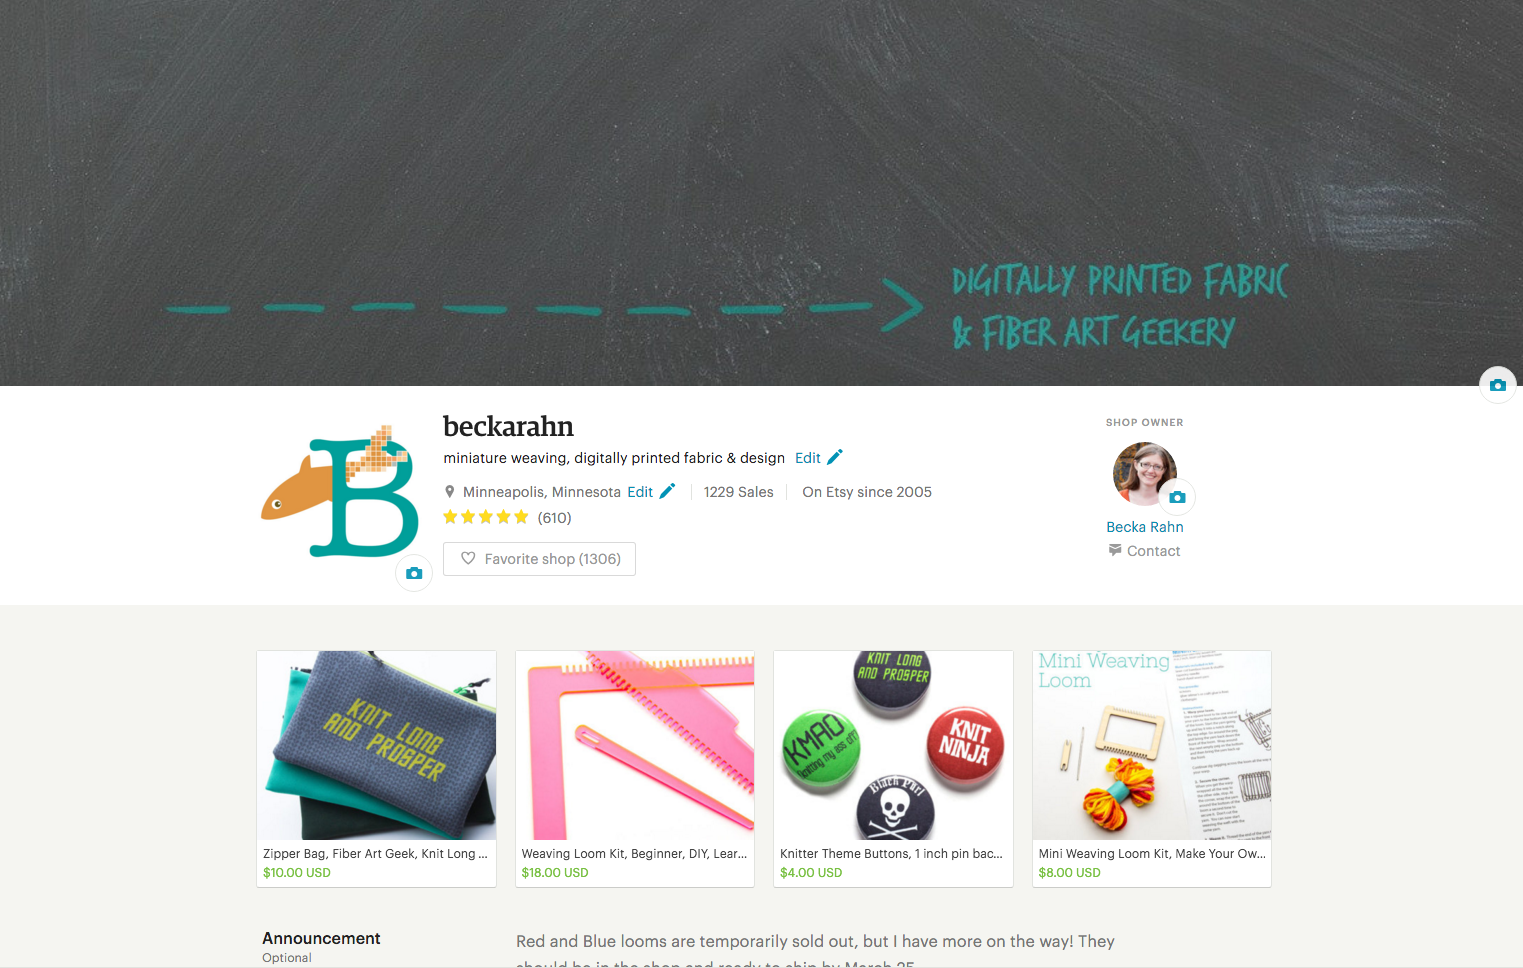
Save and upload to Etsy and here’s what this version would look like.
Or a little bit silly version with just a few more overlays and text. (I haven’t actually designed my own new banner and I am really liking the idea of this one.)
Etsy Banner Version Three: A Collage
PicMonkey also has a really simple collage tool that would make a great banner. Go back to the main PicMonkey menu and choose Collage. It will immediately pop up a window asking you to choose some photos for the collage. Find some photos and click open. (You can add more later.)

Before you start adding photos to the design, choose a collage arrangement under the Layouts Tool set (the icon looks like a collection of rectangles). The preset for a Facebook Cover works great for this, but you can choose any layout you like.
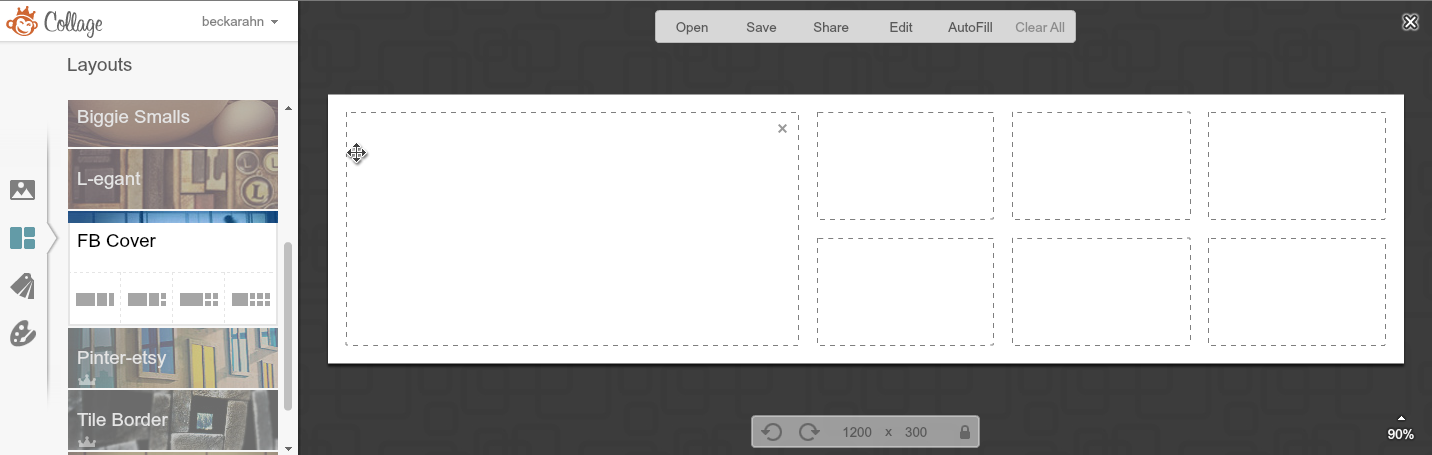
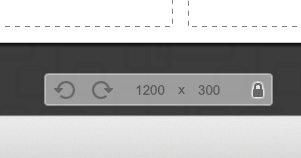
At the bottom of the screen there is a box which shows the dimensions of your collage. Click the lock icon on the right to unlock it and then change it to 1200 x 300 pixels.
Now you can add your photos by clicking the Photos Tool Set (mountains icon) and dragging the thumbnails of the photos to the empty boxes in the collage. Clicking on a photo in the collage will bring up a tool to resize it. Drag them to move them within the collage box. You can also adjust the background color of the collage and the spacing of your boxes by using the Background Tool Set (icon looks like a paint palette). PicMonkey has a great collage tutorial that shows you a few more things like how to add more boxes and resize them.
Here’s a collage style banner that has been uploaded to my shop.
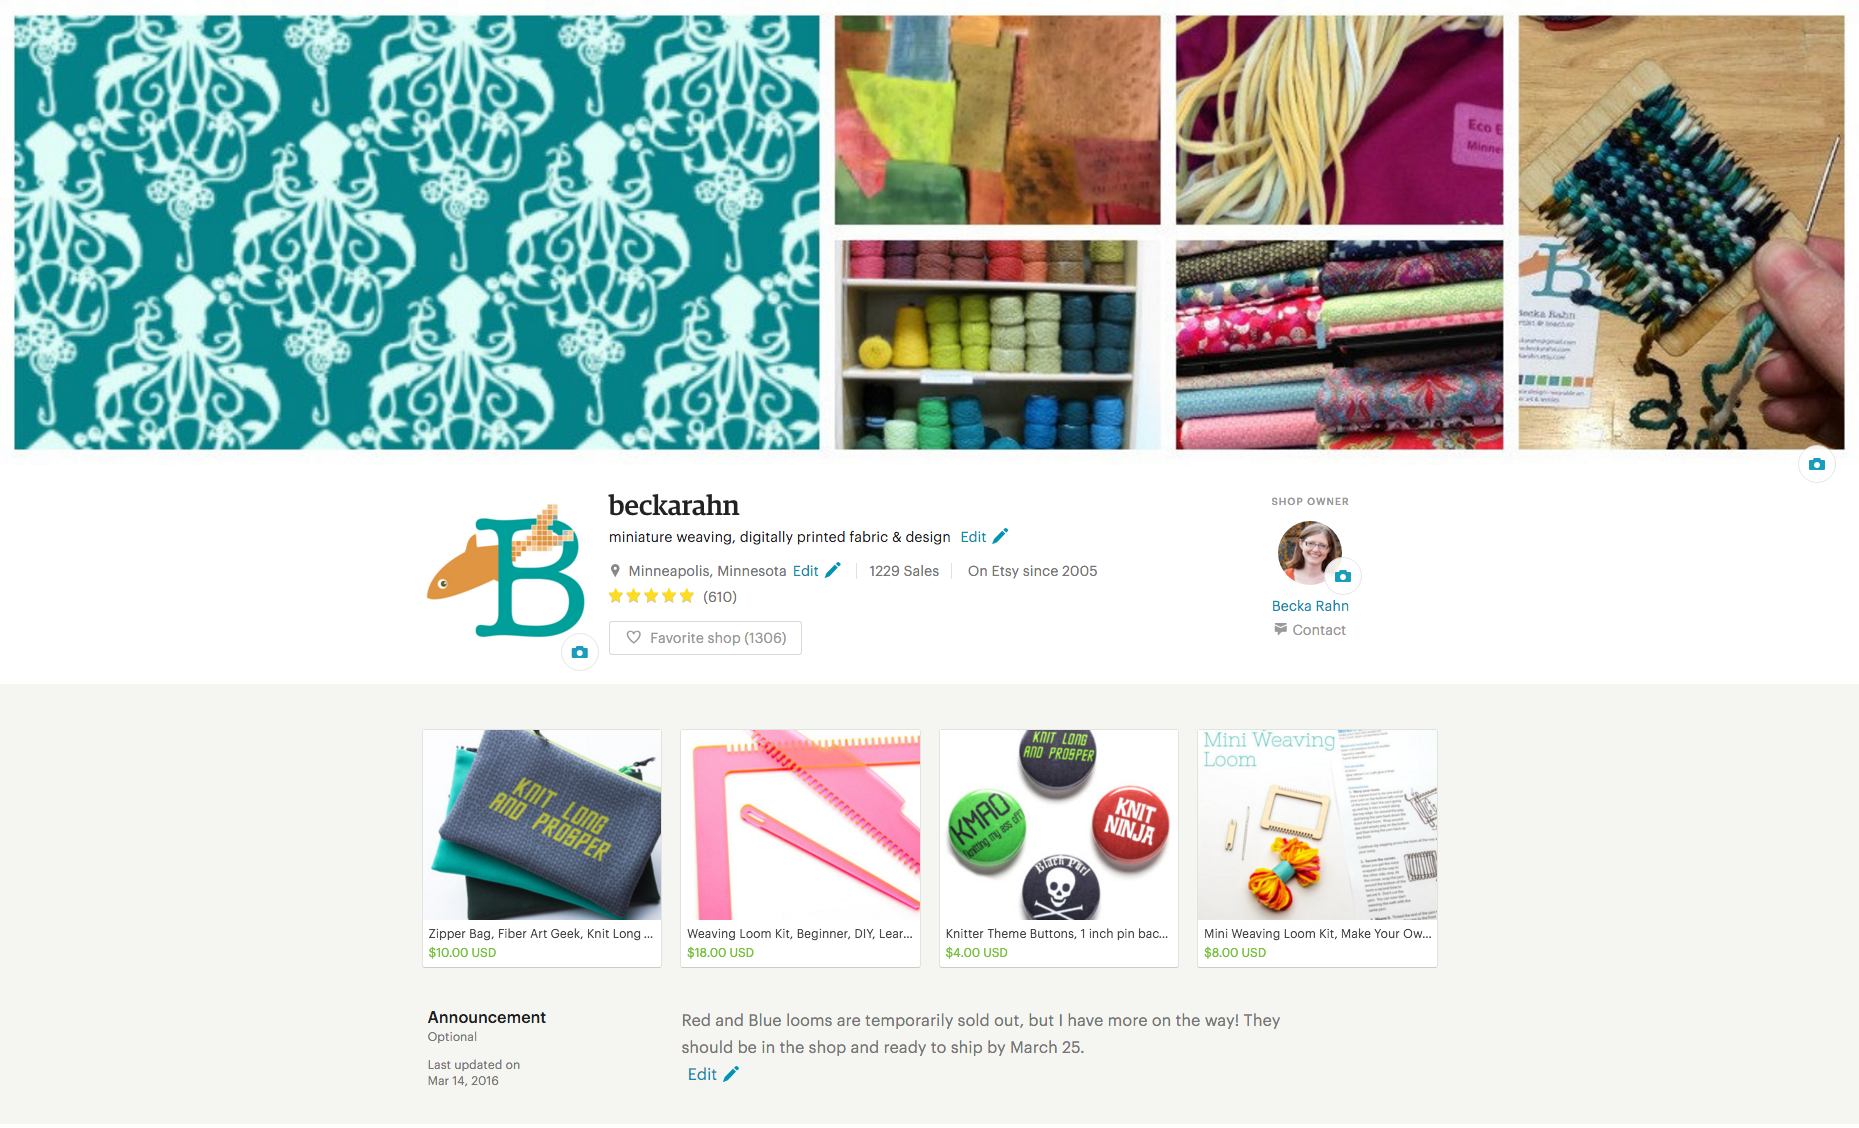
I hope this has given you a great starting point and some ideas that might make this update little more fun and less of a chore. I’d love to see what you come up with! Share a screenshot with me on instagram or twitter @beckarahn.