A Mini Tutorial: Spoonflower’s New Proofing Tool
Spoonflower recently introduced a new proofing tool that works right in your Design Library. I think it’s great! I made a mini tutorial video to show you how it works.

Spoonflower recently introduced a new proofing tool that works right in your Design Library. I think it’s great! I made a mini tutorial video to show you how it works.
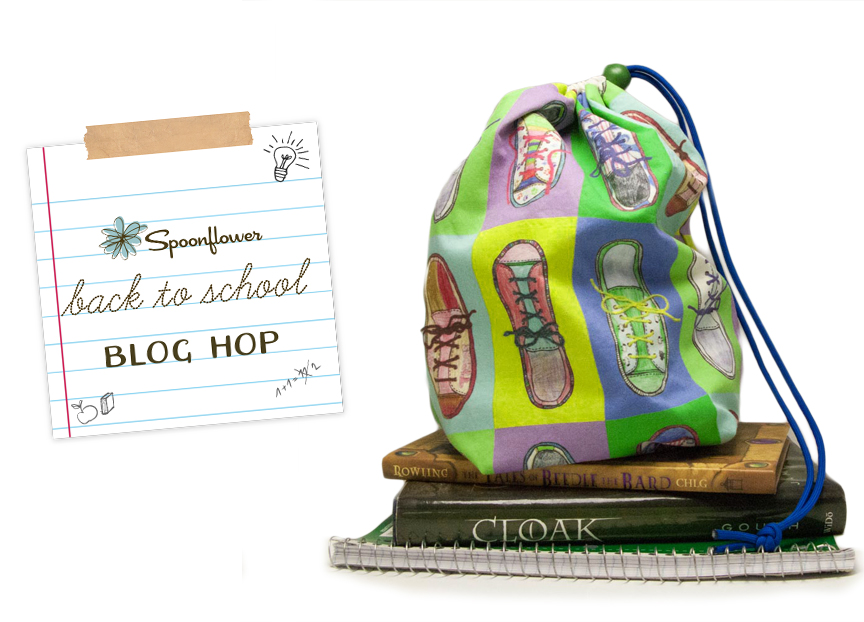
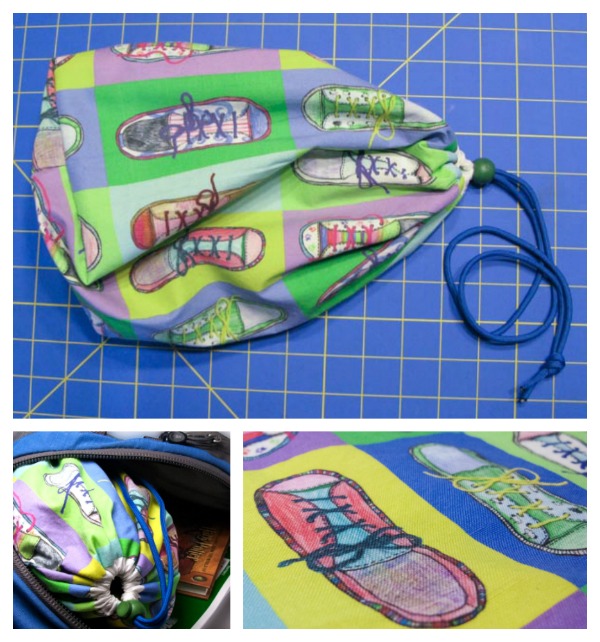
When you live in Minnesota, “Back-to-School Season” is quickly followed by “Snowboots Season”. When I asked my sister what she thought would be a great back-to-school project to share with the Spoonflower Back to School Blog Hop, she described a “stuff sack” type bag to put the kids’ shoes in their backpacks when they have to wear their snowboots to school. Something to keep the papers from getting dirty and books from getting crumpled by dirty sneakers. With each kid needing regular shoes, gym shoes and snowboots, there are a lot of shoes getting hauled back and forth on the bus every day.
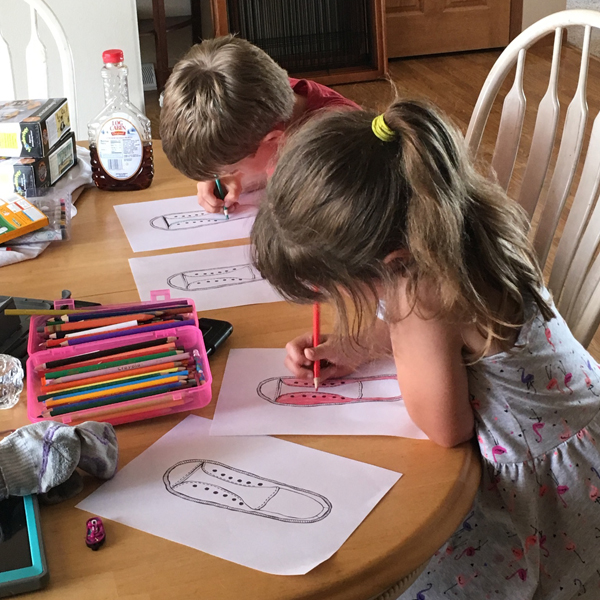
My niece and nephew are 7 & almost 9 years old and I thought the bags would be the most fun (and more likely to get used) if I could get the kids to help me with the fabric design. What better for a shoe bag than a fabric print with shoes?
So I drew a coloring book page with a canvas sneaker. I drew it in fine tip sharpie, scanned it and emailed it to my sister. She printed copies and let the kids color the shoes any way they liked. They chose colored pencils for these, but this would also work with markers, crayons, or watercolor.
Download: If you want to make your own shoe print, you can download my shoe coloring book page here. It is yours to use any way you like.
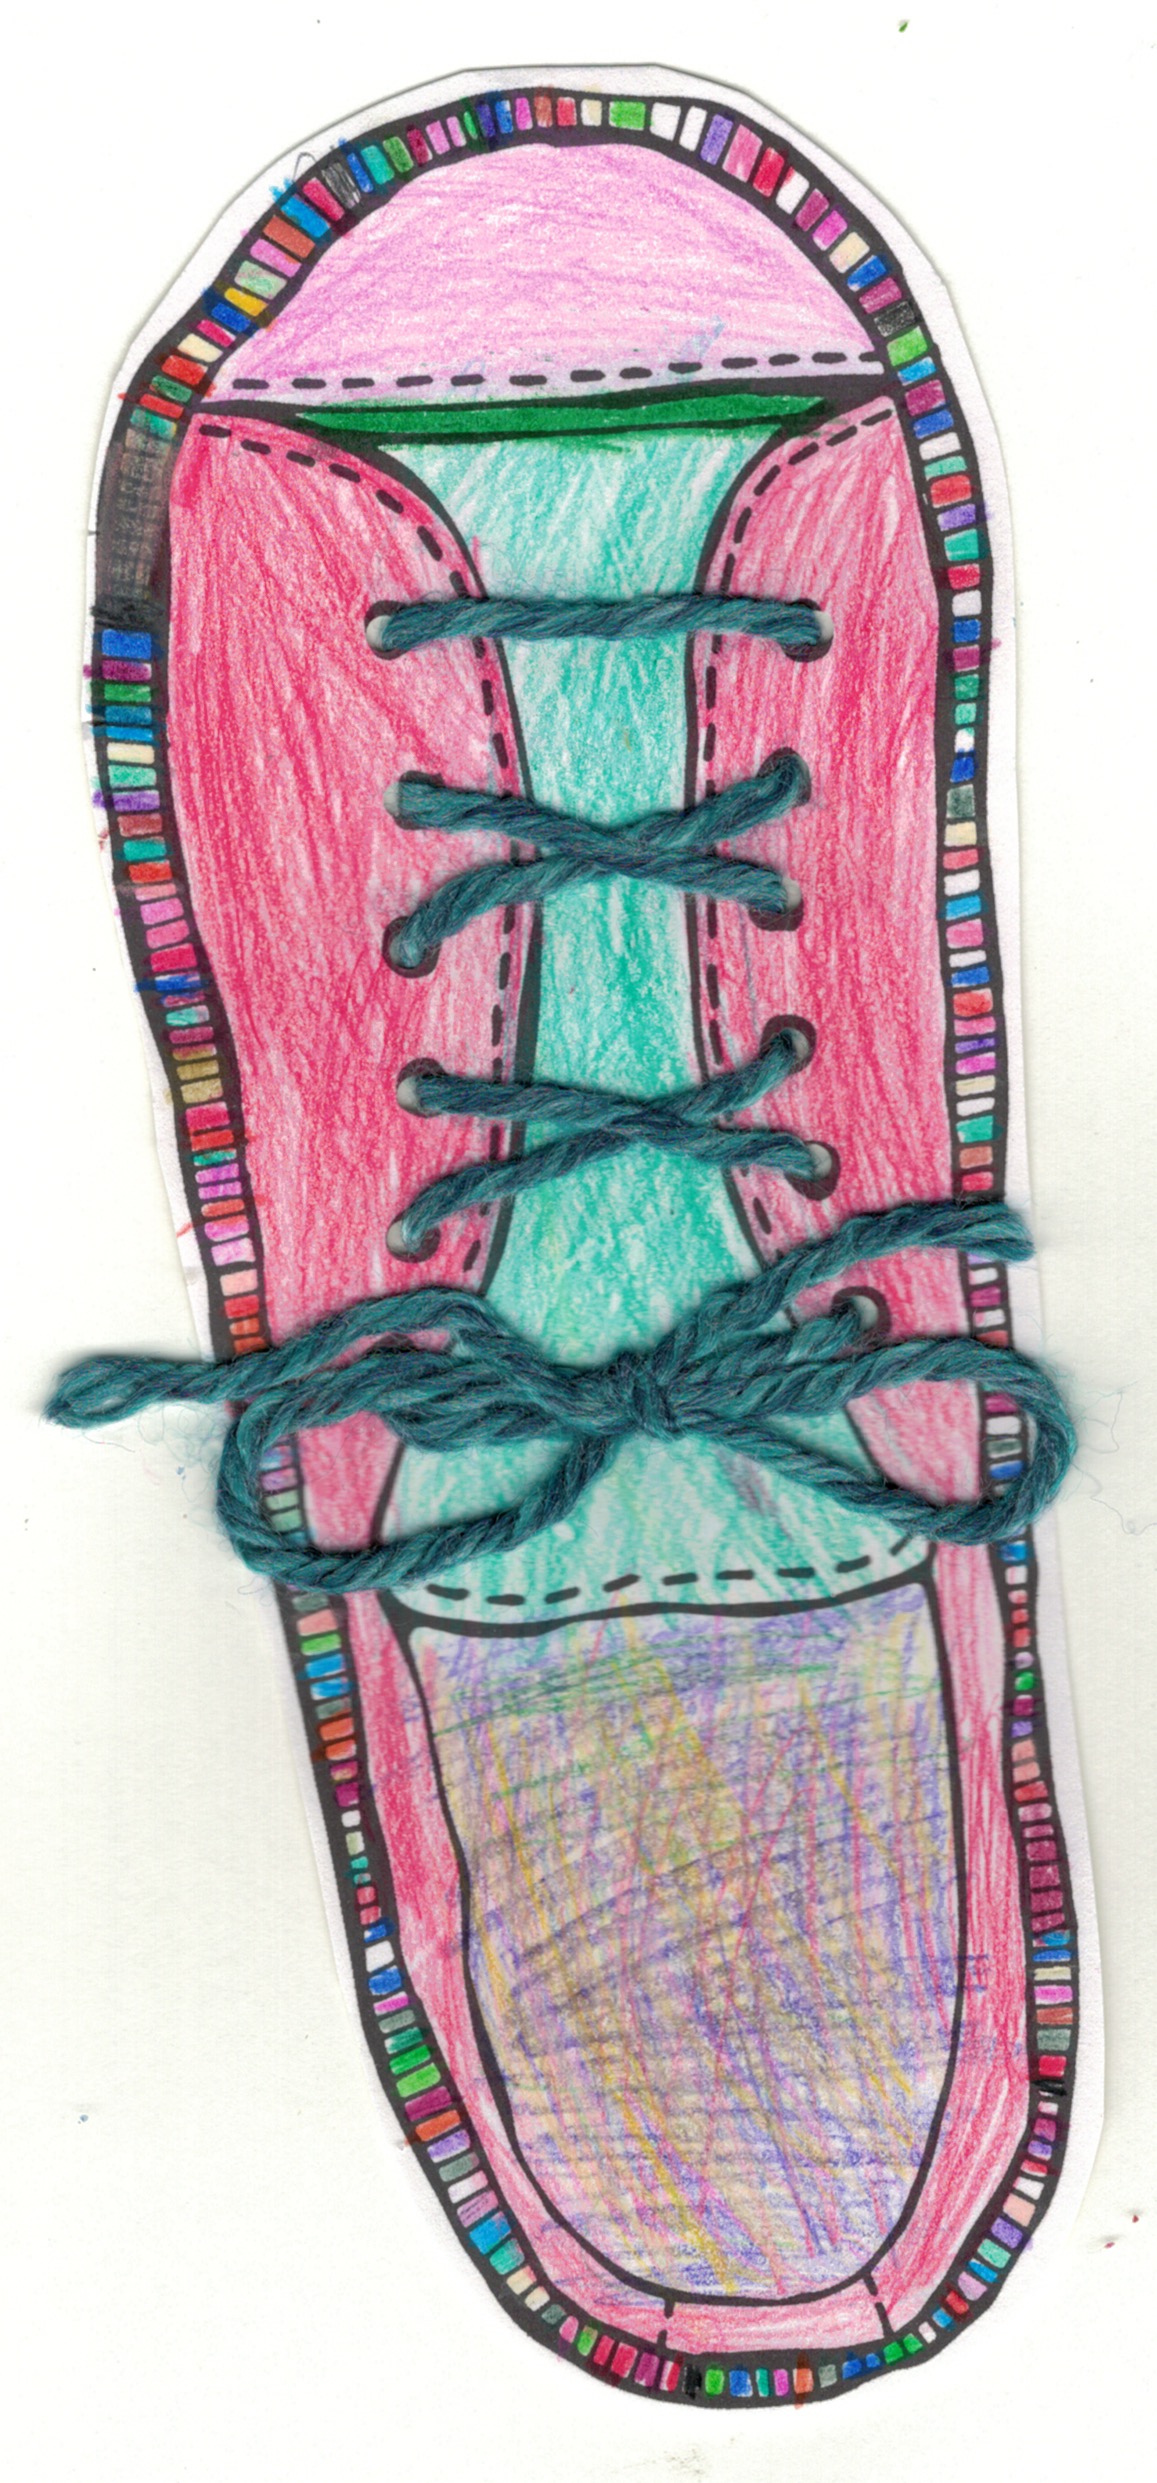
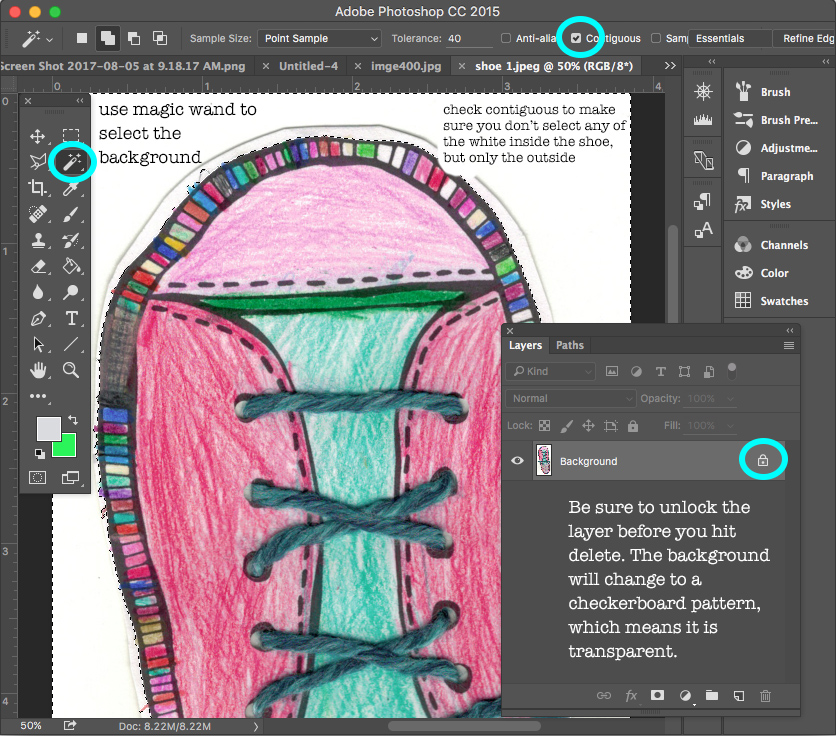
I love to add texture and dimension to my designs so when I got the colored shoes back from the kids, I used a 1/8 in paper punch to punch holes at the eyelets and I made shoelaces from colored yarn. I threaded it through like lacing the shoe and tied a bow. Then I scanned the completed shoes.
I opened each shoe in Photoshop so that I could cut out the shoe and make the background transparent. I used the Magic Wand tool to select the white background and then unlocked the layer so that I could delete that white edge and leave just the shoe.
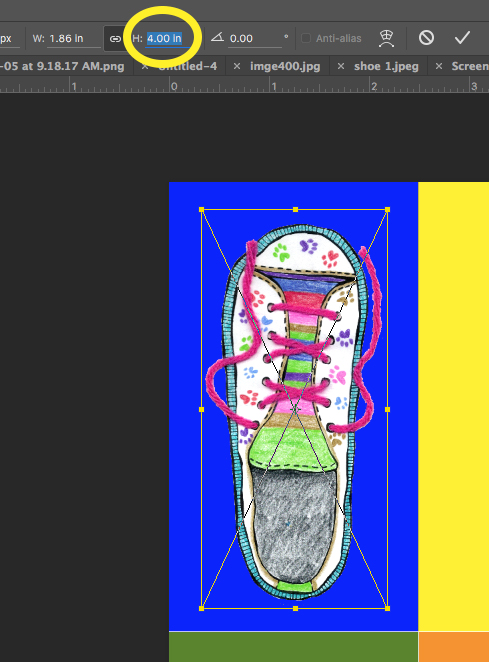
I wanted to do a repeating Warhol-inspired pop art design with the shoes by putting them each on a brightly colored background rectangle, so I set up a new canvas in Photoshop for the background. I created a new file that was 7.5 x 9 inches at 150 dpi. That’s the size I decided to make the repeat for my design.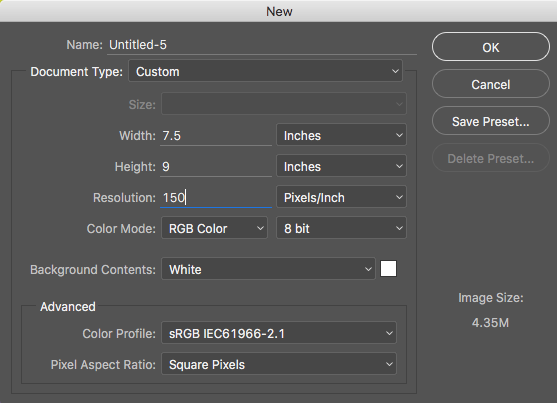
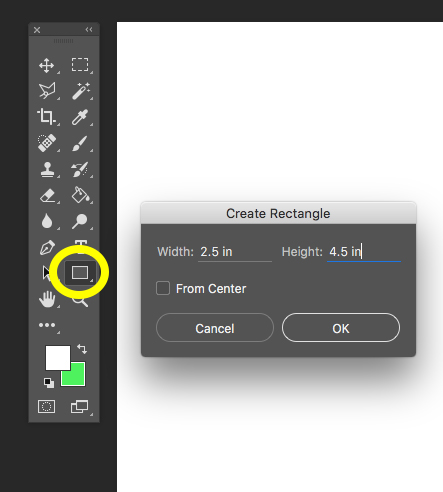 I filled this canvas with 6 rectangles, each 2.5 x 4.5 inches. I drew these using the Rectangle Tool (yellow circle below) and filled them with a random color. Hint: If you click once with the tool inside your canvas, it will bring up a dialog box and you can type in the exact size of the rectangle you would like. Just repeat that to make all six rectangles. Here’s a little more about how to use the Rectangle Tool. Use the Move Tool to move the rectangles into place and be sure that you have selected the layer that you want to move. (Each rectangle will be on its own layer.)
I am going to match the colors to the shoes a little later, so the colors don’t matter at this step, just pick ones with a lot of contrast.
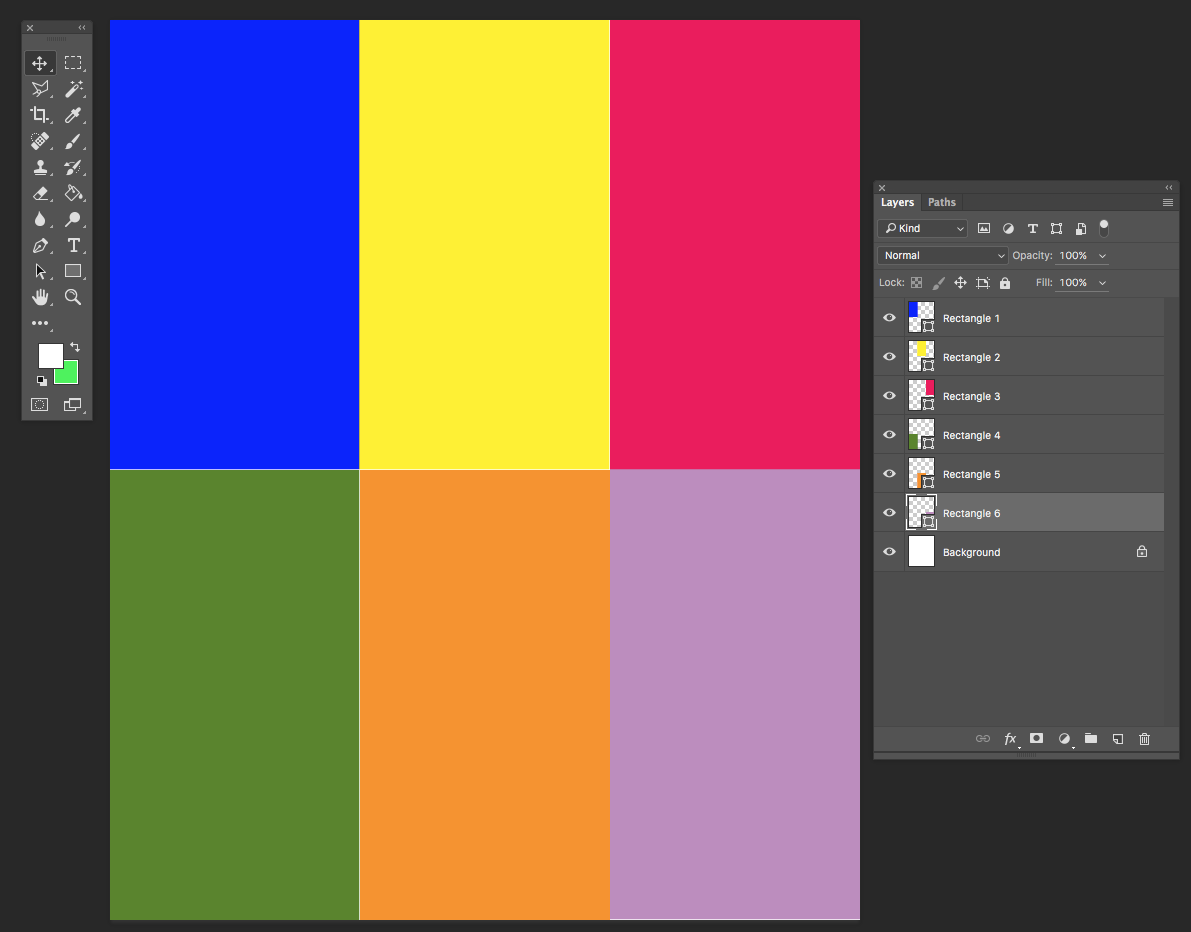
Next, I placed the shoes into the design, using File -> Place Embedded and chose the edited version with the transparent background. I resized each one as I brought it in so that each shoe would fit in a rectangle. I adjusted the height to make each one 4 inches tall and made sure to click the chain icon (to the left of the yellow circle) to make sure it was scaled proportionally and not “squished”. If you want to adjust them after you have placed them, be sure that you have the right layer selected. Each rectangle and each shoe will be on a different layer at this point.
Finally, to recolor the rectangles and match them to the colors in the shoes, I used the paint bucket/eyedropper tool in combination. The annoying part of this step will be keeping track of which layer you are on, so I recommend going to Layer -> Merge Visible and making your design all one layer for this step.
 I then switched to the Paintbucket Tool and hovered over a color in a shoe. When I hold down the option key with Paintbucket selected, my Paintbucket will transform to an eyedropper. I clicked with the eyedropper to choose a color from a shoe and then released the option key. Now the cursor switches back to paint bucket and I can click inside a rectangle to fill with that color. Continue to select (hold option – click) a color and paint (release option – click) until you have colors that you like.
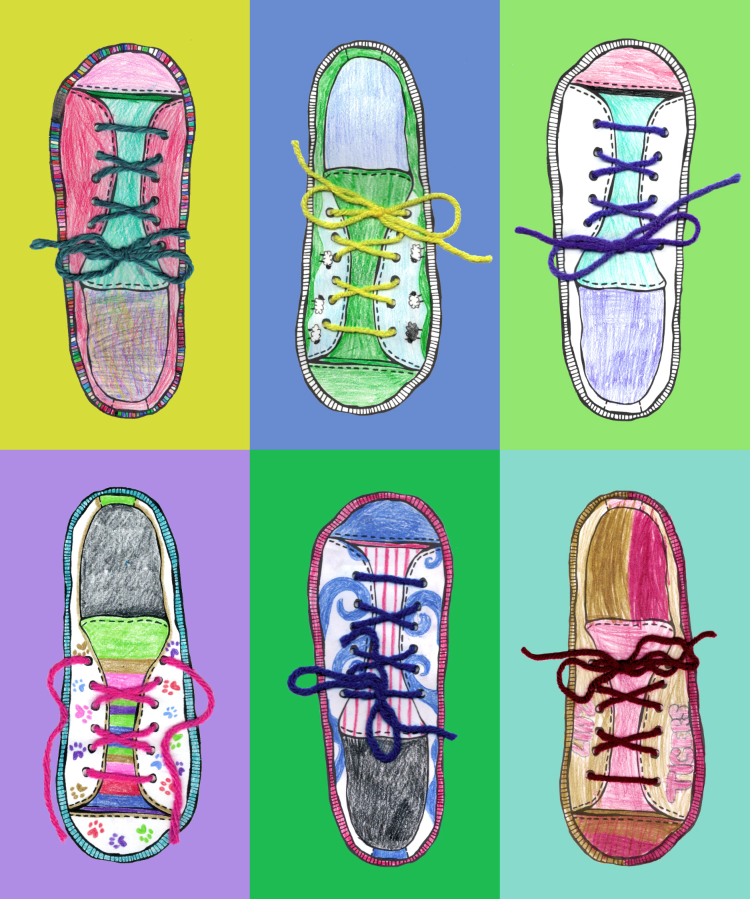
My finished repeat is below.
Now save this design as a .jpg and upload it to Spoonflower. I liked mine arranged as a half-drop repeat. You can get two bags out of one yard of fabric. I chose Basic Cotton Ultra for this project because I wanted the bags to be sturdy but not too bulky since they are designed to go inside another bag.
If you aren’t feeling like you want to design your own fabric or you don’t have kids around to do some coloring with you, I also curated a collection of great shoe fabrics by other Spoonflower designers. You can shop that Shoe collection here.
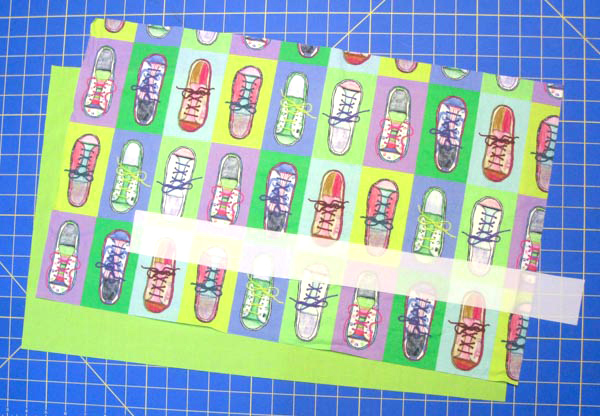 You need three rectangles to make each bag.
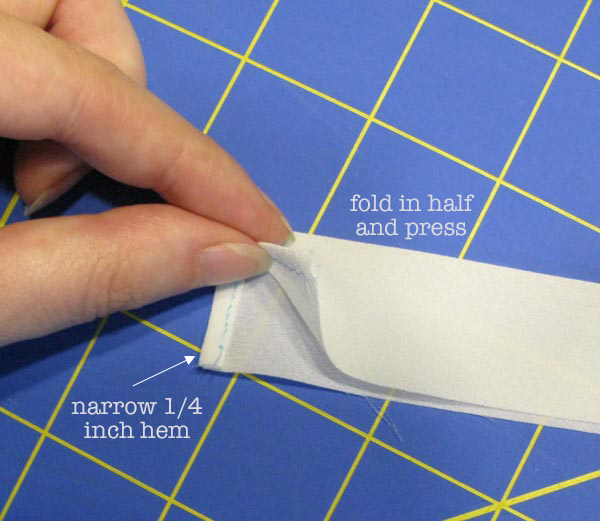 Start with the small rectangle of fabric for the drawstring casing. Make a narrow 1/4 hem at each short edge. Then fold the strip in half, matching the long edges and press.
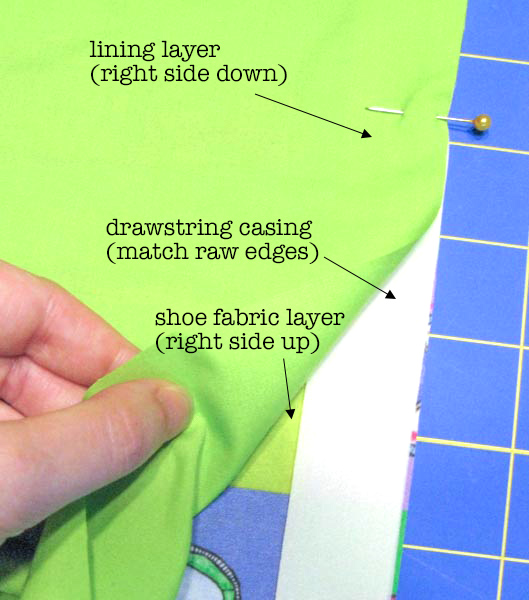 Lay the shoe fabric right side up on your table. Place the casing in the center of the long edge of the rectangle, matching the raw edges. Place the lining fabric right side down, matching the long edge. Pin through all the layers and then stitch the long edge using a 1/2 inch seam allowance.
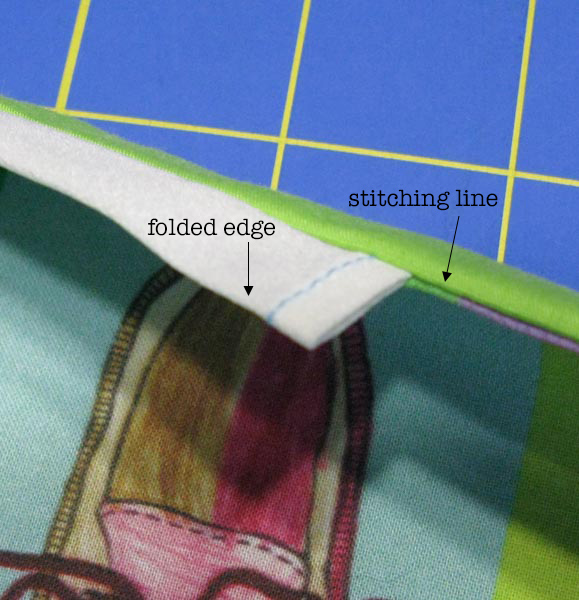
Turn the layers right side out and press so that the casing is free at the top and the shoe and lining fabrics are pressed down wrong sides together.
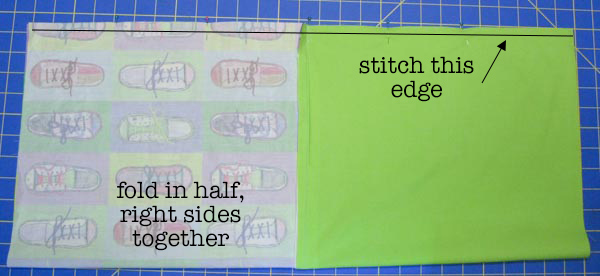
Unfold and open out your bag and refold it in half matching lining to lining and shoe fabric to shoe fabric. We are going to sew the outer and lining side seam all at once, making a tube. Match the long edges, pin and stitch with a 1/2 inch seam allowance. Press the seam open.
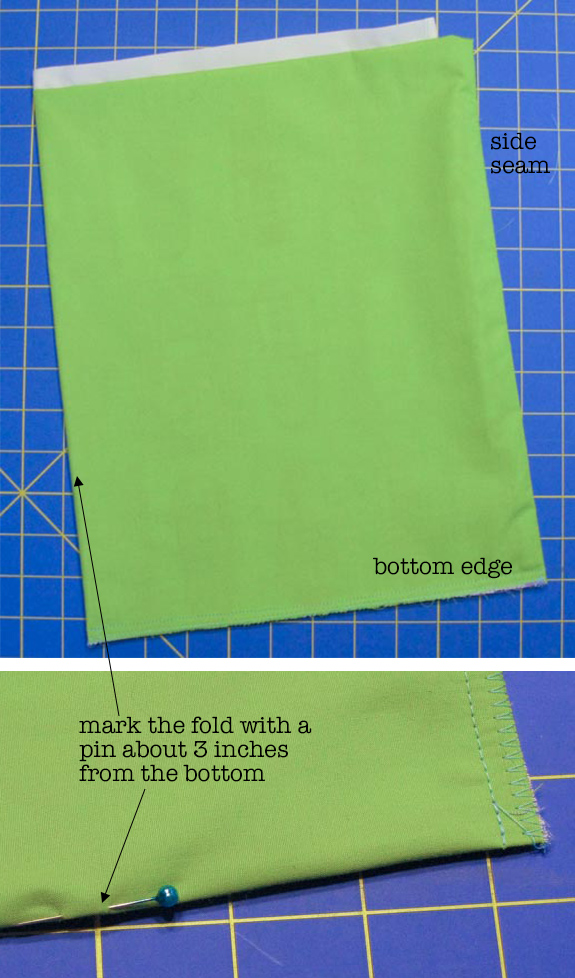
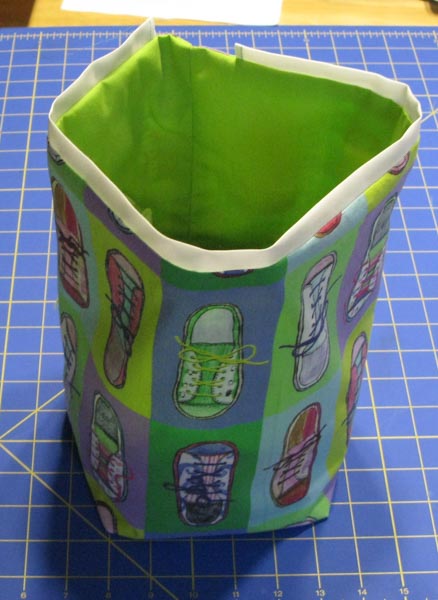
Turn the tube so that the casing is at the top, the shoe fabric is to the inside and lining is outside. It will be like a doubled over tube, open at the top and bottom.
We need to mark the side of the bag for the next step. Fold the tube in half along the stitching line at the side seam and lay it flat on a table. Then mark the opposite folded edge with a pin, about 3 inches from the bottom corner. You will use this pin to help make a corner gusset in the next step.
 Stitch the bottom edge of the bag through all the layers, using a 1/4 inch seam allowance. You can serge or zig zag over this raw edge to keep it from fraying.
Starting with the side with the stitched seam, open out the corner of the bag and match the side seam (black arrow) to the bottom seam (white arrow). Stack them one on top of the other and fold it flat, creating a point right at the corner. Pin it to keep the seams from shifting.
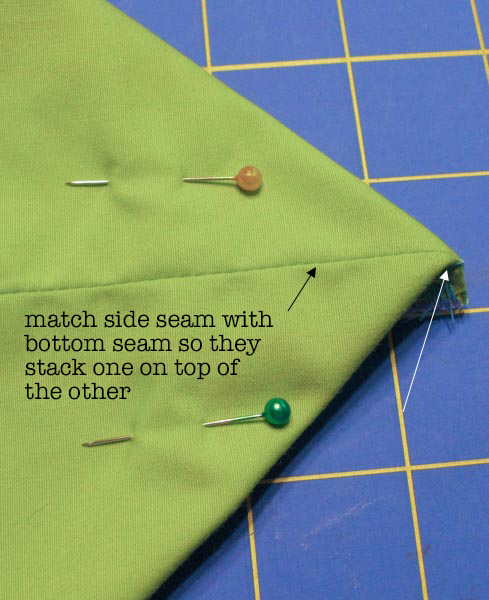
Measure 2.75 inches from the tip of the triangle and use a ruler to draw a light pencil line. Your line should be 5 inches from folded edge to folded edge. Stitch across the corner through all layers, following this line.
 Repeat for the other corner.
Since you don’t have a side seam on the opposite side, use the pin you placed to match the side to the bottom seam. Mark and stitch the same way. This will form square corners on the bottom of the bag. You can trim away the excess at the corners if you want to remove some bulk, but I like to just fold it towards the bottom and use is as an extra layer of reinforcement.
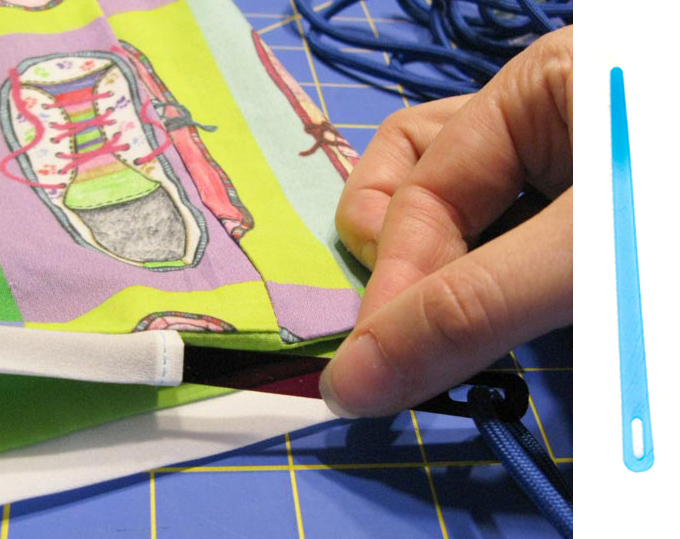
Turn the bag right side out. Cut a piece of paracord that is 36″ long. You can get one of my laser cut needles to thread the cord through the casing or use a large safety pin or elastic threader.
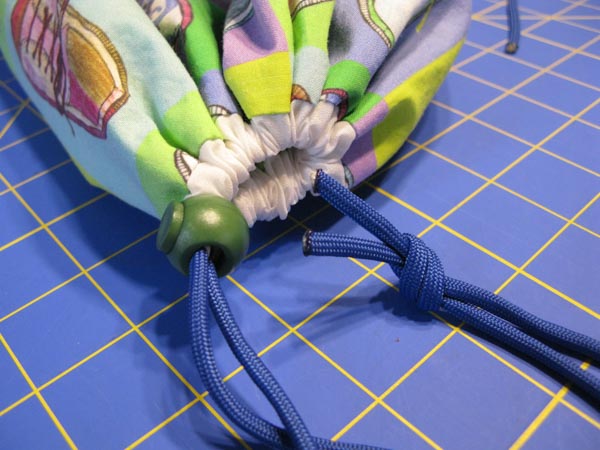
 Slide the cord lock over the ends of the cord and then tie the cord ends together in a knot. Melt the ends of the cord so it doesn’t fray. (Please be careful! It gets hot and you should work in a ventilated area.)
If you want to follow along with the other blog hop posts in this series: Wednesday, August 2 – Robin Szypulski | Kritter Stitches – Bookbag on SF blog • Amy Watkins | Cozy Reverie – First / Last day of school photo pennants • Kimberly Coffin | Sweet Red Poppy – 1st day of school outfit • Abby Glassenberg | While She Naps – Plushie key chain • Heidi Kenney | My Paper Crane – snack bags • Erin Williams | Printable Crush – book covers

 In June, I will be spending a week at Arrowmont School of Arts & Crafts in Gatlinburg TN. I haven’t ever been to Arrowmont, but I have heard all kinds of amazing things about the experience there, so I am excited to have been invited.
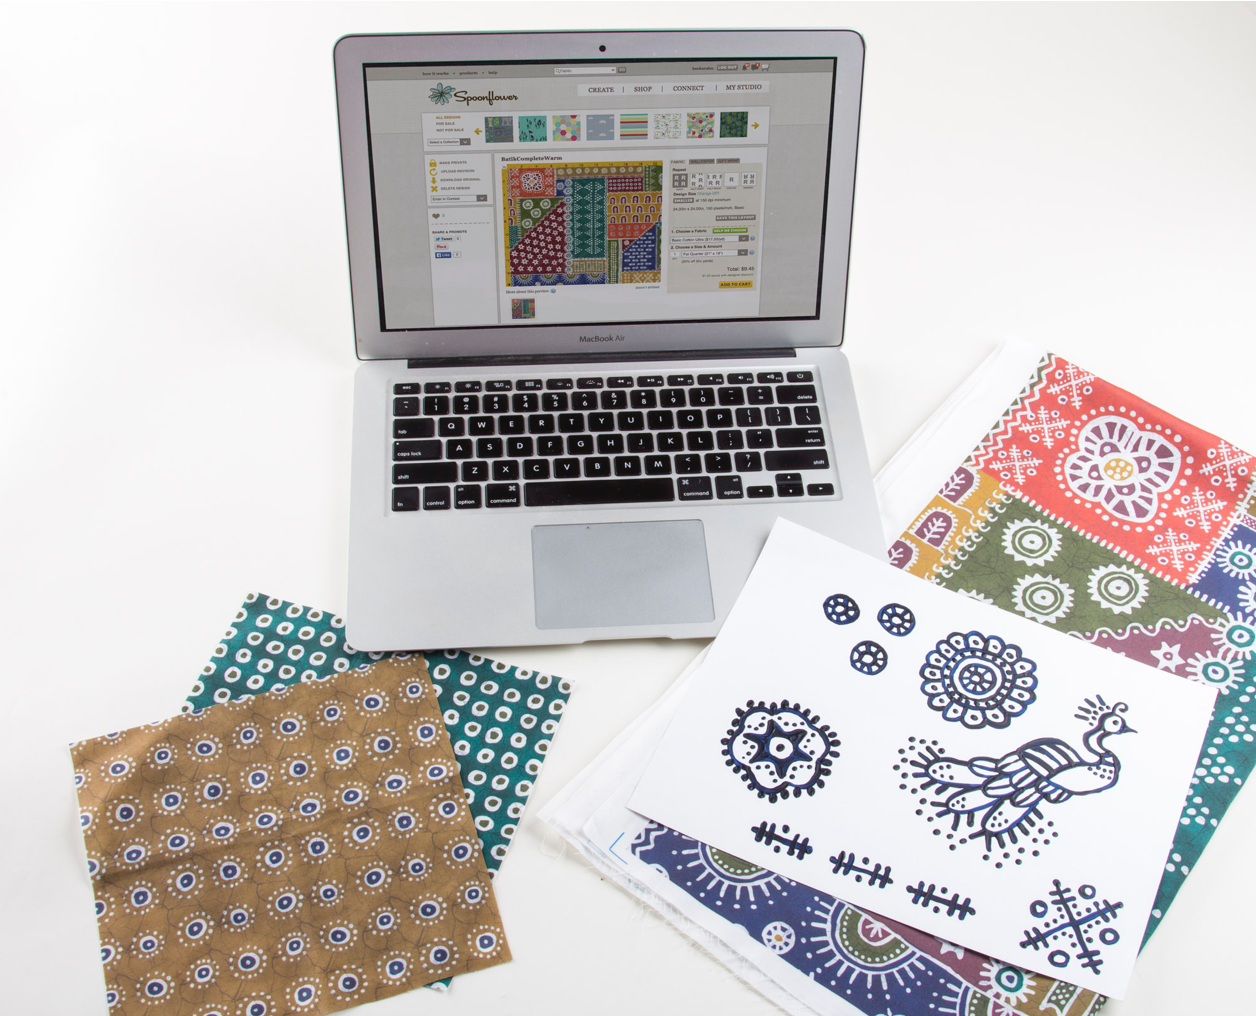
Our class at Arrowmont will be intense. We have 37 hours to explore all kinds of techniques for designing your own fabric. For the class in April at Spoonflower, we are going to focus on Adobe Illustrator, but for this one at Arrowmont, it is all about Photoshop and layers and texture. I have had several potential students email with questions about the class (which is awesome) and so I thought I should talk a little more about what we will be doing, since the description in the Arrowmont catalog is necessarily brief.
 My theme for this class will be exploring the different paths you can take to design fabric. Everyone knows the feeling of staring at a blank page with an equally blank mind. Where do you start?
We are going to start this class by building a common vocabulary. We will talk about pixels and resolution and color. We will learn about different design tools that are common to Photoshop and other graphics programs (select, layer, opacity, offsets). Then we will start building a toolbox of techniques. Each day in this class we will take a different path to start a fabric design. One day we will work with scanned found objects; one day we will start with photos; one day we will doodle with paint. We will learn ways to layer and manipulate textures borrowed from other objects.
Are you ready for this class? You don’t need to know anything about Photoshop or designing fabric. It is helpful if you are comfortable working with computers and you have maybe explored Photoshop (or other graphics programs) a little on your own. You should be able to pull a photo off of your camera, save it and find it again. You should be able to connect to wifi and navigate webpages. You should be brave enough to try things and not worry that you are going to “break something”.
We will be creating a faux batik, similar to this tutorial I put together. Why faux batik? Because it is a fantastic way of practicing a set of design techniques you can use for many other things: scanning your original artwork and manipulating the colors, digitally coloring a design, layering with a photographic textures. It’s a great model that will teach you many skills that you will be able to use for future designs.
We will all go crosseyed if we have to spend 7 hours a day looking at computer screens, so I have a lot of design ideas and exercises that we will do offline as well to help break things up. These will be things like learning how to make seamlessly repeating designs or creating balance in a repeating pattern. We will take a photo walk looking for textures.
You will also have time in class to explore something independently. I want you to be able to work on your own, but with the ability to ask questions and screw things up with help right there. So we will set aside time for me to work with each student one-on-one to explore your own design goal.
These are some of my goals for class. I hope that by the end of class, students will have learned:
You can see all of the details at Arrowmont’s website. If you want to know more about any part of class, feel free to email me!
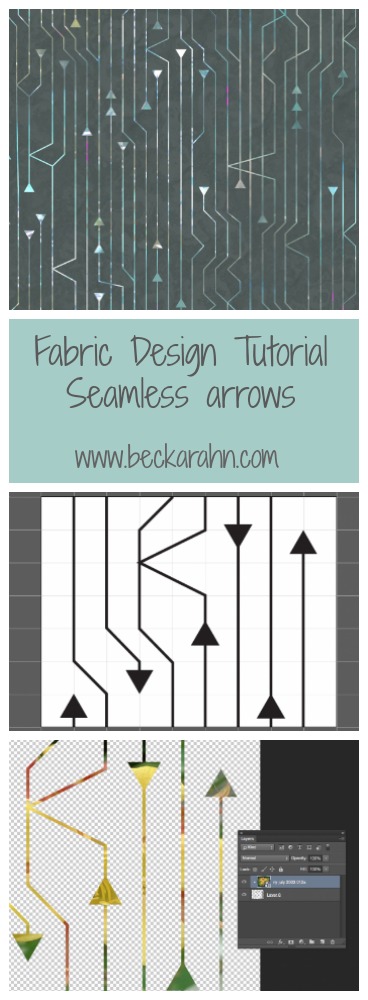
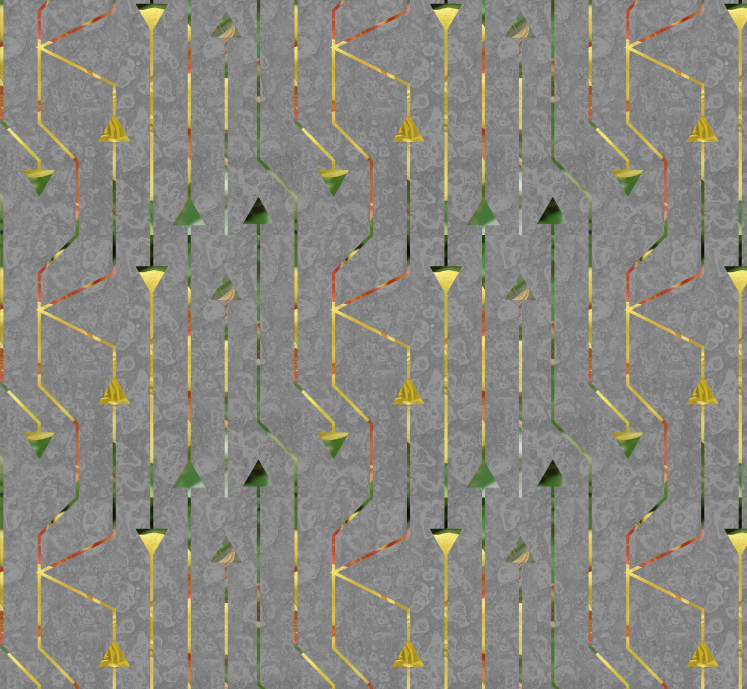
(This is part four of a tutorial for making a seamless arrow pattern. Find Part One and Part Two and Part Three here.)
Proofing and touching up the pattern is the finishing step to create the seamless arrow design and I am going to do that with the Photoshop pattern tool. The first thing I do is select the whole design (Edit -> Select All) and create a pattern tile by choosing Edit -> Define Pattern and click OK.
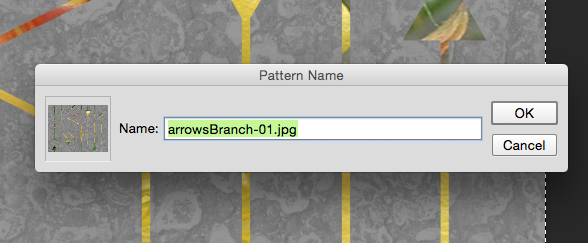 It will look like nothing has happened. That’s ok! The tile that you selected has been saved in the patterns palette, which is kind of hidden.
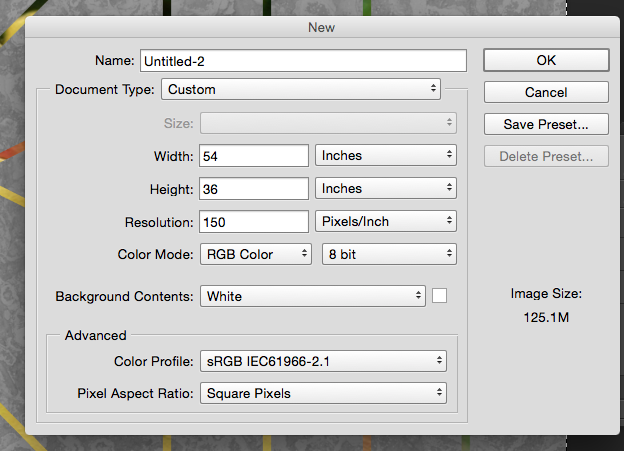
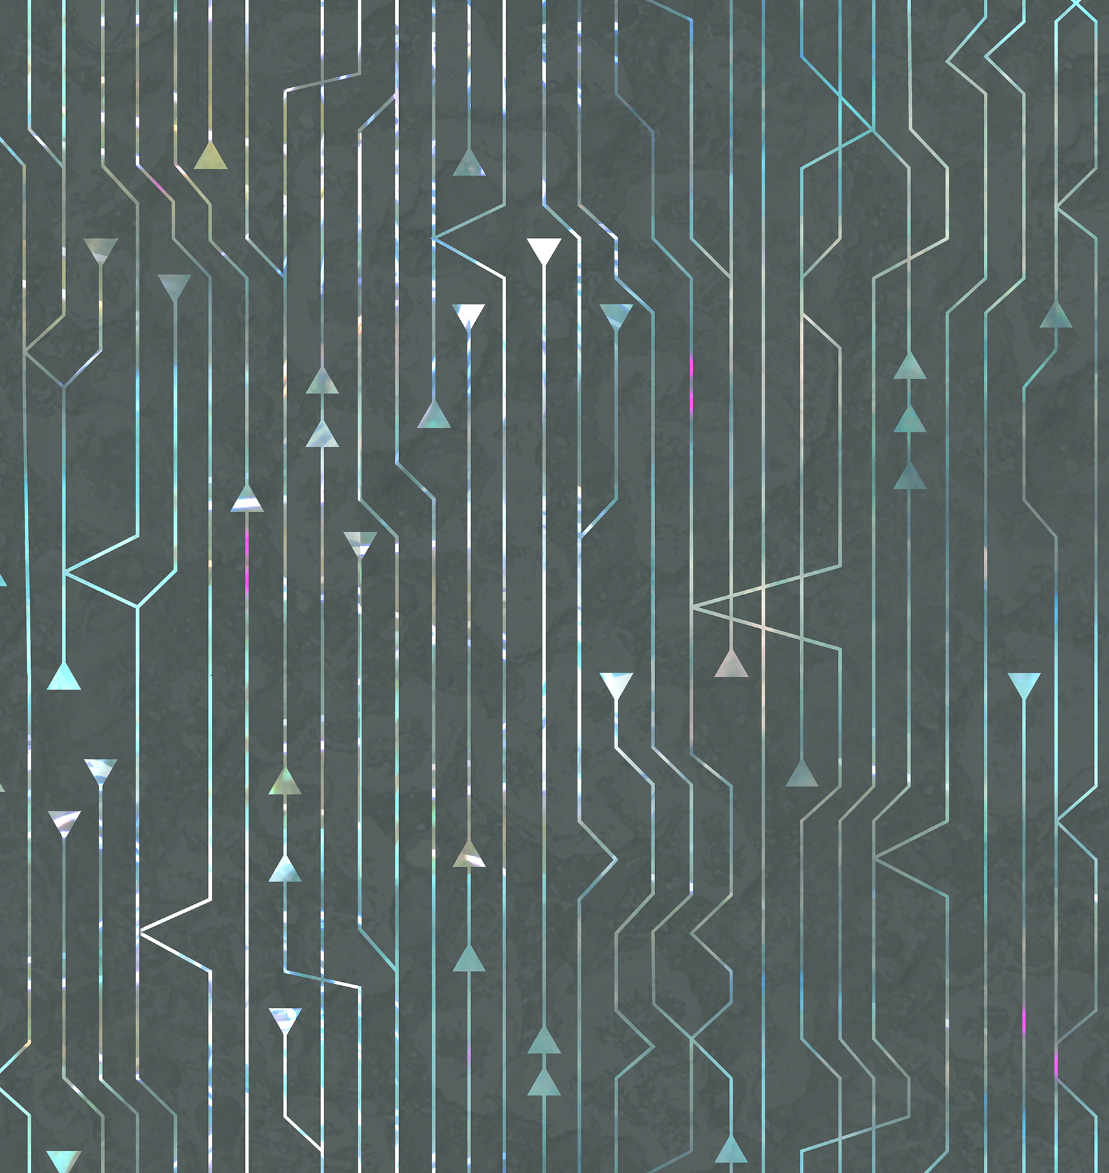
To proof the design, I create a new blank file that is the size of a yard of fabric. That’s an arbitrary size – I just think it’s nice to look at a large number of repeats.
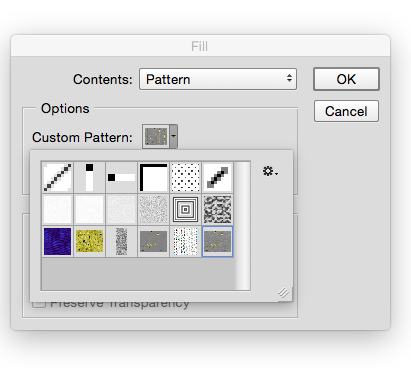
Then I choose Edit -> Fill from the menu. From the pop-up Fill menu, choose Pattern from the contents drop down menu. Just below that in Options there is another drop down and in it, you should find that pattern you just saved. (See what I mean about a little hidden.)
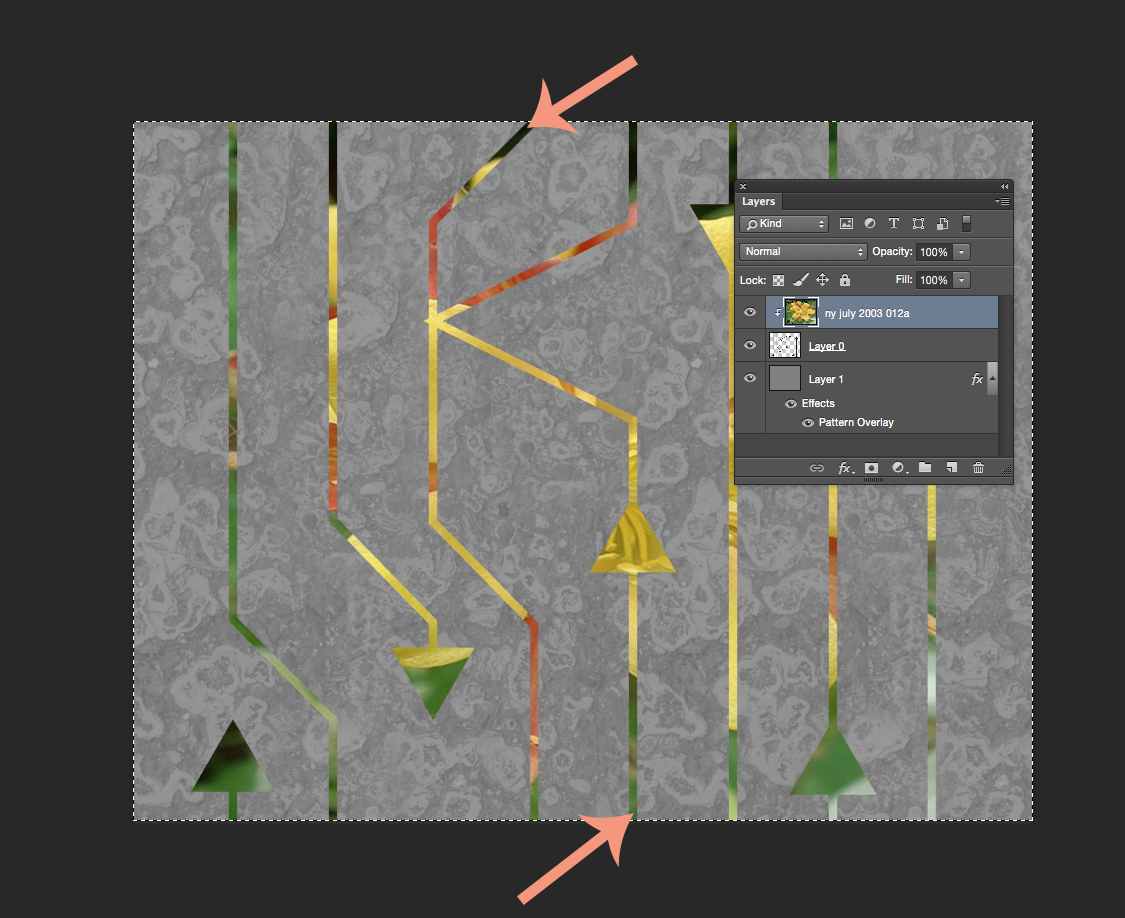
Now you can see what it looks like when the tile is repeating across a whole yard of fabric. And right away a couple of things jump out at me.
![]()
Oops. I didn’t think about the edges and I have a blank space where there aren’t any arrows. I can fix that by cropping out some of the blank space. The other thing that jumps out is a seam where the color changes. The color change is kind of abrupt and it makes a dark line. I can fix that pretty easily by going back a step to my original file. I select the photo layer of that flower because that is where the color is coming from. The easiest way for me to make that contrasting line to go away is to just use a paintbrush to just touch it up. I choose a green color from the bottom of the image and paint some at the top where that really deep green was, hiding that seam line and blending the two together.
After I do those two little edits…
I have a pretty good finished design. I save that tile and that is the repeat that I can upload to Spoonflower and print my fabric. This is the version that I used for my grant project exhibition, which I will post photos of very soon.
More in this series: Part One • Part Two • Part Three • Part Four
Just a quick note about a class coming up on Monday August 17 (that’s just 1 week!). I have had a lot of requests for exactly this topic, so this class is really designed by you: creating seamless repeats from your artwork. The idea is that we will take your art, whether it is a texture or a drawing or a painting and we will learn 4 or 5 different techniques for making it be able to tile seamlessly. What does that mean?
Here is a pattern that is not seamless. You can easily see the edges of each repeat tile. It looks like a set of playing cards set side by side.
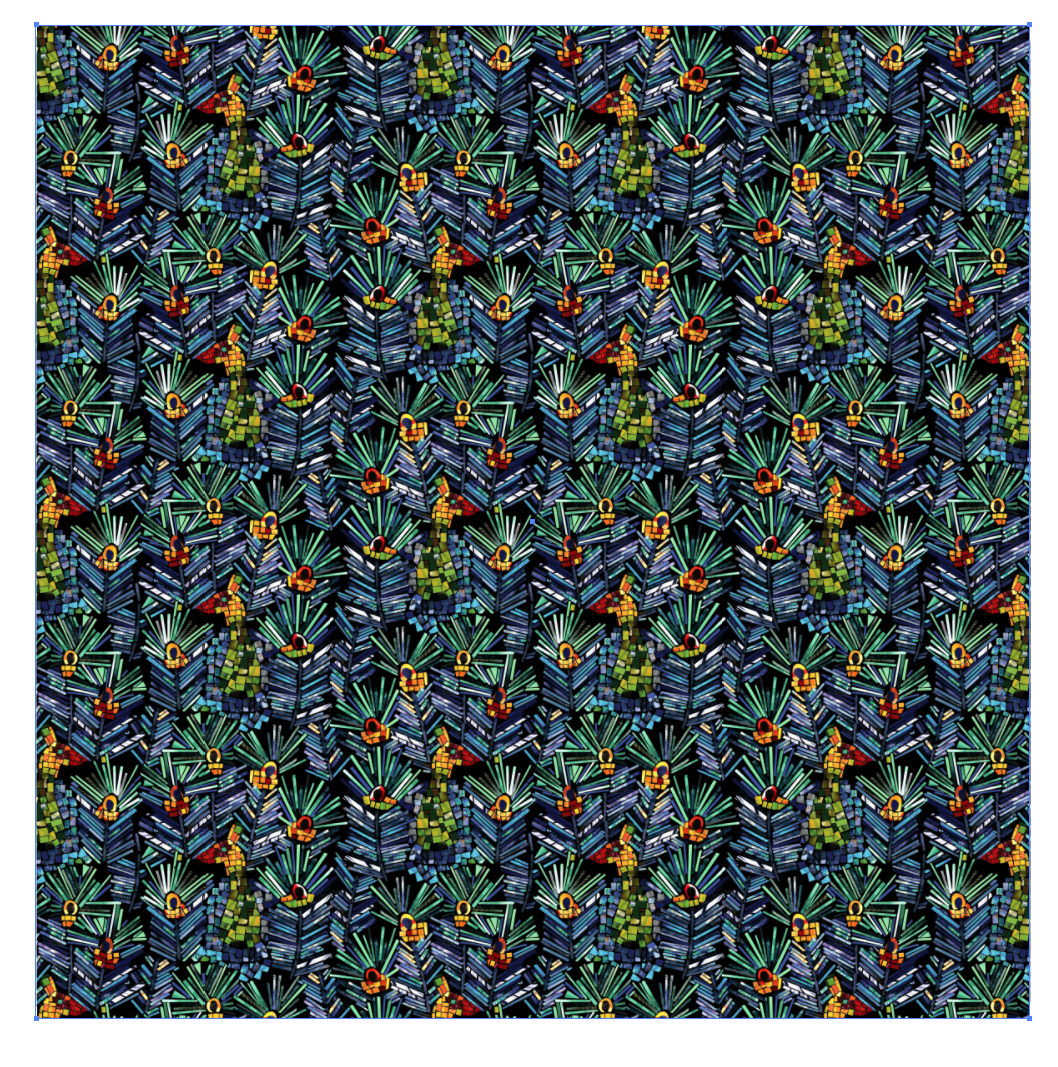
 This is the seamless version of that tile. I copied and flipped the peacock and added in extra feathers so it disguises the edges of the tile. You can’t see the edges of the rectangle, but it is still just one rectangle repeating over and over.
This is a complex version. We will try different techniques in class from really simple (mirrored repeats) to learning a tiny bit about the healing brush and clone in Photoshop. You can register for class at Textile Center’s website. Hope to see you there.