About beckarahn

This author has not yet filled in any details.
So far beckarahn has created 861 blog entries.
2 January, 2023

Construction Week 10: Drywall

2023-01-02T18:08:47-06:00Construction, Everything Else|Comments Off on Construction Week 10: Drywall

Week 10 means we have walls! This couple of weeks has been the messiest so far. It is amazing how much dust drywall generates! The space looks so so different at this point. Since I last posted, they finished all of the rough in for the plumbing and electrical. The roofers were finally able to get here and put a permanent roof on the dormer and do all of that roof finishing. The weather had been holding us up a little bit. We had a temporary roof of plywood with a giant tarp on top of it. We had a big snowstorm come through with crazy winds and the tarp blowing sounded just like thunder for 2 days. So I am really glad that’s finished. We also have insulation. Which is incredibly important in winter in Minnesota. The whole house feels a lot warmer. There’s still a draft because the windows are all covered in plywood, but it’s an improvement.

We had a tiny bit of drama with the drywall delivery. A huge crane truck pulled up in front of the house but the operator decided that our neighbor’s mulberry tree was in the way, so he told our contractor that he was just going to “trash it”. Our contractor looked at him like he was nuts and explained that trashing the neighbor’s property just really wasn’t an option. So they drove off in a huff with all of our drywall still on the truck. They simmered down a little while later, figured out a different option and our crew carried all of those drywall sheets up the outside stairs. I am again glad that was not my job.

My favorite part of this few weeks was getting to see the real shape of the space. I told my dad (who was our architect) that I think it almost looks faceted. Because it’s an attic, there are angles everywhere. There are really only a couple of walls that go floor to ceiling uninterrupted. Most of the others are divided up by a sloped ceiling or an angle. I was considering painting some bold colors upstairs but I am now thinking that with all of those angles it might just need to be one color. I can’t wait to see how the light plays across everything once the windows are in. We finally have some of our windows about 8 months after we ordered them. Two more are still in limbo; we aren’t sure when they will be ready.

Today they’ve started to lay down the floor in the main room and the tile guy is here working on the bathroom floor to get it prepped for the tile. I’m excited to see how much lighter the space is with the maple colored floor and light creamy tile.

14 December, 2022

Construction Week 7 Tour

2022-12-24T12:04:03-06:00Construction|2 Comments

Here’s an update after 7 weeks of construction. When we last talked, the upstairs was still open to the outside. They’ve spent a couple of weeks making things more finished and closed in. The electrician has been here and replaced our electrical panel with a larger one to accommodate the new circuits upstairs. The plumber was here to connect everything up from the basement so we have water, vents, sewer and everything all connected up. The power and water were off again for a day so they could make all of those connections. On one memorable day, we had 5 different people simultaneously working in 4 levels of our house (that includes 2 guys up on the roof!)

They also did a lot of finishing to the new roof section and getting everything weather tight. We really enjoyed talking everything through with the electrician to help figure out where to place lights in the new spaces and how we are going to use the spaces. He is going to put some extra light in that end room because we mentioned that we like to play board games and he thought we’d like the extra light there. You can see some of the wire spaghetti down in the basement in the photo below.

Although we aren’t really doing any of the work, it is surprising how tiring it is just having all of that activity going on around us. There’s just a lot of coming and going. Mostly they’ve been able to use the outside staircase that they put up early in the project, so not everyone has been through the house. But the plumber and electrician both needed to work on every level to get everything all tied together. They like to start early in the day and I am not really a morning person.

We’ve been trying really hard to keep Stanley out of the way so he’s not getting in the way of people trying to work, eating chunks of plaster off of the floor, or barking at the new people. So we’ve started a ritual with him that after all of the workmen have gone home for the day we announce “You are free to move about the cabin” and then we open all of the doors and gates downstairs. He always grabs a toy and runs around wagging and gurgling at us. (We call his happy noise a gurgle; he sounds like a Wookie.)

27 November, 2022

This week they cut a hole in the roof.

2022-12-07T09:55:19-06:00Construction|1 Comment

What a couple of weeks it’s been! Once they got all of the asbestos, old insulation, walls and all of the rest out of the way, it was time to start creating the new space. This wasn’t without a few hiccups. First they needed to cut open the floor to install some new joists in the floor to hold up the new dormer. Our house was built in 1927 so nothing was what you would do if you were constructing it new today. Things have different sizes and spacing. And for some of the spaces, we weren’t sure where the supporting or load bearing walls were exactly or how they were constructed because all of that is hidden. So there was at least a day of investigating and measuring.

Once they had done some preliminary work to make sure the roof and walls could support it, it was time to cut open the roof. And then it snowed. Sigh. We knew that the snow was going to be a problem at some point during this project. So they delayed a day, but meanwhile the crane showed up to deliver two steel beams that are now helping to hold up the new roof.

They lifted the beams with a crane up and through the window in the front of the upstairs to get them up into the space. Steel is very heavy so it wasn’t practical to try and carry it up a flight of stairs. We didn’t know it at the time, but when they delivered the steel, they basically dumped the beams off a flatbed truck into our front yard and the brackets to secure them got bent. We’ll discover that a few days later.

Once the steel was in place, it was time to cut open the roof for the new dormer. Yikes! In order to have enough room to put a bathroom, we needed to take the sloped part of the roof and make it taller, so they cut out a huge piece of the roof and built a new section and new outside walls. Here’s me standing in the opening. If I took a big step forward, I would be just about in the doorway to the new bathroom. Up over my right shoulder you can see a reddish beam in the rafters on the other side; that’s one piece of the steel. If it looks like it’s a little wonky that’s because it is. And yes we are looking at the outdoors. You can see the roof of my garage and the big tree in the backyard.

Next they started putting in the new roof and walls. You can see the beginning of that here. Unfortunately things went a little sideways here. Our contractor, who is completely awesome, had to be out of town for a couple of days and the crew that was working on this part of the project were a little underqualified for the job. Things progressed really slowly for a couple of days and things like the bent brackets on the steel and some other major details got missed. I won’t go in to the details of that, but let’s just say that it was all completely fixable and because our contractor is awesome, it’s fixed now.

Meanwhile, the plumber was also here getting the plumbing set up to add that bathroom upstairs. He had to join in to the plumbing stack in the basement and snake it all the way up through the first floor to get it up here. They had to move some wiring so our first floor bathroom lightswitch is in the hallway for the next little while. Here’s a photo of the wall they cut open, but before they got the new plumbing in place. The new electrical will run through this same space. This was one of the major unknowns: figuring out if there was enough space to get everything up through this wall without having to tear out part of the downstairs bathroom too. So far so good! He’s got everything now connected from the basement all the way to the upstairs floor and you can see where the shower and toilet will be.

Next comes Thanksgiving, so we get a couple of days off from construction chaos. Hah! We had Thanksgiving brunch because my husband had to work in the afternoon and there’s a giant hole in our house so we weren’t going to go anywhere. For those of you that don’t know, Mr. Becka has a little side job working as a replay tech for the NFL for Vikings home games. So there was a Thanksgiving day game and he was off on the football field for most of the day. I was just settling in to watch a movie and work on some holiday gifts when the dishwasher started making an unhealthy sounding racket. Stanley was barking at the noise and suddenly there was water pouring out the front of it. I turned it off, I threw its circuit breaker. Still water flooding the kitchen floor and running through the floor into the basement. And not just into the basement but pouring down a pipe directly into the electrical breaker box. The shutoff valve for the water to the dishwasher was completely corroded and stuck. After a frantic couple of minutes, I managed to get the main water shut off and throw the main electrical breaker to the house. And then when the water was *still* pouring down the wall, realized it was siphoning the hot water out of the water heater. I called my dad to help me figure out where the shutoff valve was for that.

I was drenched. Every towel in the house was wet. And I spend the rest of Thanksgiving day in the house with no power, no water and no heat (since the power was off, the furnace couldn’t run.) I called 2 emergency plumbers and 8 electricians trying to get help on whether it was ok to turn the power back on. No one could help me until the next day. So Stanley and I curled up on the couch with a book on my iPad and a down comforter. That whole saga had absolutely nothing to do with the construction at all. We figured out the next morning, when there was enough light to see, that the water pump for the dishwasher had broken. So we Black Friday shopped for a new dishwasher and we are hoping that the plumber (who will be back this week) can install it while he is here. Except for the dishwasher everything else was fine and we were able to get it dried out and turned back on. Please think us calm and unchaotic thoughts for next week! It’s supposed to snow on Tuesday again and we are scheduled to get the new roof done, so I am hoping the weather gods cooperate with us!

11 November, 2022

What it’s like to have asbestos abatement

2022-11-30T09:23:07-06:00Construction|1 Comment

I imagine that most of you have never had an asbestos abatement sign posted in your dining room. This was the first full week of the construction at my house. As I am typing this, one of our crew is upstairs with a shop-vac getting rid of the rest of the 80 year old insulation in the attic. I don’t think he was looking forward to today; it was messy.

We started the week with the asbestos crew setting up. It took an entire day for them to seal the upstairs with plastic and wide yellow tape on every surface. Then they had to construct a 3-part decontamination area at the bottom of the stairs. That’s what you can see in the photo up at the top of the post. They explained to me that they had to have three separate chambers, including a shower, right there in my dining room. On top of the middle section you can see a portable water heater and we turned on our outside faucet for them so they could run a garden hose in through the window. We had all of that set up over night, so we ate dinner at my desk. Stanley was very suspicious of this new construction in his space. We pulled out every rug in the house to put over the plastic on the floor because it was slippery and we didn’t want dog toe nails to compromise the area.

Once they got all the set up done, it really only took an hour to take out the asbestos, which was all in the floor tile. I understand that the tiles get double wrapped in plastic and then they can be disposed of. So we are no longer the proud owners of any asbestos. Yay!

The way our house is arranged, there is just one door that connects the left and right side. Our offices are one on either side of that doorway, so Stanley and my husband were kind of trapped on one side and I was stuck on the other. We made jokes about having to boost the 90lb labrador out the guestroom window to go potty, but happily we didn’t have to resort to that.

While all of that was going on inside, there was also a big project outside. Since the staircase to upstairs is narrow with a sharp corner at the top, and they need to haul huge sheets of plywood and 2x4s up there, they spent the day building an outside staircase to our second floor. So they will have an easier way to move all of the materials without everything needing to go through my living room. I’m really happy about that.

Once the asbestos was gone, demolition started! It looks so different already! We are keeping a little bit of that pine panelling in place around the stairs, but it was really too old and brittle to salvage most of it. Those yucky looking dirt piles are the disintegrated paper insulation. That’s what he has been working on most of the day today and I told him that I was really glad that was *his* job and not mine. There’s no insulation at all up there now and it’s COLD. Fortunately they will have that fixed in just a couple of weeks.

1 November, 2022

Three Camera Tries: The Making of Our Halloween Love Note

2022-11-20T21:52:43-06:00Everything Else|Comments Off on Three Camera Tries: The Making of Our Halloween Love Note

If it’s too much of a spoiler to know how our Halloween photo is made, I don’t want to ruin the magic for you. This is your warning to skip this post. But shooting our photo this year was an interesting creative challenge and I thought it would be fun to talk about how we made it work and what we learned about our cameras.

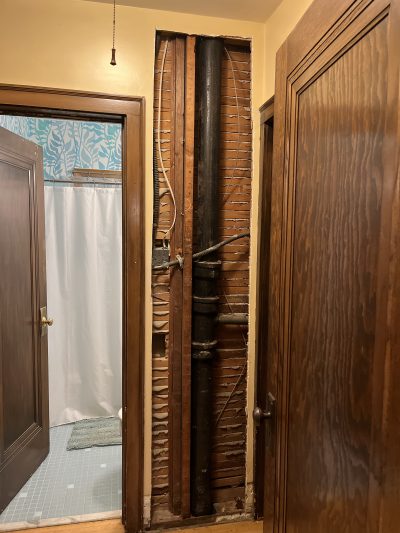
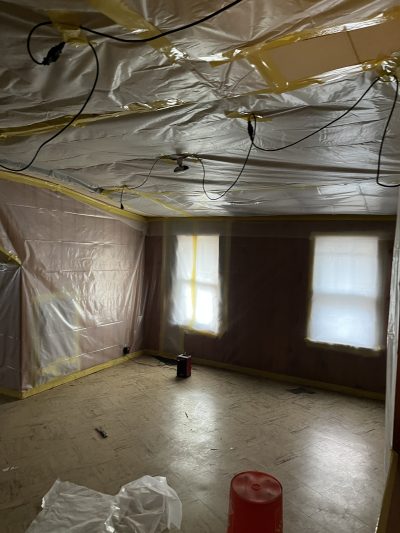
We have an unfinished basement (which is awesome) and as an artist I have to take a LOT of photos of my work. So we have a corner that is the dedicated photo studio. It has a large roll of white paper and big lights and a tripod set up most of the time. I’ve learned just what I need to do to get great photos in that space. It’s where we usually do our Halloween photos. The previous owners of our house had built a little workbench under the basement stairs full of drawers that we affectionately call our “Prop Shop” which is where we store all of the Halloween props and costume bits as well as all of the backdrops and props to photograph things for my Etsy shop and dress forms for photographing garments. It’s a great setup. In my last blog post I talked about how we are starting construction on a house project this week. That means that everything that used to be on the second floor of our house had to move elsewhere. The furniture, our bed, our collection of board games, the exercise bike, boxes and bins all are now living in what was my photo studio. There is no way to take a photo there.

So instead of building a set, we decided that the Halloween photo needed to be something that was just our faces because that was going to be easier to do in some other part of our house. We had a couple of ideas, but we knew that the light was going to be the most challenging so we decided to go with spooky skeletons and deliberately make the light cast dark shadows on our faces.

Our rule about Halloween photos is that it should be about 80% “real” and 20% Photoshop, where we use Photoshop to just put in those details that make it awesome. This photo is a great example of that.

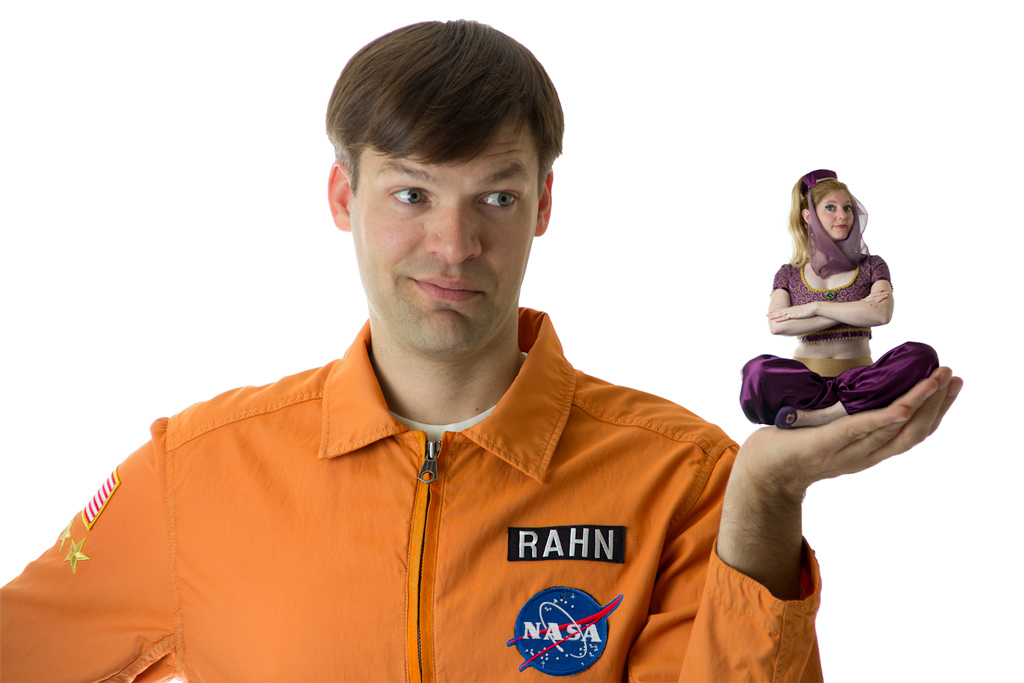
We took two photos. Photoshop helped make my hair blonde and change the tan windbreaker I found for Andy’s costume into flight suit orange. And we put the two photos together.

So we started this skeleton photo with two photos also. We wanted to use just our faces, so I bought a black spandex hood that we could put over our hair and we put on black shirts to make it easy to “erase” the rest of us from the photo.

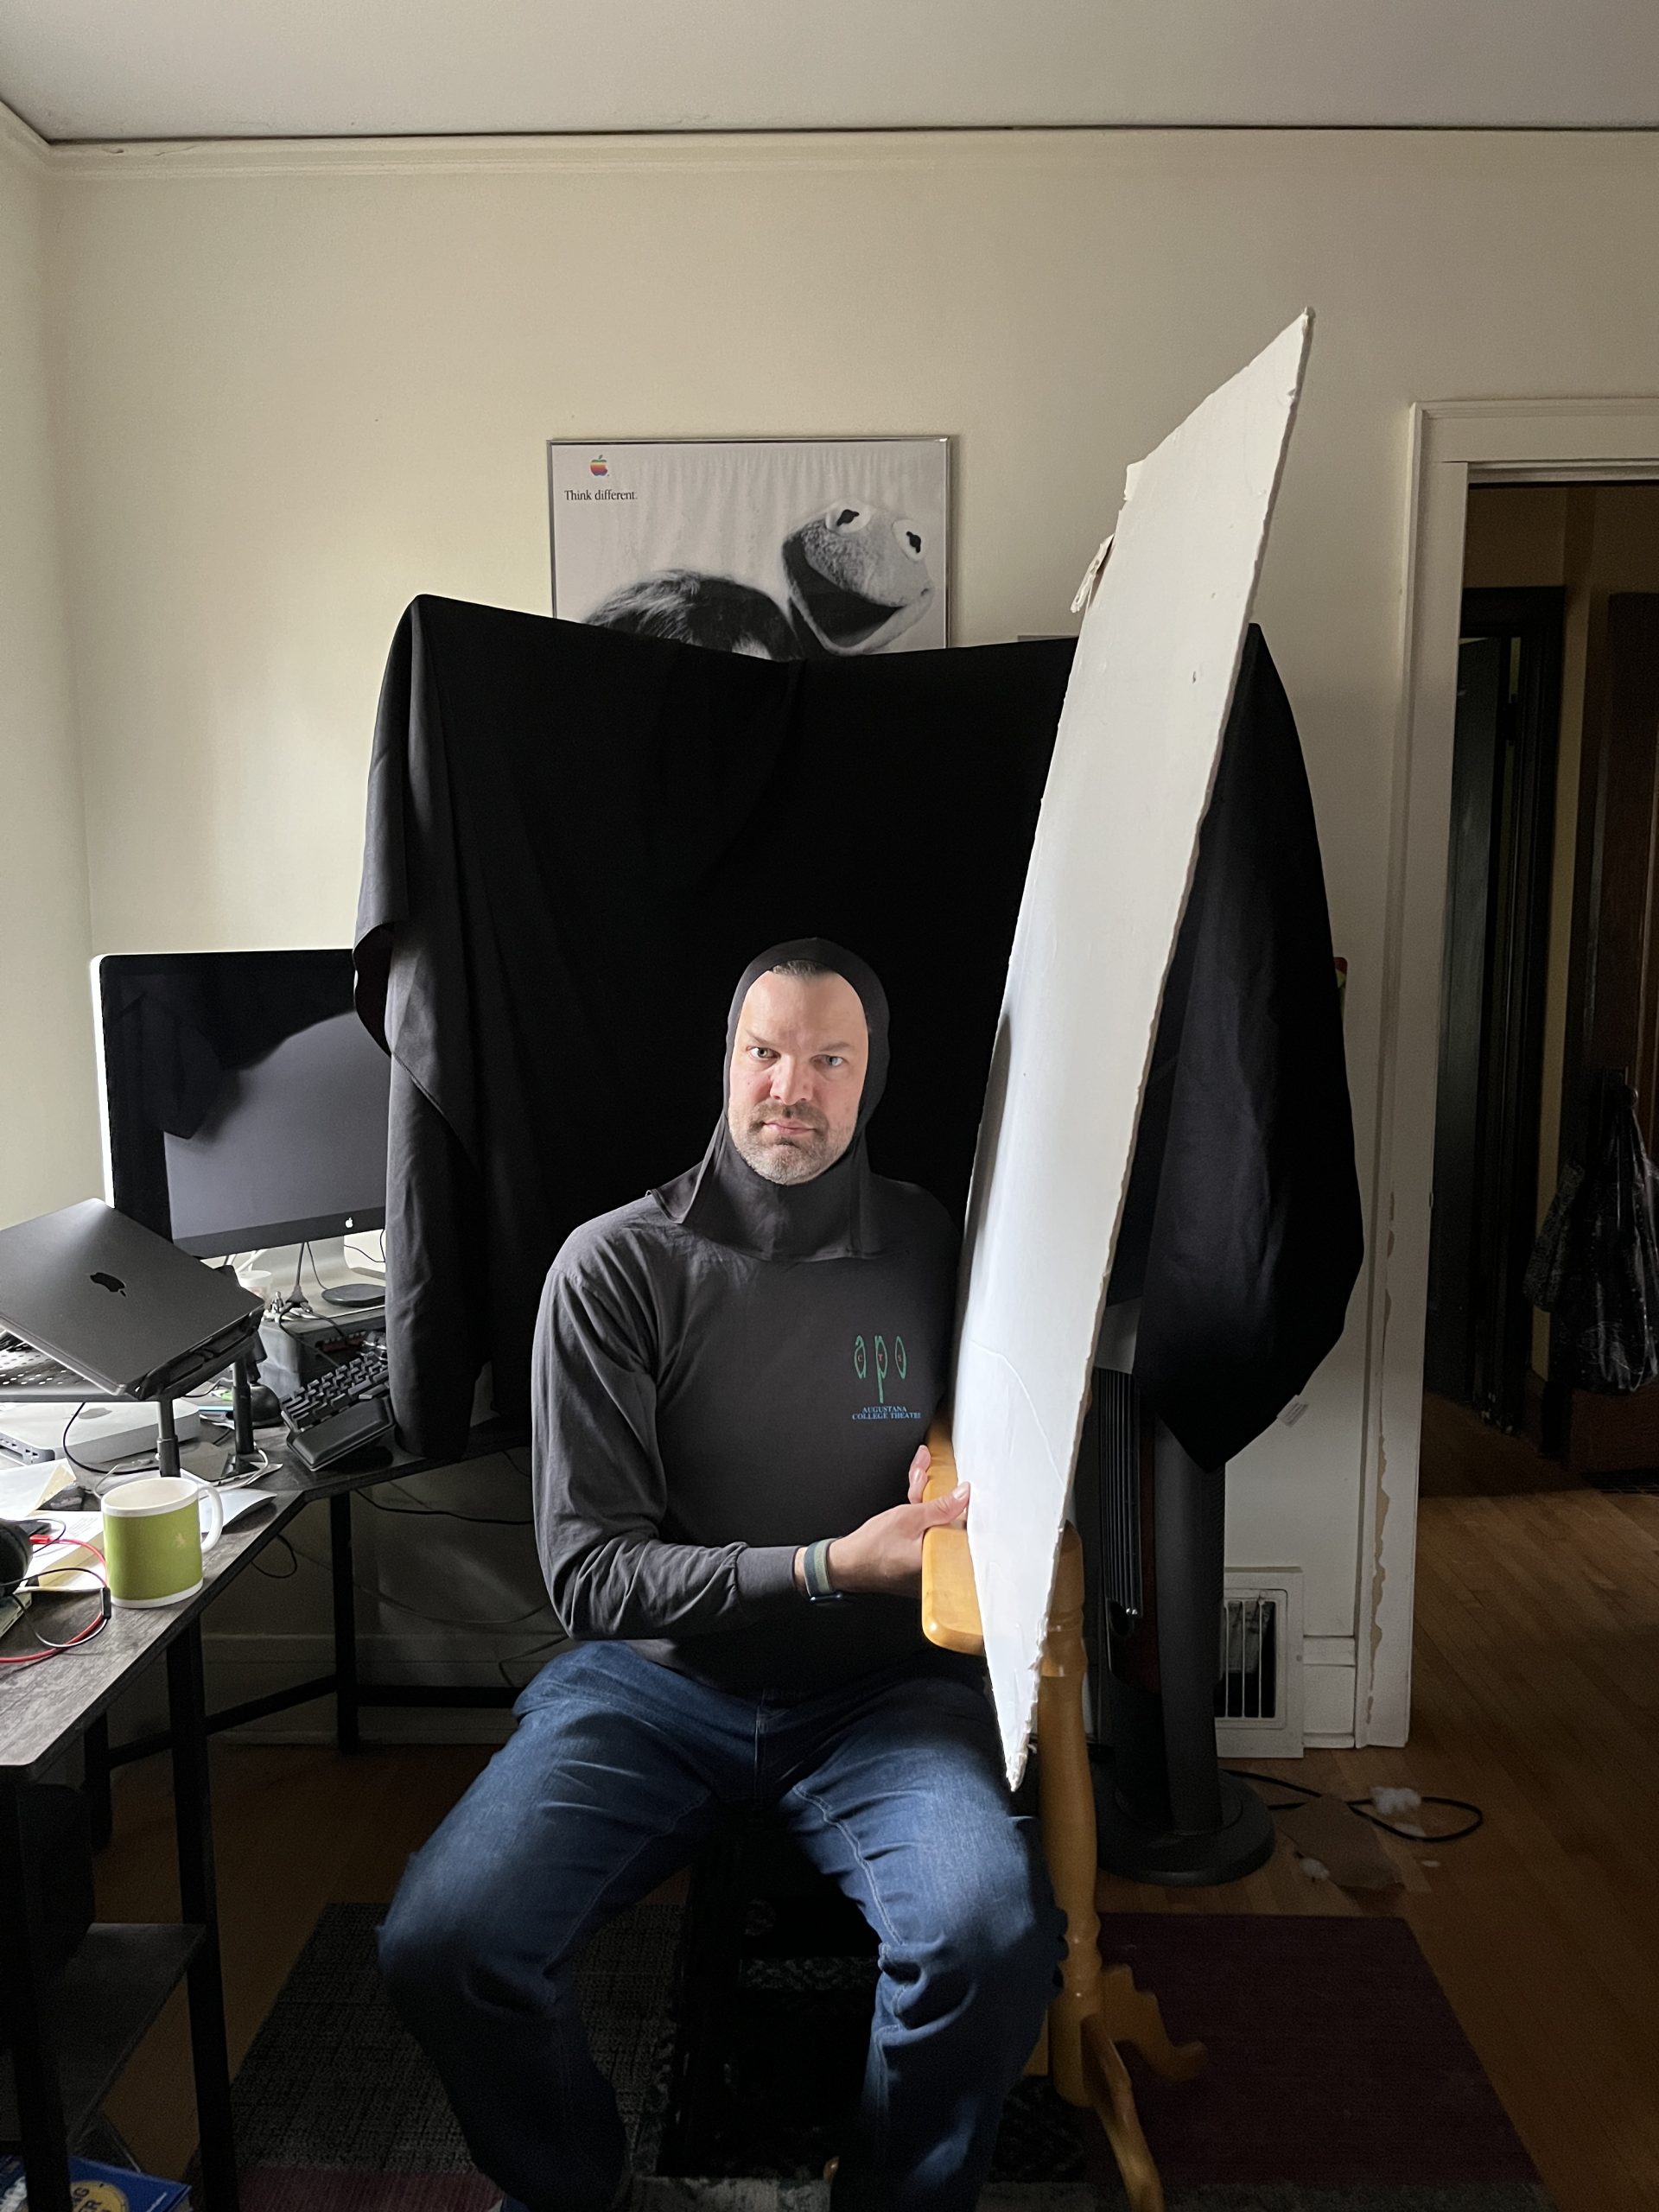
Then I built a “set” out of two pieces of foam core and a black tablecloth and put it on the desk. Andy’s office has a nice big north facing window and on the Saturday morning we took these photos it had great light reflected off the house next door. So that was our light source. We wanted the light to cast some kind of dark shadows but it was too dark, so we each held up a big piece of white foam core to reflect the light back on the other side of our faces. We each took the photo of the other and because the light was exactly the same, they look like we are sitting side by side. We agreed on “dead” expressions and big wide open eyes.

Here’s where it got interesting: it took three cameras to get the shot. We started with a little Canon point-and-shoot that we got just a few months back. It’s a pretty good camera although I am still learning its quirks and we thought it would be the easiest. But when we pulled the photos off the camera they were terrible. Blurry and grainy. (I realized this morning I can’t show you because we deleted them all.) That dark “moody” lighting we were trying to get was not something this camera knew how to do.

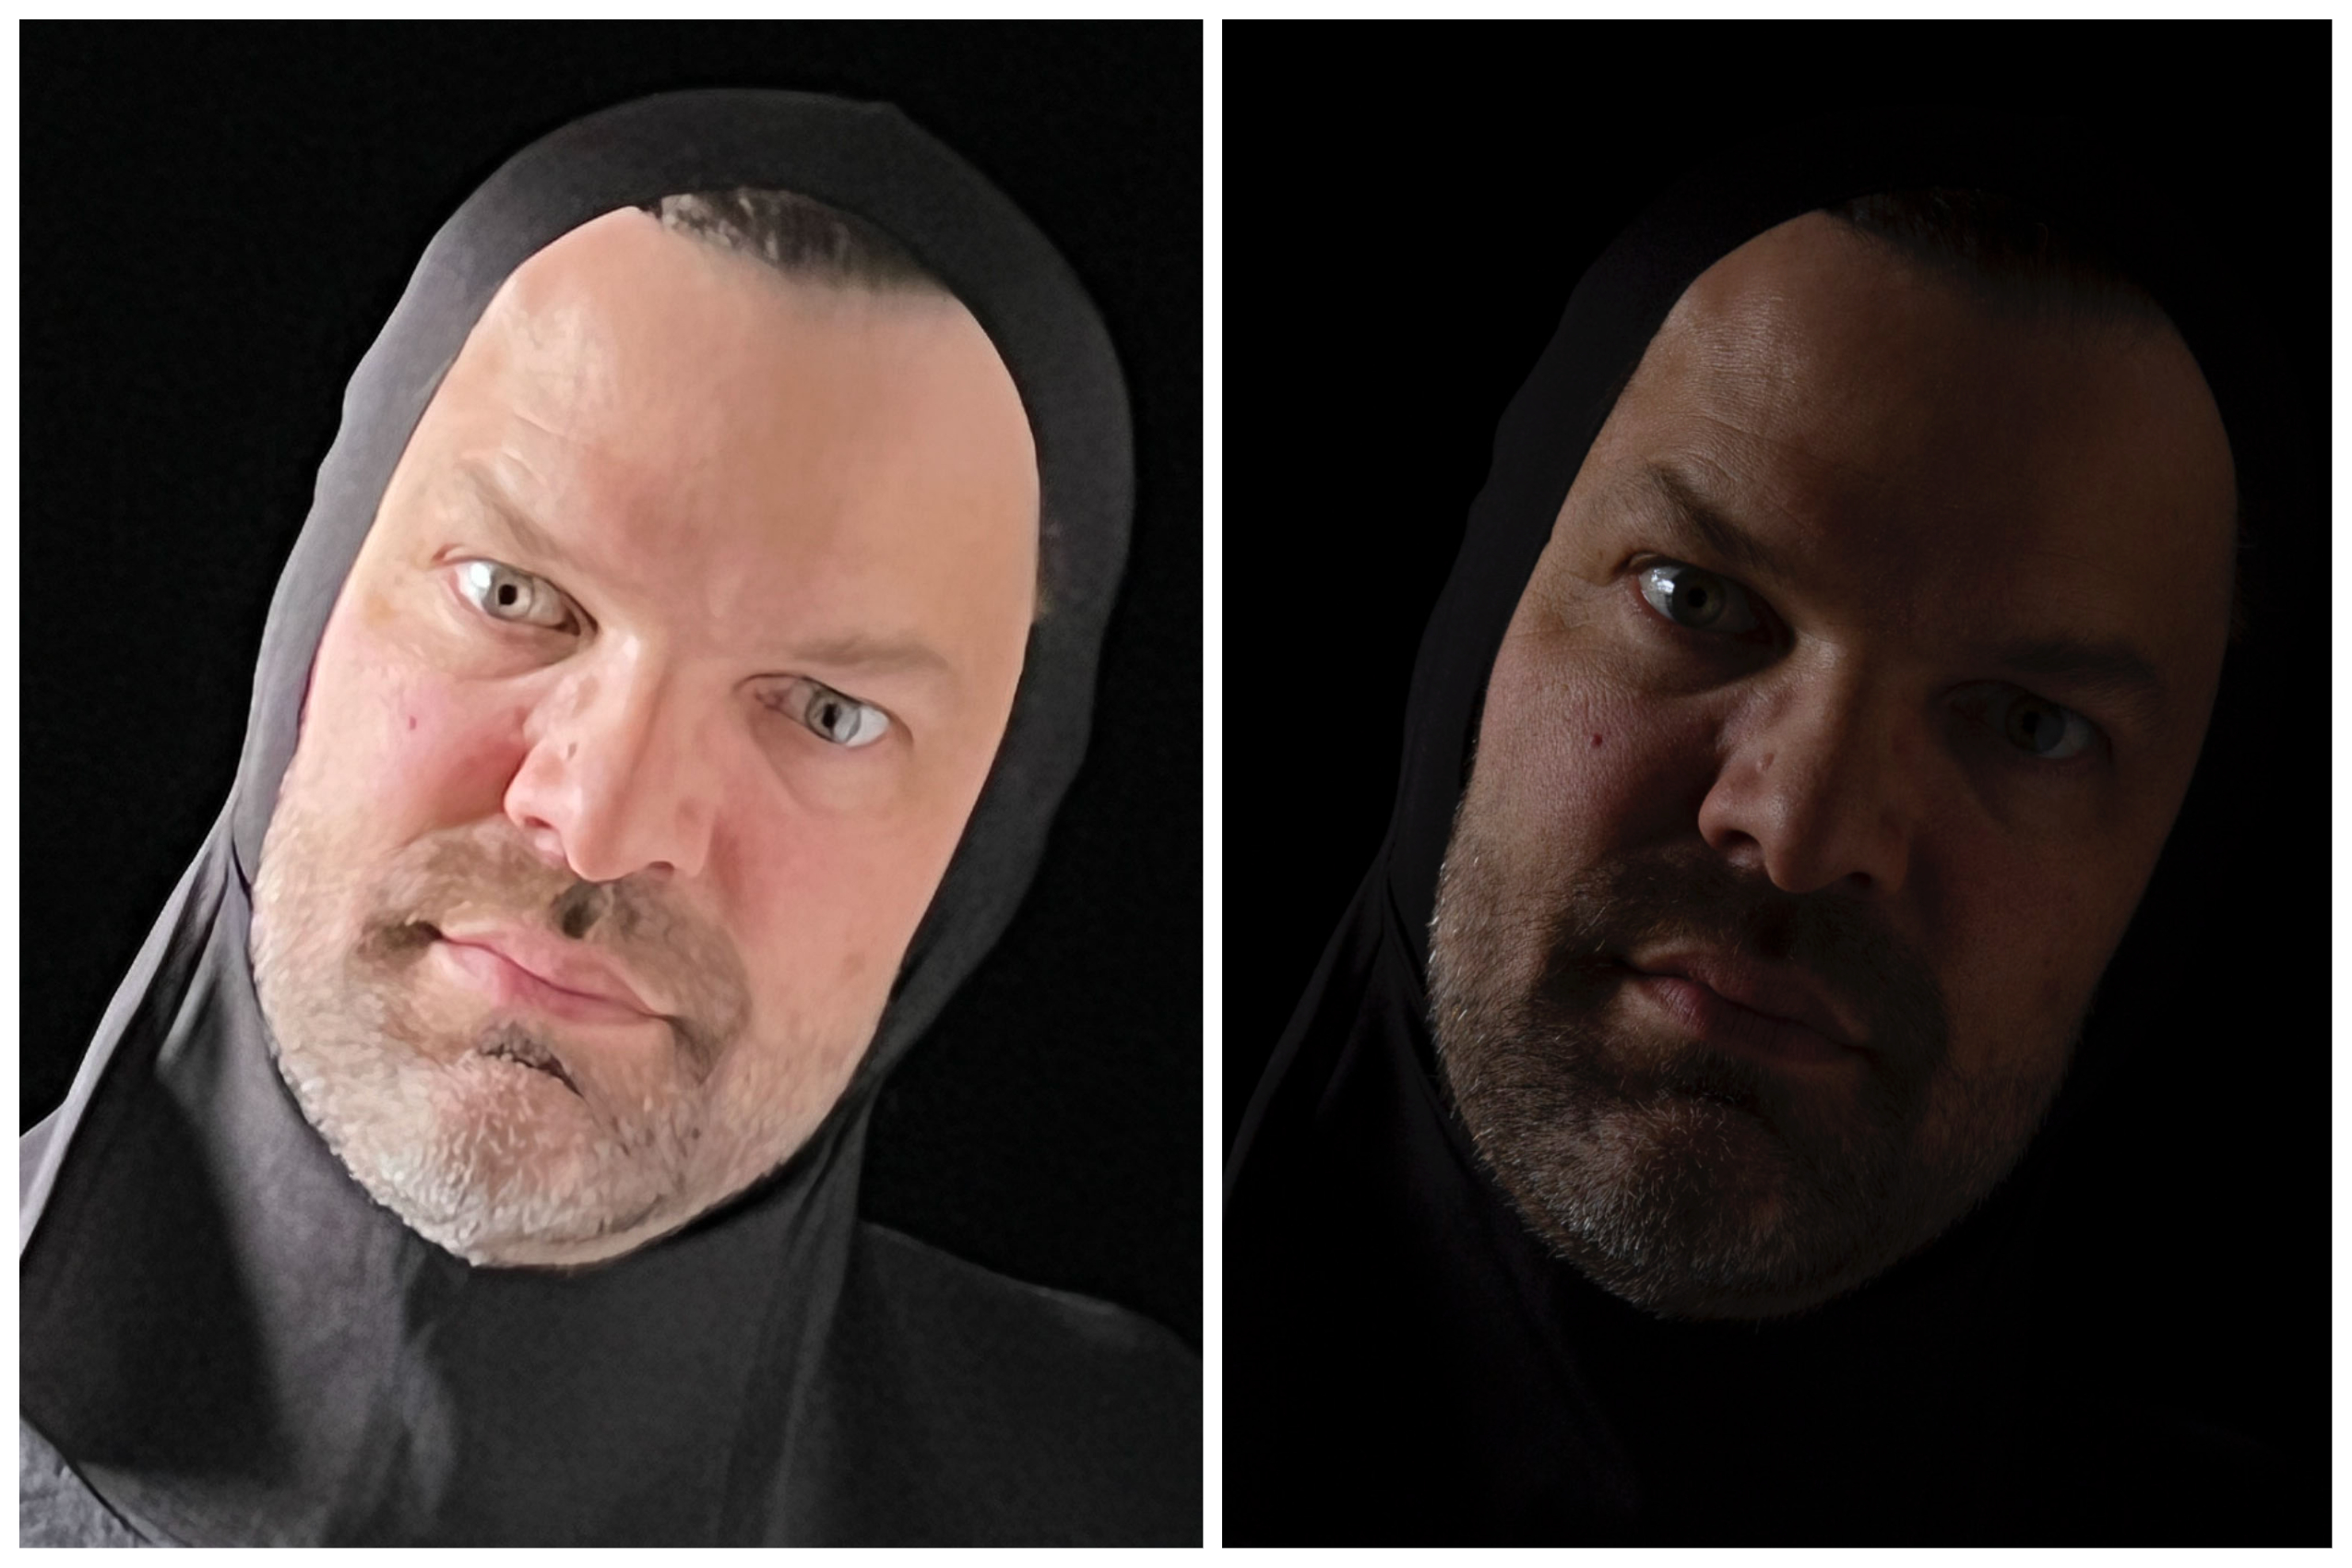
Next we thought we’d try my iPhone. It’s a pretty new phone with a great camera too and again, we were going for easy. The photo on the left is the one from my phone. It has so many “make your photos look amazing” algorithms built into it that it basically took exactly the opposite photo from what we were going for. It took out all of the shadows and made everything bright and “perfect”.

So finally we pulled out our big old Canon DSLR. It’s more than 15 years old, but it’s the camera we usually use for Halloween. That’s the photo on the right. Although it is overall pretty dark because we were working with very little light, just look at those beautiful shadows and the sparkle in his eye. That one was a keeper. Both of these photos are straight off the cameras without any tweaking. What a difference, huh?

Now you might be wondering, where are the skeletons? That was our cheat. Someone on Facebook asked me how much was masks and how much was makeup and the answer is none of it. I bought a skeleton vector graphic on Etsy and we Photoshopped it. We layered the graphic over our faces and carefully tweaked and warped it so it fit our faces exactly, matching noses and eye brows and chins. The layer is transparent and uses some color blending to make it look like it’s painted onto our faces. We erased our eyes from the graphic so you could see them just a tiny bit brighter. I drew the hands (referring to another graphic I found) and then layered a grungy paint texture over top of them to make them match the faces.

Although we had newer and “better” tools, it turns out that when we went back to the one we knew the best we took the photos we needed on the first try. It was very satisfying, after a frustrating hour of photos that were just plain wrong, to go down and dig out the other camera and say “there it is” when we got it right.

20 October, 2022

The Construction Project: Before we start

2023-09-13T20:22:57-05:00Construction, Everything Else|2 Comments

A year ago in September, I was teaching a Zoom class and my husband heard a “whump” from the other room. He thought the dog had gotten into something upstairs, but when he went to investigate he found that a large section of our ceiling had fallen down. Our house was built in 1927 and is a beautiful Craftsman style bungalow, but the upstairs hadn’t been updated at all. So that nearly 100 year old fiber ceiling tile just gave up.

The downstairs is beautiful with all of the original oak woodwork and maple floors. Ours is very similar to this one with a little larger footprint and only a “half” story on the top level so the ceiling is only full height in some parts. Our upstairs is one big open room and was our bedroom and my husband’s work-at-home office during the pandemic. When we bought the house 20+ years ago, the people we bought it from (Harold and Olive) were in their 90s and were only the second people to own the house. They had “finished” the upstairs into what we figure must have been a family room with knotty pine paneling covering every wall and tons of closets and storage nooks. It was functional but certainly not pretty. We lived with it because (as any of you know who have lived in an old house), there was always something else more in desperate need of being fixed.

At first we stared at the piles of disintegrating ceiling tiles and dusty paper insulation and laughed. Because what else can you do? And then we tried to figure out how to fix it. We knew we couldn’t really do it ourselves, even though we are pretty experienced fixer-uppers. It’s an entire floor of the house. That’s more than a weekend project.

So we talked to friends and found a fantastic contractor. It took months to work into his schedule and talk about what we wanted to do. Then he was put on medical leave. So we had to get another contractor (also awesome) and work into his schedule. We pulled in my dad, who to our great good fortune is a retired architect with a love of old houses and creative problem solving.

Our “fix the ceiling and the insulation” project turned into a “what would happen if we cut open the roof and added a new dormer so we could have a second bathroom?” project. We had every intention of fixing up this space when we moved in so we had some money saved up (thank goodness) so that let us dream a little bigger than just fix it and we get to make it a new cool space.

Things I learned so far which I didn’t know:

  • You have to have a certain ratio of square footage of space to windows to provide light and ventilation to meet building code. We had not even close to enough. Because it’s one big room it has to have a lot of windows. Windows take 8 months to get right now. We ordered our windows in May and we are keeping our fingers crossed we will have them by the time we need them.
  • In 1927, walls of houses were insulated with newspapers sewn into booklets. We spent a lot of time crawling into the knee walls and rafters getting measurements so we could draw up plans and we pulled out fragments of December 1927 newspapers written in Norwegian (?).

  • You don’t want to have to figure out where to store the contents of an entire floor of your house for a year and a half. I just have one word for you about the state of my basement: yikes. Our basement is unfinished, so usually I have a “wet” studio for painting and a photo studio set up down there and it’s our space for working on projects like fixing computers or unpacking craft shows so things don’t have to be all over the dining room table. Next week I am rearranging, organizing and taking as many things as I can to goodwill to try and clear some space for the electrician and plumber to work. I can’t even tell you how nice it’s going to be to have the basement and upstairs usable again.

Asbestos abatement for those lovely floor tiles starts next week. Wish us luck!

Go to Top