13 December, 2010

Giveaway Day!

2010-12-18T09:03:12-06:00Everything Else, Freebies & Patterns|96 Comments

I am a little late getting this posted because Minneapolis got 20+ inches of snow over the weekend and we are a little distracted by shoveling!

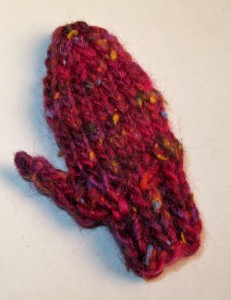
In honor of the snow, I am giving away mitten ornaments for your tree.  I will give away three pairs of tiny knitted mittens like these:

To enter, leave a comment and tell me:

what is your favorite color?

how many inches of snow you have at your house right now?

5 December, 2010

Mini Mitten Ornaments: A free pattern

2010-12-05T18:42:41-06:00Freebies & Patterns|Comments Off on Mini Mitten Ornaments: A free pattern

I wanted to knit some tiny mitten ornaments and although I found all kinds of cute patterns using sock weight and other tiny yarn, I didn’t come up with anything for worsted weight, which I have oodles of scraps of.  These mittens knit up in about 15 minutes and are simple enough that you can add stripes and some simple patterns if you are so inclined.

Materials: Worsted weight yarn scraps, four size 3 DPN, yarn needle

CO 12 stitches. (I like them divided evenly on 3 needles.)

K1 P1 ribbing for 6 rows.

K1 P1 KFB P.  Repeat 2 more times.  You now have 15 stitches.

Knit 8 rows.

K2tog, K 3.  Repeat 2 more times.  (12 stitches)

Knit 1 round.

K2tog, K2.  Repeat 2 more times.  (9 stitches)

Knit 1 round.

K2tog, K1.  Repeat 2 more times.  (6 stitches)

Cut your yarn.  Thread the end through a yarn needle.  Pass the yarn end through the last 6 stitches.  Pull tight and then pull the end to the inside of the mitten.  (I don’t weave in ends on this, I just stuff the yarn tails to the inside of the mitten.)

To make the thumb, you will do a short section of i-cord.

CO 3 stitches.  Knit 4 rows of i-cord.

K2tog, Knit 1.  Cast off, leaving about a 6 inch tail.

Thread the end of the yarn through your needle.  Slip the yarn end down through the center of the i cord and use the end to stitch the thumb in to place.  I put the bottom (cast on) edge of the i-cord even with the top of the ribbing.

Bury all the ends of yarn inside the mitten.

19 April, 2010

Wet Felting – Q&A

2010-04-19T09:14:08-05:00Tutorials|Comments Off on Wet Felting – Q&A

I had a comment with lots of questions about felting and so I thought I would just answer in a post and share with everyone.

I love all of your crafts but I am really interested in wet felting slippers and am wondering if you could recommend a place to purchase good roving to use?

In Minneapolis, you want to go to the Fiber Studio.  Pam, the owner, is super nice and she also sells on etsy and mail orders.  Maybe more important than where you get your wool, is what kind of roving you get.  I recommend Corriedale for beginners.  Corriedale is the kind of sheep that the wool comes from, it’s not a brand name or company.  Corriedale is a nice soft fiber, but it is a little coarser than merino and it is much easier to felt if you are just starting out.  It is what I use with all of the kids & beginner classes that I teach because it is so reliable.  Make sure that your fiber does not say “superwash” or “washable”.  Those are treated so that they will not felt.

Also, how many ounces does it take to do a pair of slippers?

That’s a little hard to say, because it depends on what you are doing – how thick they are, how big you are making them (kids or adults, short or bootie style).  I would guess that somewhere between 3-4 oz would probably be enough.

I just tried my first pair and it was a disaster. Not all of the wool I used felted.

I am so sorry!  You might have had a mix of wools that didn’t all felt the same.  When you start out, I would try to make sure you have all the same kind of wool – different colors are fine, but get all Corriedale or all merino.  I taught a class once with some beautiful mystery fiber – all but one color in the mix felted really well and the navy blue didn’t felt at all.  It was really discouraging and my students were patient but frustrated.

I did one color for the inside and another for the top and the top just fell off when I tried to remove it from the resist!

I am guessing this is because your piece started to felt before it was completely assembled.  This is really common in my beginner classes, so don’t feel bad!  Two things are probably happening:

1.  When you first start assembling your slippers (or any other felt shape) you have to handle the wool really gently.  You can wrap it around your resist, get it wet, add layers etc, but you don’t want to do anything to agitate it until you are completely done building up the layers.  Agitating would be anything that involves squishing, patting, rubbing, kneading, or smooshing the wool.  If you have agitated the bottom part of your slippers so that they have started to felt and then you try to add another layer on top, they will not “stick” together no matter what you do.  What happens when you are felting is that the individual fibers shrink, curl up and lock together.  Once that “felting” has started, there is nothing for the next new layer of fibers to grab on to because everything has already grabbed on to something else.  The way to fix this is to make sure that you have every layer and all the parts of the slipper completely assembled around the resist before you do any agitating.  You will want to pat and rub the fibers in to place, resist the urge!

2.  If you add your layers of wool too much at a time, sometimes it doesn’t want to be friends with the other wool.  Thin layers are the key.  Add a thin layer of wool, add a mist of soapy water.  Repeat many many times.  Thin layers means that you should be able to see through it.  Spread the dry fibers out so they are like a thin sheet before you add them to your slipper.

For more great step-by-step help, check out this book:

Feltmaking by Chad Alice Hagen

Chad is a fantastic teacher and she knows her stuff.  This is my “go to” book for wet felting.  She has a lot of steps (like making your olive oil soap solution) so it seems a little involved, but trust me.  Follow her instructions the first few times until your fingers learn what they are doing, then you can start to experiment.  The olive oil soap “slime” is worth every minute of the effort, especially if you are making something big.

Hope that helps!

25 January, 2010

Quilted Valentines – A tutorial

2010-01-28T10:01:19-06:00Freebies & Patterns, Tutorials|6 Comments

What you will need:  scraps of fabric about 4 inches square (almost anything will work), scrap of batting , pencil, buttons, sewing needle, thread, sewing machine, iron, blank cards, scraps of colored card stock, double-stick tape or glue stick.

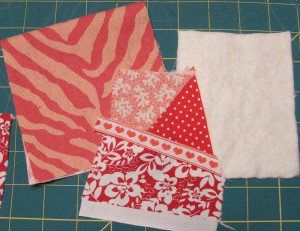
Start with your fabric (a piece for the front and a piece for the back) and batting.  I have a plain tiger print (left) and I made a quick little piece of crazy patchwork by pulling some scraps out of my bin and stitching them together (middle) and a piece of cotton quilt batting (right).  Felt or a scrap of polar fleece would work fine for batting too.  (The photo doesn’t show the backing pieces.)

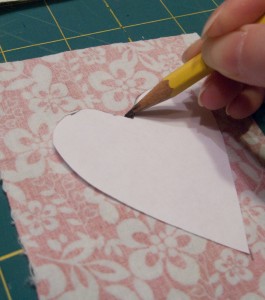
Draw and cut out a heart from scrap paper to make yourself a pattern.  If you like slightly lop-sided hearts like I do, get your favorite kid or husband to draw it for you.   Size depends on how big the card is that you are making.  My hearts are about 3 inches tall.   Put the pattern on the wrong side of your back fabric piece and trace with a pencil.

Stack up your fabric pieces in this order from top to bottom:

  • Back fabric (wrong side/traced side up)
  • Front fabric (right side/pretty side up)
  • Batting

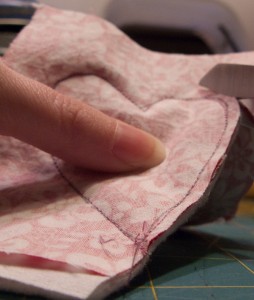
Stitch all the way around the heart, following your pencil line.  (I hear you.  Somebody said, “But you need to leave an opening to turn it right side out.”  Nope.  Just trust me, we get to that next.)

Trim away the extra fabric, leaving about a 1/8 inch seam allowance.  Clip the dip at the top of the heart and trim off a little at the tip, to help it turn a little neater.  You can clip the curves too if you want to.

Now, how to turn it right side out?

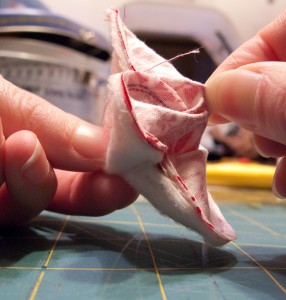
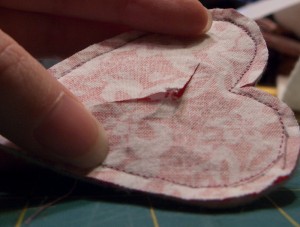
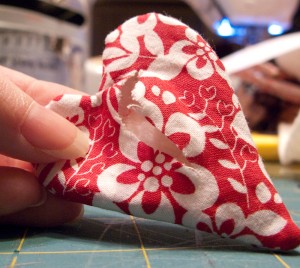
Pinch the layers with your fingertips and pull them apart so that you have just the center of the backing fabric.  With a sharp pair of little scissors or a seam ripper, make a little slash through just that backing fabric. Don’t go all the way to the stitching line but keep it in the center.

Why not leave an opening in the stitching?  I like how this way you get a really nice smooth stitched edge all the way around (no hand sewing), plus this backing part of your heart will be stitched to the card, so it doesn’t show.

Use the slash you made to turn the heart right side out.  With a chopstick, gently smooth it out then bring your heart over to the ironing board and give it a good dose of steam.  (We’re looking at the back in this photo.)

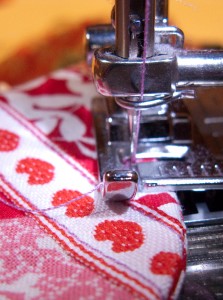
Now, quilt it!  Stitch about 1/4 inch from the edge all the way around the heart.  Do a second border of stitching or some doodles in the center of you like.  I like to press it again after this step.

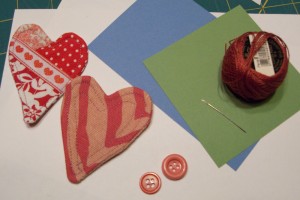
Now it’s time to assemble the cards.  Choose a quilted heart, a button and a scrap of card stock.  I used some recycled card stock from a holiday project.  Using embroidery thread, stitch through the heart and button to attach them to the card stock scrap. I like to make mine off-centered. Tie a knot on the back to hold everything in place.

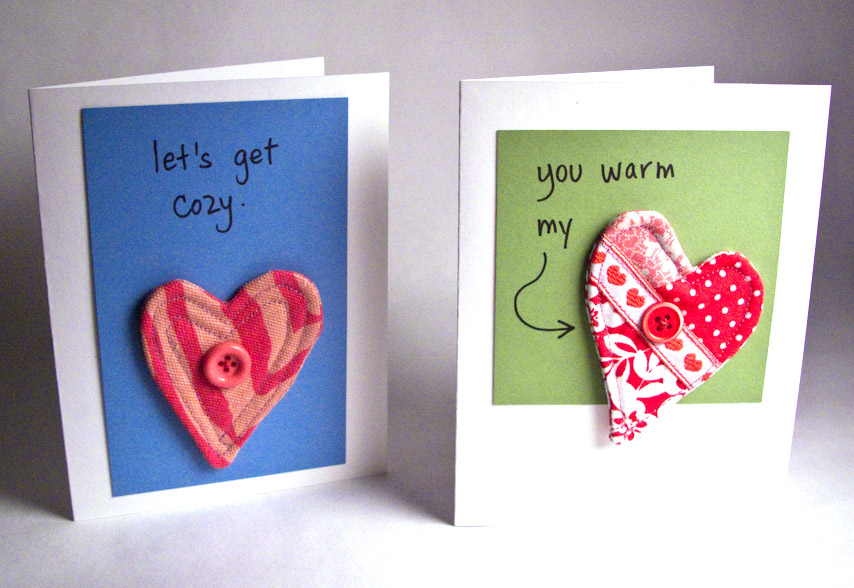
There are two quilted hearts stitched to their card stock scraps.  Now to finish them up.  Use double-stick tape or glue to attach your quilted heart/colored card to a plain card.  Write a message if you want to or leave it blank.

Happy sewing!

11 December, 2009

I’ve never seen a purple cow…

2020-11-11T13:21:21-06:00Freebies & Patterns|3 Comments

Holiday gift making is in full swing around here, which gives me nothing to tell you about because then I would ruin the surprise.  So, here’s a little project for you that I thought it was time to post again.

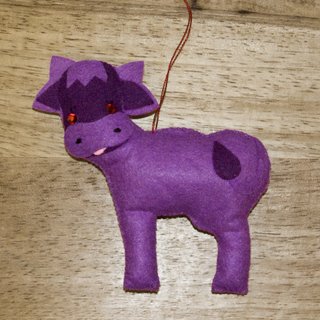
The original purple cow christmas tree ornament came from a 1970’s church bazaar and was purchased by my Grandma.  It is the favorite ornament of my youngest sister but sadly the original had a run-in with a mischievous puppy.  So this is my reproduction of the Purple Cow.  Download a free pattern and instructions for your own cow.

Go to Top