Part Four of my batik-behind-the-scenes series takes us to the fun part: starting to put it all together.
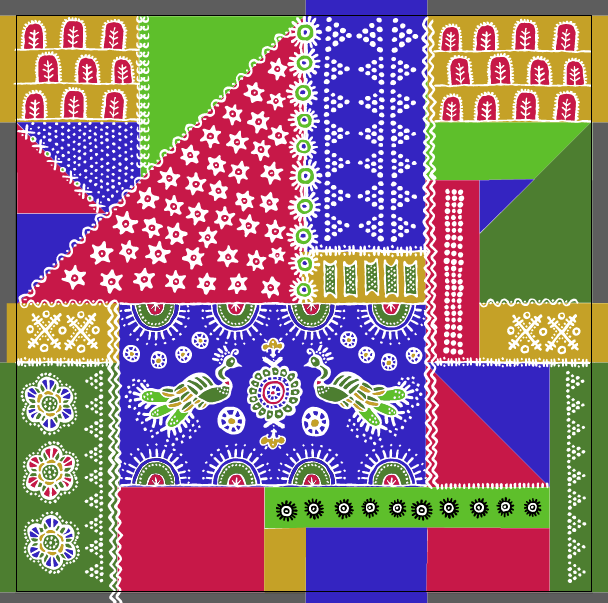
It’s time to start laying out my canvas for putting together all of the elements into a whole design. I decided to think about this as two layers: the background colors and the batik designs. I wanted a large repeat area so I made a new canvas 24 x 24 inches. The original faux batik design I was inspired by worked almost like a stripe pattern with bands of designs that went across the width of the fabric. I decided I would like something a little less directional and more versatile than a stripe, so I decided to lay out a “crazy quilt” kind of background made up of squares and triangles. I made this background as a layer all by itself to act as a guide for where to place my designs.
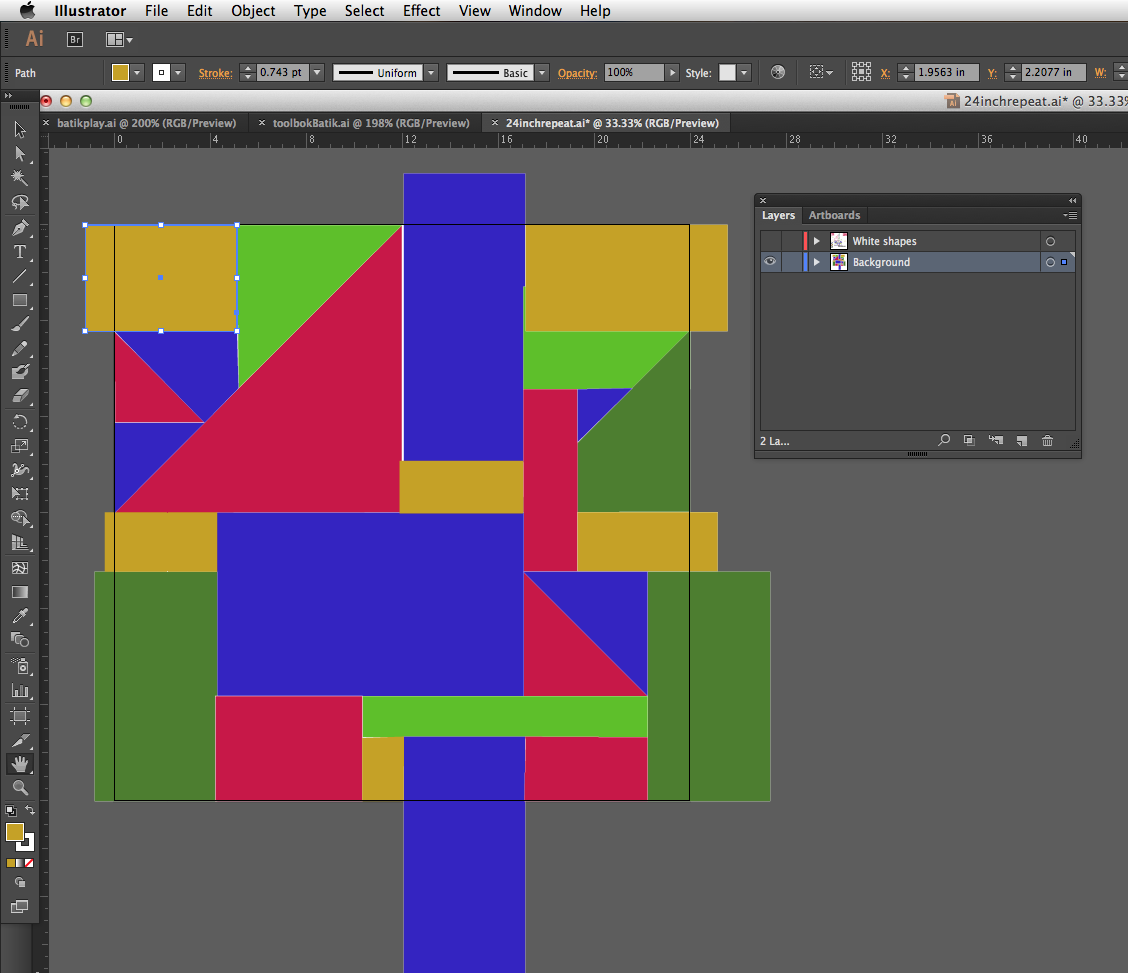
The shapes that extend off the edges of the 24 inch square “tile” are my reminder to myself that those blocks are going to help make this design more seamless. If you look at the large green rectangles on the bottom corners, I want that color to continue across the edges of the design, so when you repeat and put these tiles next to each other, those two green blocks will connect up and look like one larger green block. Make sense? This makes it harder to see the edges of my tile.
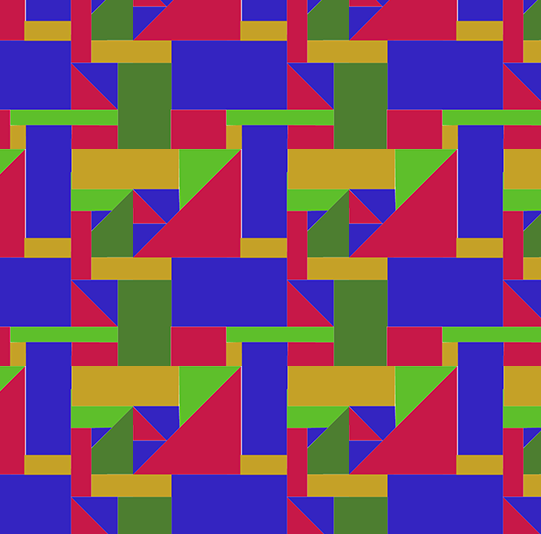
Here’s what it looks like when I tile it. I see that I still have a pretty obvious line going along the right edges of the blue shapes. I think I can fix that later with some color work, so I am going to leave it alone for now.
How did I make the shapes for the background? There are two main tools in Illustrator for making these kinds of shapes: the pen and the “pre-defined shape” tool. You can draw more free-form shapes with the pen and the shape tool lets you just click and drag to make rectangles and circles.
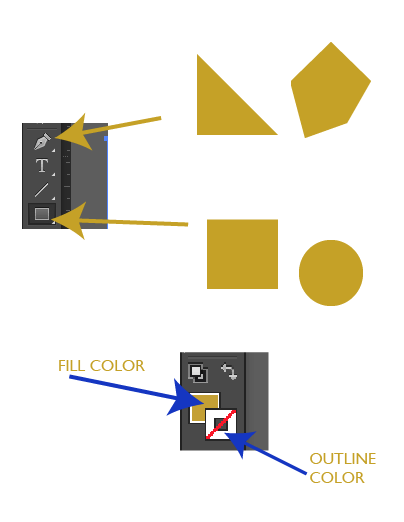
The colors I chose to lay out this design in are just placeholders. I picked 5 contrasting colors so that I could see my shapes easily and to work out a rough color balance, but these aren’t the colors I am going to use for my final design. I am going to talk about how to pick those colors in Part Five. You can see the color you have currently selected by looking at the palette. The solid square shows the fill color and the open box is the outline. My shapes don’t have an outline, so I have the “not” red line showing in that section above.
The easiest way to pick and choose colors is to use the eyedropper tool. This tool has two “modes” that I am going to call “Pick” and “Push”. Pick chooses a color from anywhere that you click. So I can click the blue anywhere on the page and that will be the color that shows up in the palette. Push you get to by holding down the option key while you are using the eyedropper. The icon will flip around and now anytime you click it will push that color you have selected to the shape you click on.
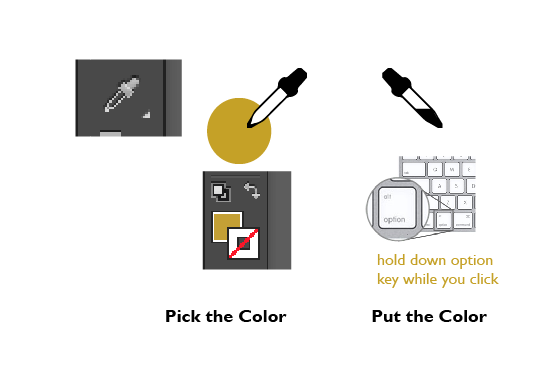
I made a little animated graphic to show you how this works. First I pick it with the regular eyedropper and then hold down option and push it to the next shape.
 Once I have my background all laid out, I lock the layer so that I can’t accidentally select or change something (I can unlock it later). Now I can go on to placing my batik shapes into a new layer on top. I already converted all of my shapes into vectors and I have them all in a “toolbox” document. I use this to copy and paste into my design document. This way I always have a copy of the original shape that I can go back to and I can pop back and forth between the two documents. I decide which shape I want to fill, then I choose something from my toolbox, copy and paste it over.

I rotate and resize it. Sometimes I need to select and make more copies of a motif or I delete a bit that’s not working. Once I have them placed and filling the area I want them to be in, then I use the same eyedropper trick to color them. Choose the color I want and then push it into each section of the design.
Here’s as much as I have finished so far. Just so you don’t think this is a fast process, this much has probably taken me about 6 hours.
More in this series: Part One • Part Two • Part Three • Part Four • Part Five • Part Six