17 April, 2017

An introvert’s guide to surviving an art show

2017-04-17T11:59:52-05:00An Artist's Life, Tutorials|4 Comments

A friend posted a comment on something I wrote on Facebook:

I want to have a booth at a show, but I am nervous that I will not be charming enough. Any tips for being yourself And an introvert and a good salesperson for the crafts you love to make?

That seemed like an awesome thing to think about and share what I do. I am a major introvert. When I say that, I always have students from my classes say “There’s no way you’re an introvert.” but it’s really true. When I am in front of a class, I can turn off the introvert for a while and I enjoy it, but I have a timer and it runs out. I get what I call a “teaching hangover”, especially when I teach in the evenings where I need several hours to unwind and reset before I can sleep or deal with people again. It’s a different feeling than just being tired. I feel prickly and scatterbrained and I crave silence. (It’s a lot like the onset of a migraine now that I think of it.) I need to get that out of my system before I can do anything else. So a class that goes until 9 pm means I will be up until 2 am before I feel like I can relax again. I know that about myself, so I have come with a lot of ways to make it work.

When you’re an introvert, showing your art at a show is pretty much you having to be “on” for 8 or 10 hours straight, which is so hard to do. The reason people come to art shows is because they are interested in handmade items and they are interested in meeting the artists that make them. That means you. My last post was all about how that interaction with the artist can make all the difference in both positive and negative ways. So here are a few ways I deal with being an introvert and surviving a long show day and making sure I am being the best ambassador for my art.

Meet your neighbors

One of the first things I do is try to meet the people that are set up on either side of me. Especially if you are staffing your booth by yourself, it’s nice to feel like you have a couple of friends who are in the same boat. It makes it feel less awkward to borrow a sharpie or masking tape from them and you have someone to eye-roll with when things are slow. Chances are good that everything is going to be crowded (because it always is) and you are going to be encroaching on each other’s space in some way. That’s a lot easier to tolerate from a friend when you are crawling under their table to find your water bottle or their customers are standing in the way of your display and chatting.

Don’t forget fuel

It’s tempting to get a giant latte loaded with sugar and figure that caffeinated energy will carry you through your introvertness. And that works to a point. But around Hour 3 when you are jittery and the sugar has crashed, your ability to cope with crowds of people is toast. It’s going to be loud and you will get thirsty from talking a lot. Water is good. I am not really excited about plain water, so I drink a lot of tea. I have decided that almonds, apples & cheese are pretty much the perfect show snack. Cut everything up into small pieces. Stash it in a container under the table. You don’t want anything that makes your fingers messy and you want to be able to eat it in a couple of bites. You might get a break, but you might not. And I don’t know about you, but if I am hungry, I am even less interested in talking to people and they stress me out more.

Be present

The simplest version of this one is “don’t sit down”. It’s tempting to make yourself a home base where you feel comfortable watching people come in to your booth, but you are out of the way. But the problem is that when you sit down, you are tempted to pull out your phone or your knitting or something to keep yourself busy. Then you are looking down and not making eye contact. And then you look busy and someone with a question might not want to interrupt because it looks like you are counting stitches. And we introverts don’t want to be interrupted, so this one just perpetuates itself. A tall stool or chair helps with this, so you can literally sit and not have to be on your feet all day, but you are still at eye level with the people who are shopping and not tempted to hide in your phone. My phone battery is iffy so there is no surfing for me or my Square checkout might not make it through the day. I always wear a bracelet to fidget with even though I would love to have my knitting to fidget with instead. Being present also means not letting yourself get monopolized. I overheard several unhappy comments from customers at my last show because one of my neighbors had a huge bunch of friends in the booth chatting with each other. No one else could get in to look and the artist was completely unaware.

Don’t get trapped

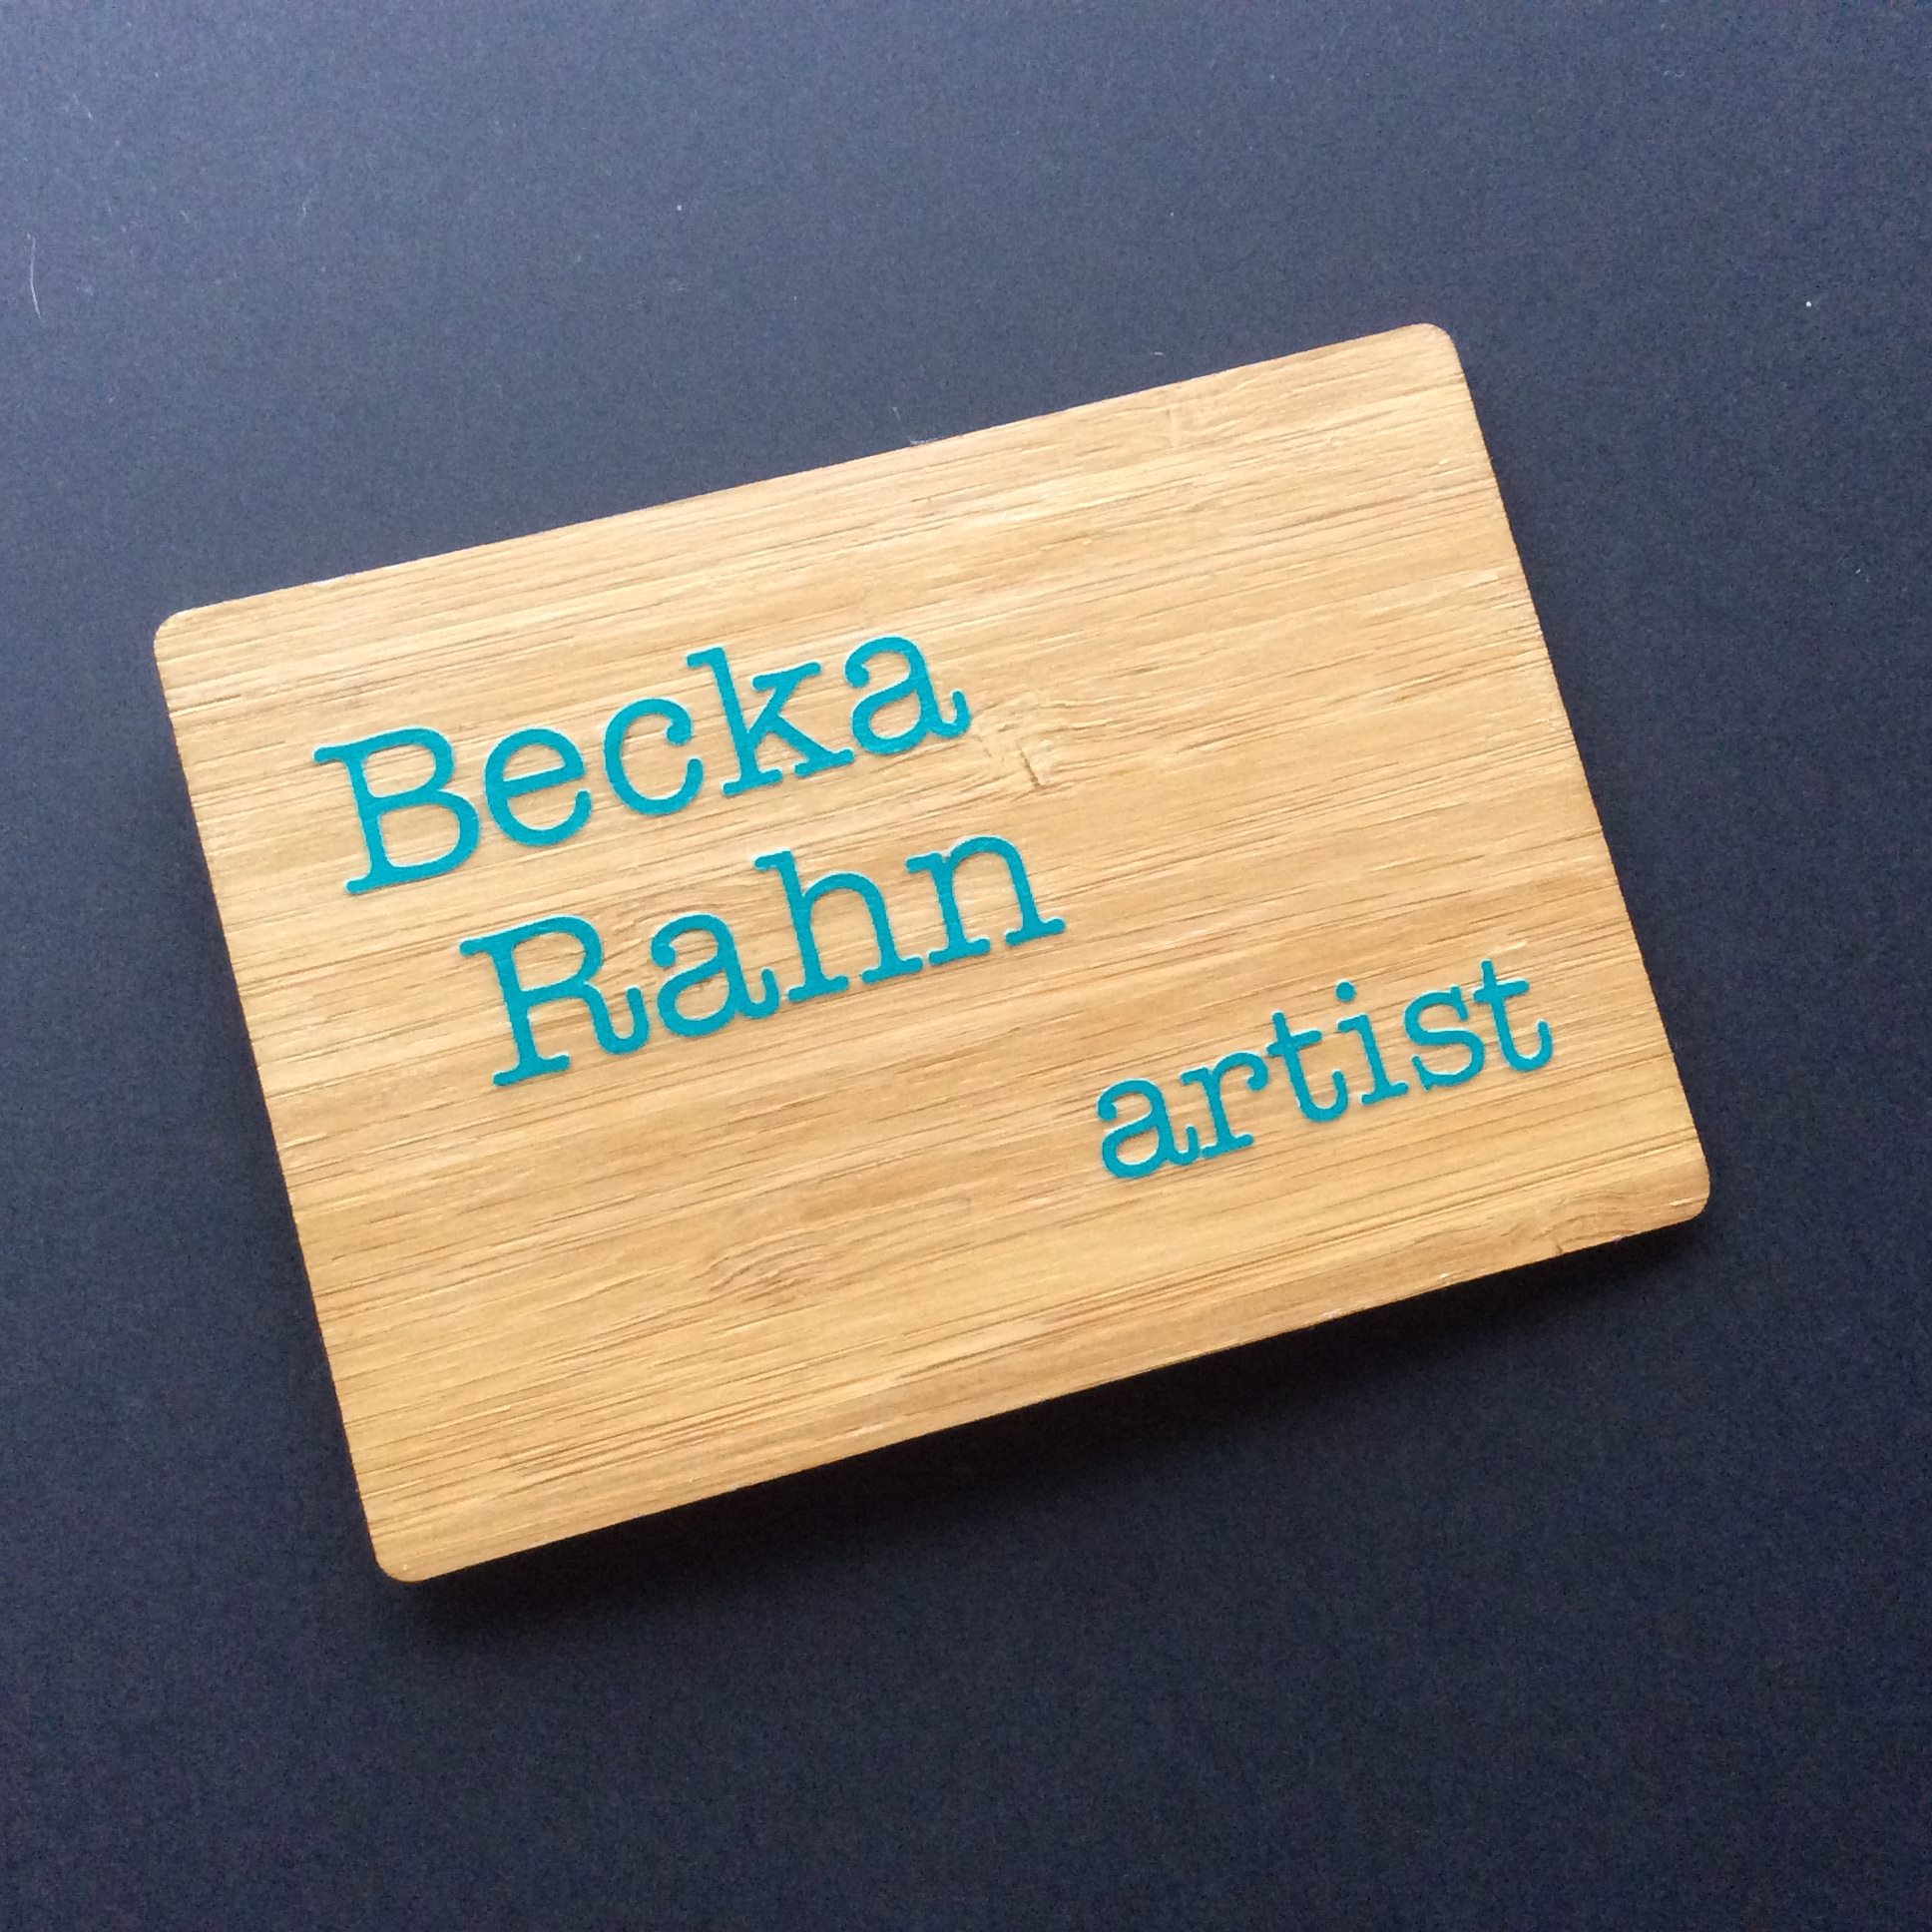
This one is about your booth design. It took me a while to figure out the simple design of “here’s a table with all of my stuff and I stand behind the table” totally makes me feel trapped. I am constantly on display along with my art right in front of all of those people, aka the Introverts Nightmare. I now try to make a booth where I have several places to stand, including out in the aisle. I want to be able to see my things at all times, but I want to be able to move around and not have me or the customer feel like we are watching each other. I think it also helps to wear a nametag so that no matter where I stand people can figure out that I belong to the booth. Some shows really don’t lend themselves to this, but give your design some creative thinking. I have seriously taped out the space with masking tape on my livingroom floor and mocked up the booth before I go.


Find the story

Ugh. Small talk. Right?

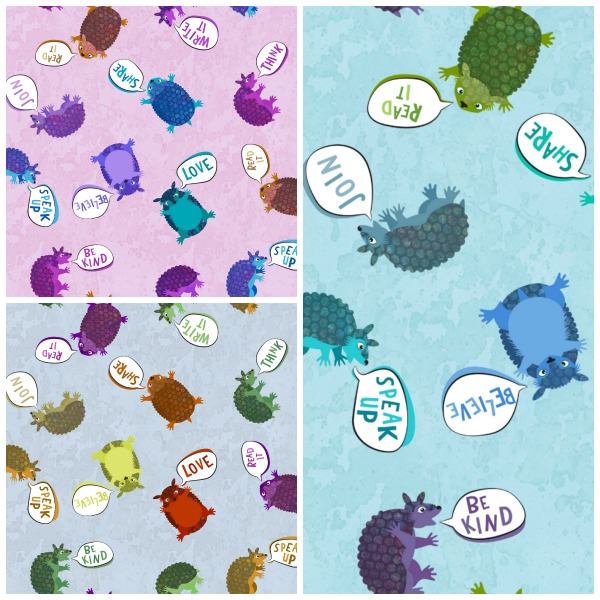
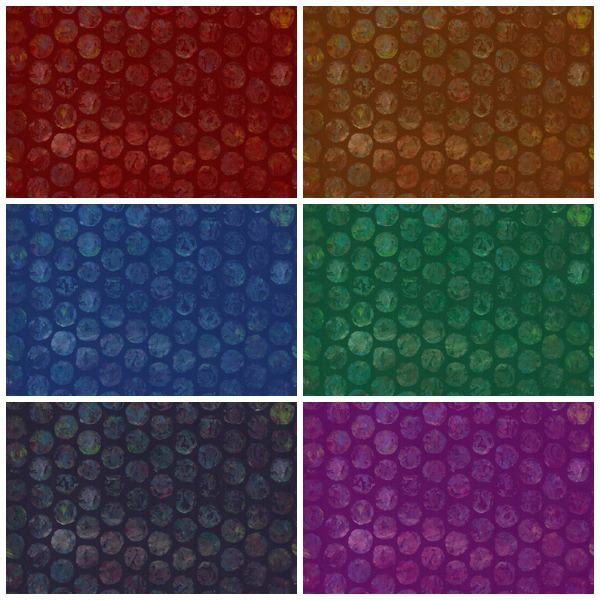
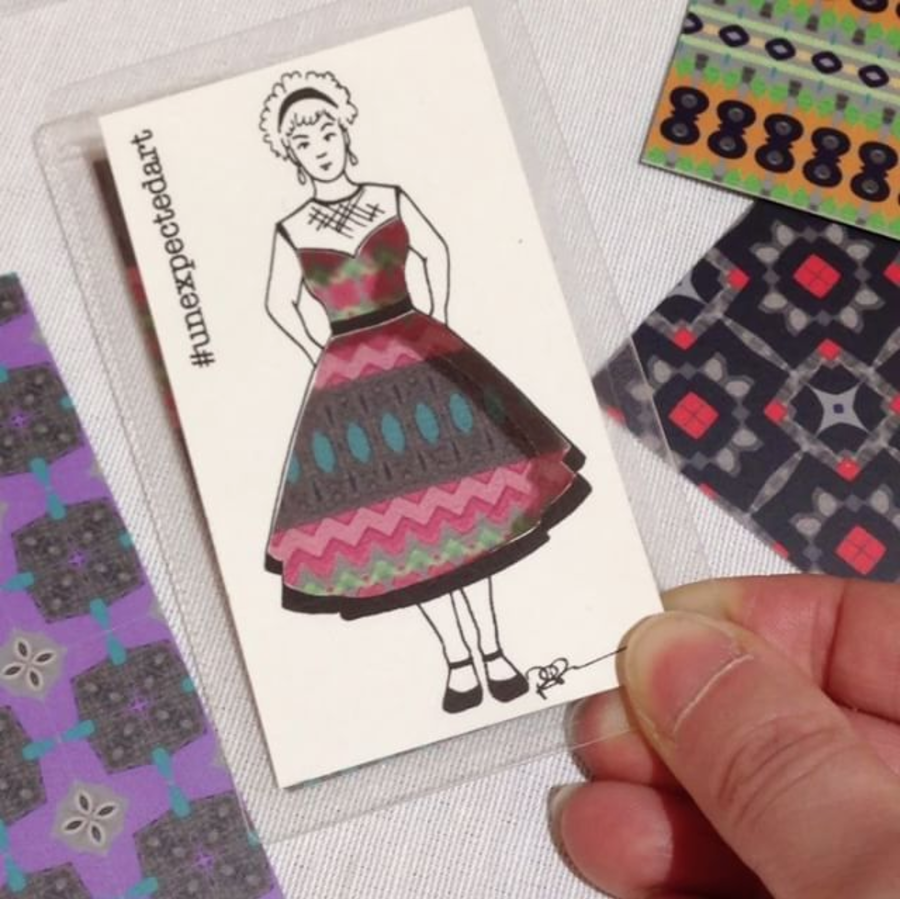
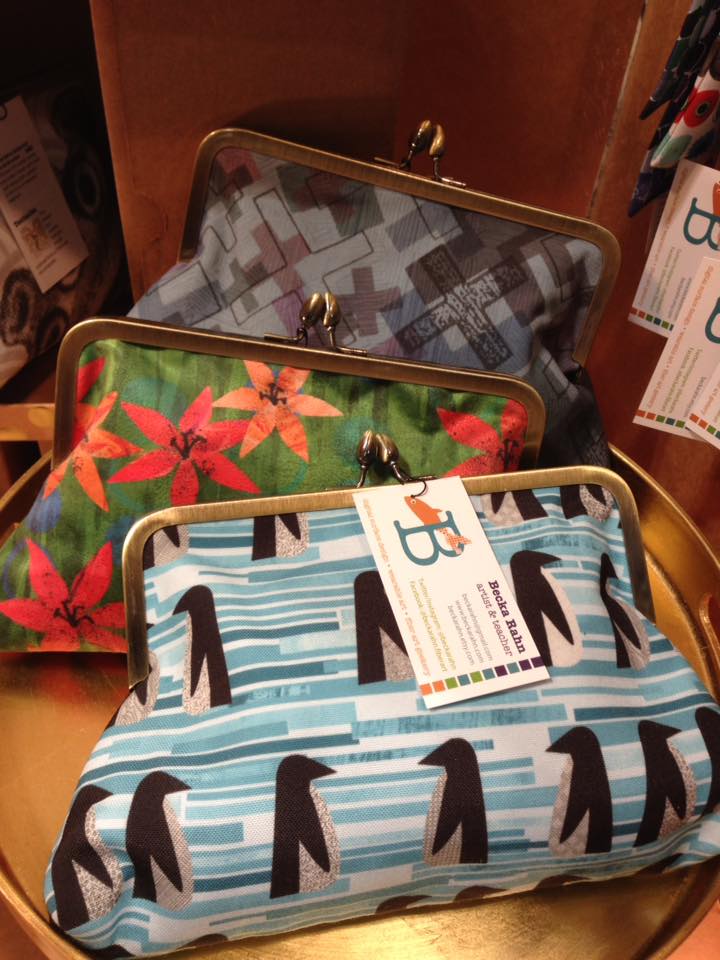
“Let me know if you have any questions.” is a good opening line, but it’s so commonly said that we almost don’t hear it any more. Often the first thing someone says when they walk up to my things is “Pretty fabric” or something like that, so my opening line has become: “Thank you! I design all of these fabrics and have them digitally printed.” At which point they usually look up at me with a confused look on their face (because what I do is unusual) and they ask me a question. “What do you mean digitally printed?” “You designed all of them?” “You can do that?” And now we have a conversation started and it’s the easy conversation. It’s easy to talk about what you do because you love it. You wouldn’t be doing it otherwise. You aren’t selling it at that point, you are sharing your love and enthusiasm for it. And that’s a way more fun conversation than “How much is this?” I also print out a card that talks about what’s unusual about my work and I put it in the display. That’s for the introvert shoppers.

What’s the opening line you can say that invites people to ask you more?

  • Something you can’t tell by looking at it (ie it’s digitally printed)
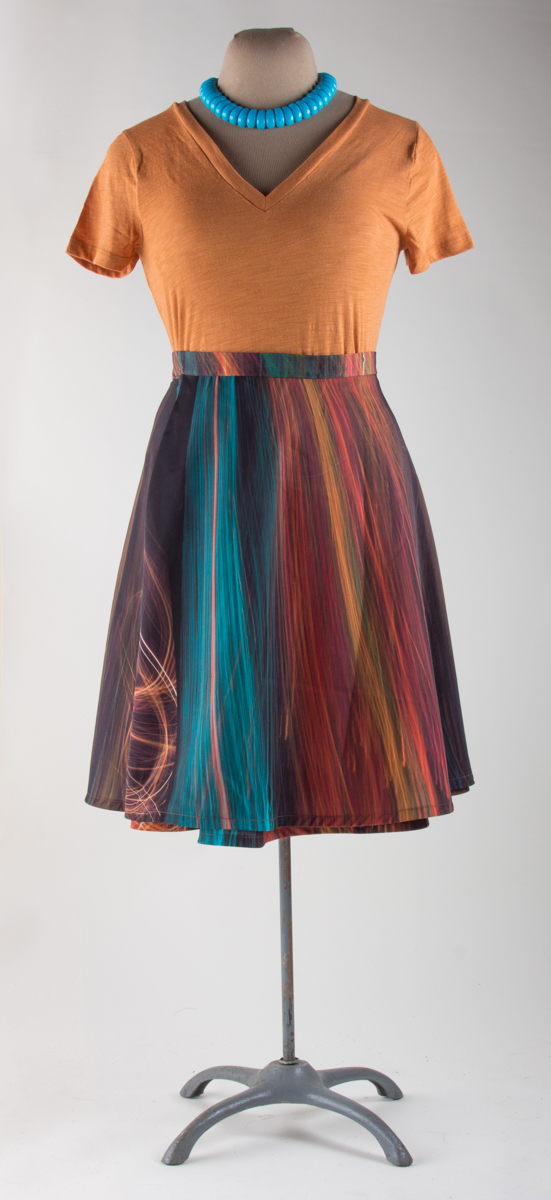
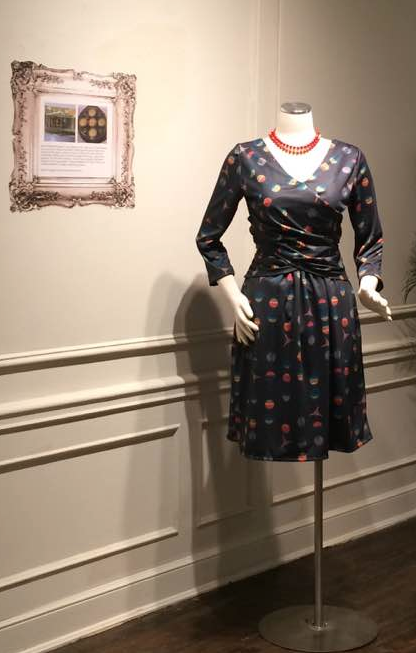
  • Alternate ways to use it (ie it’s a necktie, but I am a girl and I am wearing one right now)
  • What’s unique about it (ie I use all reclaimed fabrics or recycled silver)

Have a break

Get a friend to come. Leave for 5 minutes and go away from the crowd where you can be “off” for a while. Walk outside or even hide in the bathroom. Anything where you can be anonymous for a couple of minutes will give you a little chance to reset. I rarely have someone stay in the booth with me. There is never enough room and you tend to talk to that person instead of customers. But someone who can drop by for 10 minutes is the best gift you will get all day. It’s always the last thing I think to organize, but it’s so important. Shows will often give free or assistant passes to vendors; this is what you use those for. This person doesn’t need to know how to do anything more than say “The artist stepped away for just a minute and will be back soon.”

Go home and reset

This is important for multi-day shows. I always have invites to go out and grab dinner after a show and I rarely say yes. You need the time in the evening to reset if you are going to do another day at the booth. Have a hot bath, eat something, drink a glass of wine, go to bed early.


I have actually gotten to where there are some art shows that I really enjoy. I know what to expect, I know I will be having the same small talk conversation all day and I still enjoy it. But that’s taken some practice. Your first few shows are going to be exhausting. Making your booth/strategy work for your personality is going to make you feel more confident and even if it feels a little contrived to come up with an “opening line”, the more you do it, the more natural it becomes and it doesn’t feel that way at all.

11 April, 2017

It’s all about the story.

2017-04-11T15:37:23-05:00An Artist's Life|2 Comments

When you are an artist and you do shows where you sell your work in person, you tell a lot of stories. I talk about the designs I make and where they come from. Sometimes, I tell stories about the reason I am a computer geek is because I wrote computer games with my dad when I was a kid. Sometimes I talk about someone’s new puppy. I even got interviewed before this show by Make It Minnesota and they posted some of my stories as an artist profile on their website. That’s part of how people relate to art and how they make a connection to it, by finding a story that resonates with them.

I did a big show this weekend and I always buy myself a small present at this particular show. I am a junkie for colorful costume jewelry, so usually it’s a bracelet or a pair of earrings. Last year I got an awesome bright green aluminum cuff and the year before it was a pair of enameled scribble earrings. Both of which I love and wear all the time. This year I had a 5 minute break to grab some hot tea and a bracelet caught my eye as I was cruising past the booth. It was my colors, the design was unusual, it had caught my eye from the aisle and the price range was just right. Perfect. I had found my treat.

Unfortunately, the story that goes along with this one doesn’t match that initial love-at-first-sight reaction. As I handed it to the artist to pay for it, we got to chatting. He said something about babysitting the booth because his mom broke herself and I chuckled at what I thought was a joke. I obviously misheard because he immediately snapped back at me and said “I don’t know why you are laughing. It isn’t funny.” Embarrassed, I commented that it was so nice of him to take over since she couldn’t be there. And the response was “Well she’s paying me, so it’s not that nice.” Given his previous reaction, I assume this isn’t a joke. He sees my nametag and asks about my art and I show him the skirt I am wearing, which is one I designed. He asks if I do menswear and I tell him that I actually do have bow ties for this show and they are getting a lot of really positive reactions. He makes a face and then says,

You should make mens swim trunks. I totally wouldn’t wear that but I could see it as mens swim trunks.

Not “Oh that’s nice.” or “That’s interesting.” (which is Minnesota code for “I think that’s whack-a-doodle but I am too polite to say so.”) But “let me tell you what you should be doing instead”.

I can’t imagine making and selling swim trunks. That’s not the kind of thing you think of as a handmade item. It’s totally a mismatch to my whole design aesthetic. They would be totally impractical. They would be expensive. This all flashed through my mind as one of the weirder things that someone has ever told me I should make and I couldn’t help it but I laughed. Before I had a chance to say anything more, he jumped in and scolded me again. “I don’t know why you are laughing. I am serious. You keep laughing at everything I say.” I felt like I couldn’t say anything without him criticizing me for it and I was really wishing he would just hurry up so I could go get my tea.

Another artist in my shared booth had a long conversation with a couple of ladies about a particular piece in her jewelry collection. The customer tried it on, asked a lot of questions and had a great conversation. She left without purchasing it, but with a big smile on her face. As she walked by me, I heard her say to her friend “Well that was just a showstopper for me. Wow. I can’t believe how cool that was.” What a different experience those visitors had.

So I look at this bracelet now and instead of my happy art show souvenir, all I can think of is the weird not-the-artist-but-her-rude-son and the conversation where he kept scolding me. I’m not sure I want to wear it now. The story matters.


8 March, 2017

My Love of Art Supplies: Prismacolor pencils

2017-03-08T15:18:43-06:00An Artist's Life|1 Comment

I decided the other day that it would be great to write a few posts about some of my favorite art supplies. No affiliate links or anything, just to talk about what I love and why I love it. These are Prismacolor pencils. My mom & dad bought me a basic set and I added to it because you always need more colors. When I was a kid there was a craft/hobby/art supply store downtown called Who’s Hobby House. (It’s still there.) I used to save up my pocket money and buy Prismacolor pencils one at a time from the big pencil display. They were $.75 a piece, I think. They were treasures. I remember discovering Ultramarine (which is an awesome color) and I had to ask my dad why one was called “non-photo blue”.

When I thought about writing this post about why I loved them, I went digging through all of the junk drawers and pencil cups in the house so I could take a photo and those three above are all I found. I know if I kept digging I would turn up more, but those three might easily be 30+ years old. Terra cotta, Burnt Umber and Hot Pink.

Why do I love them? The colors are rich and intense. The leads are soft and thick and you can get a huge range of color depth by pressing harder or softer. If I were to compare them to the colored pencil sets I use in classes that I teach: Prismacolor pencils are like the cappuccino I had in a cafe in Italy. Regular colored pencils are like the coffee in the waiting room at the place I take my car to get the oil changed. Both absolutely work but let’s just say that students (of any age) are rather hard on art supplies, so they get what’s easy to replace. These were the first “grown up” art supply I remember having where I really understood that it was the good stuff. (Kids should always have the good stuff as far as I am concerned, but that’s a post for another day.)

Today’s my birthday. And when I discovered that I could only find three of my very favorite pencils, I thought I should do something about that. My 12-year-old self is totally jumping up and down right now.

I bought the whole set. Every color they make. I was just going to get a basic set, but the sweet girl at Blick Art Supplies said “I think this big set might be on sale on our website, let me check for you” and sure enough, when she checked, it was marked at about 20% of its retail price, which made it $10 more than I was going to spend anyway. Sold. And they honored the web price in the store. (Nice work, Blick!)

Six trays, 150 colors. I know this will make some of you cringe, but I know me and I know I won’t keep them in their box in these nice little trays in color order. I am so not that person. So I am going to make a zipper bag to keep them in. And I know the perfect fabric designs to use:

These are both by my friend Kelly (weavingmajor), who I met a little bit working on the Spoonflower book. Ages ago I ordered some of the pencils design on peel-n-stick wallpaper to cover a sketchbook of mine. I can tell she loves the Prismacolors as much as I do.

22 February, 2017

Make art with me: March 2

2017-02-22T11:27:46-06:00An Artist's Life, Gallery Exhibitions, UpcomingClasses|Comments Off on Make art with me: March 2

Thursday March 2 • 6-8 pm • free admission
Hennepin History Museum

I will be in the gallery talking about my work, answering questions and teaching YOU how to make awesome origami dresses like these from the exhibition. It is really fun to do and I have printed patterned wrapping paper so that every one can be different.

I was talking to someone recently about origami as a theme in my work. I never start out saying I am going to have something that’s origami, but it always shows up. Origami is a Japanese art form of folding paper. The designs are made without cutting or tearing the paper and almost always start off as a perfect square. When I was a kid, my dad had an origami book. It has been his since *he* was a little kid; a gift from a very favorite great uncle. Uncle Lester was a magician who specialized in paper tricks. I have written about him before. We were only allowed to look at the origami book with supervision, but my dad would sit with us for hours and help us figure out animals and flowers. There is one design from the book that I have had memorized since I was a kid. I remember folding it in elementary school from pieces of lined paper; it’s an unusual one that starts with a rectangle. My original engagement ring was an origami butterfly ring. I found the book it came from and tracked down an out-of-print copy for my husband for our 20th anniversary. I think origami was one of the first art forms I really connected with and said “I love this”. (In contrast, I hate painting. I really don’t enjoy it at all. It took a long time for me to embrace that. It’s ok to be an artist and hate painting.) So I hope you can come and learn to fold something. Maybe it will click with you too.

2 February, 2017

Screaming Hairy Armadillos (or armadillos as the road to inspiration)

2017-02-02T17:55:37-06:00An Artist's Life, Spoonflower & Fabric Design|2 Comments

There is a lot going on in the world right now that makes some of us want to scream. I get it. But I think we need a little break from that to talk about a different kind of screaming.

Let me introduce you to Amber.

She’s a screaming hairy armadillo from the Smithsonian National Zoo. They tweeted about her last week. And my mom and I both saw it and were curious. Why was she called a “screaming” hairy armadillo? I get the parts about hairy and armadillo, but screaming?

So we Googled it.

And then we got the giggles. My dogs are now in love with Amber’s cousin-in-the-video and come running in the room when I play the sound. I told my mom “I think I need to design something with screaming hairy armadillos on it”. This might be the first fabric I have ever designed inspired by a sound. :)

So I thought about that for a couple of days. I have been working non-stop on grant/exhibition projects and I needed a day to goof off and design something fun. And I thought it would also be fun to talk a little about that process.

First I studied a bunch of armadillo photos and thought about how to make that great armor texture they have. Cut paper bits? Something photographic? Lace? Then I saw something pop up in my Facebook feed about making a paint texture with bubble wrap.

Screen Shot 2017-02-02 at 4.48.30 PM

So I grabbed a piece of bubble wrap and some double-sided tape and made myself a roller around an empty soda can. I squirted out some paint on the tin foil, rolled some on the roller and painted some sheets of black card stock.

Screen Shot 2017-02-02 at 4.50.27 PM

Messy, but perfect! Then I started drawing some armadillos. I did a quick pencil sketch and then drew over them with a fine sharpie pen.

Screen Shot 2017-02-02 at 4.52.40 PM

I thought I would just fill in their backs with the paint texture and have them be hand drawn. Turns out that they are perfectly cute little guys, but not very successful as fabric. I played with colors and fills and I just couldn’t get them to balance. The bubble wrap texture was so bold and dark and the lines here too delicate. Bleh. So I walked away for a bit.

Then I tried re-drawing them using layered shapes in Illustrator. That worked a lot better. The big blocks of solid color were much more balanced with the bubble wrap texture. I am kind of in love with them.

Screen Shot 2017-02-02 at 5.03.04 PM

The bubble wrap also got a little tweaking. I changed the transparency of that layer to be about 45% and put it over the same base color of the armadillo (turquoise in this example). The black in the bubble wrap print darkened the color up so that I got a nice related shade and you can still see some of the rainbow colors in the paint.

Then, we all know they are screaming armadillos, so they needed to say something. Only I couldn’t make up my mind what they needed to say, so I actually did two versions of the design: one with blank speech bubbles and one with “just do it” sort of positive messages: read it, think, love, believe, speak up, try, make good art.

I thought it would be fun to have options. Want your armadillos to scream Happy Birthday? or Congrats? Or Happy Retirement? Then you can fill it in with fabric markers, paint, embroidery, or sharpies. A friend sent me a list of “g-rated” swear words yesterday. She remembered that I talked about a collaborative print I did in a class with phrases like “oh piddle” and “son of a biscuit” and I now think it would be super funny to do a version with the armadillos politely swearing up a blue streak. But that’s another day.

bluearmadillos

So I started with a blue and green colorway and did two color variations, one with bright earthy colors and another with pinks and purples. The background of the armadillos is a photo of peeling paint from a utility box. Sometimes amazing textures come from weird places. But it goes nicely with the other paint textures. I took the same bubble wrap scan and made a seamless texture out of it too. So you can also get coordinating “polkadots” that match the armadillo armor.

versions

bubbles

I named them “Activist Armadillos” and I have uploaded all 16 designs to Spoonflower as fabric or wrapping paper designs. I have ordered swatches of all of the versions and I will post an update when I get them and decide if I need to make any tweaks to the design. I can’t wait to see them.

I think the screaming armadillos would make an awesome tote bag with a lining of armor polkadots. I might have to make that for me.

30 January, 2017

It takes 6 hours.

2017-01-30T12:32:39-06:00An Artist's Life, Gallery Exhibitions|2 Comments

This video is about 2 1/2 hours condensed down into 34 seconds. That’s me installing just one of the pieces for my first solo exhibition, which opened on Thursday last week. I thought it would be fun to try and capture a little about what installation is like because I don’t think artists often talk about that part. I filmed this on my iPad, which was set up on a windowsill across the room.

The piece is called Well Dressed and there are 144 origami dresses hung on tiny clothespins from bakers twine.

IMG_9574

I had sorted them ahead of time by style. If you look closely at the photo, there are about 7 different dress styles and I wanted to make sure they were fairly evenly distributed among the “laundry lines”. I chose colors and patterns to be next to one another as I went along. The patterns on each dress were created by students in the workshops I did as part of this grant project. I printed their designs on wrapping paper in 6 inch squares. Then I did a lot of practice folding. I searched for origami dress tutorials on YouTube and Pinterest and because my paper was much thicker than traditional origami paper, I needed to fold and tweak the designs to work with the heavy paper.

I installed this piece first because I knew it would take the most time. Actually after I finished the time lapse video, I went back and added one more laundry line row so I could spread out the dresses a little more because I felt like they were too crowded.

In addition to this wall, there were 8 other pieces, a section of photos and “the making of” original art, plus 2 interactive sections. The rest of those were relatively fast to install.

Screen Shot 2017-01-30 at 12.09.49 PM

bikini

Most of my dress forms have to be creatively padded to make things fit just right. I always make pieces that fit me, but I am not as tiny as the dress forms are. Quilt batting, bubble wrap and pins are my friend. I forgot to take a photo of the “before”, but this lady is wearing two layers of quilt batting and a bra with some extra padding so she looks like this dress fits her. The arms on these dress forms help a lot to make things hang right.

Screen Shot 2017-01-30 at 12.04.41 PM

You can see from the photos that the gallery I installed everything in is an old house. I thought formal gallery labels would look kind of out of place in that kind of a setting, so I made all of my labels look like framed pieces and used vector drawings of big ornate frames to put them in. I printed those on peel and stick wallpaper and cut out the outside edge of the frame before I hung them up.

Screen Shot 2017-01-30 at 12.19.57 PM

144 paper dresses, 288 clothespins, 84 feet of string, 3 dozen velcro hangers, 8 dress forms, 12 trips up and down 2 flights of stairs, 14 feet of wallpaper, 20 yards of fabric, 6 hours to install.


Go to Top