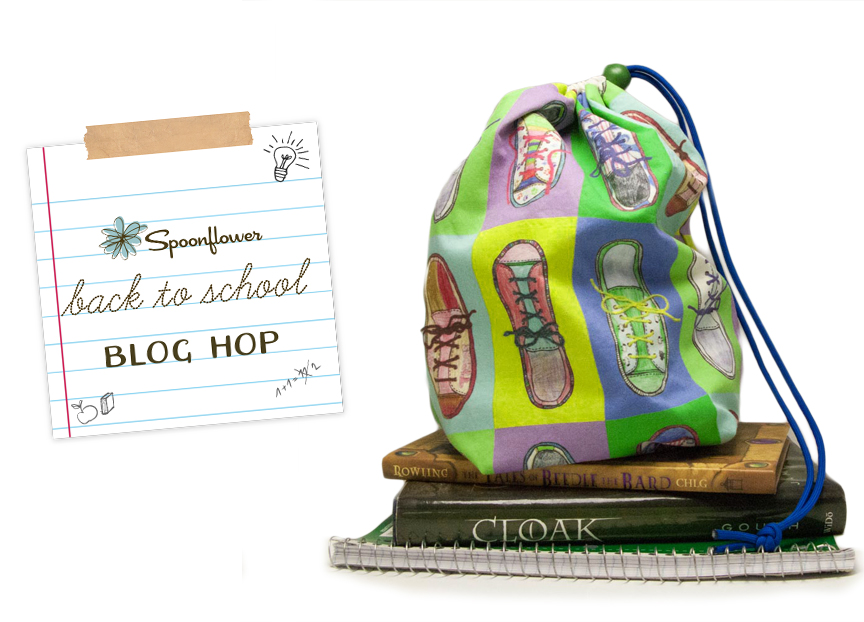
When you live in Minnesota, “Back-to-School Season” is quickly followed by “Snowboots Season”. When I asked my sister what she thought would be a great back-to-school project to share with the Spoonflower Back to School Blog Hop, she described a “stuff sack” type bag to put the kids’ shoes in their backpacks when they have to wear their snowboots to school. Something to keep the papers from getting dirty and books from getting crumpled by dirty sneakers. With each kid needing regular shoes, gym shoes and snowboots, there are a lot of shoes getting hauled back and forth on the bus every day.
Creating the fabric design.

Color & scan.

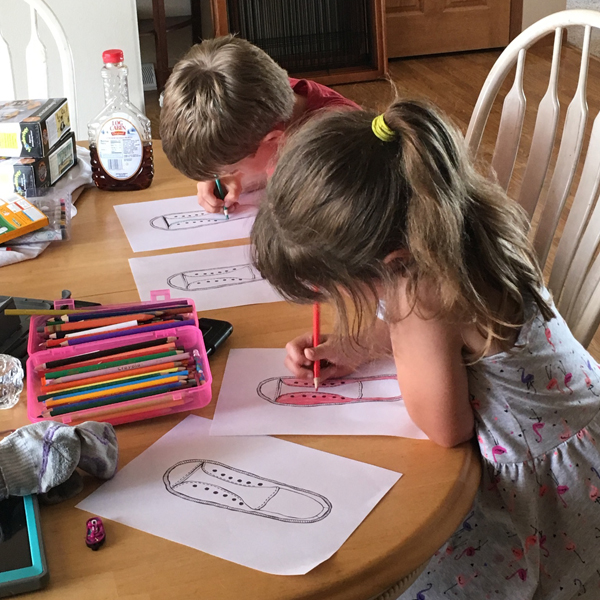
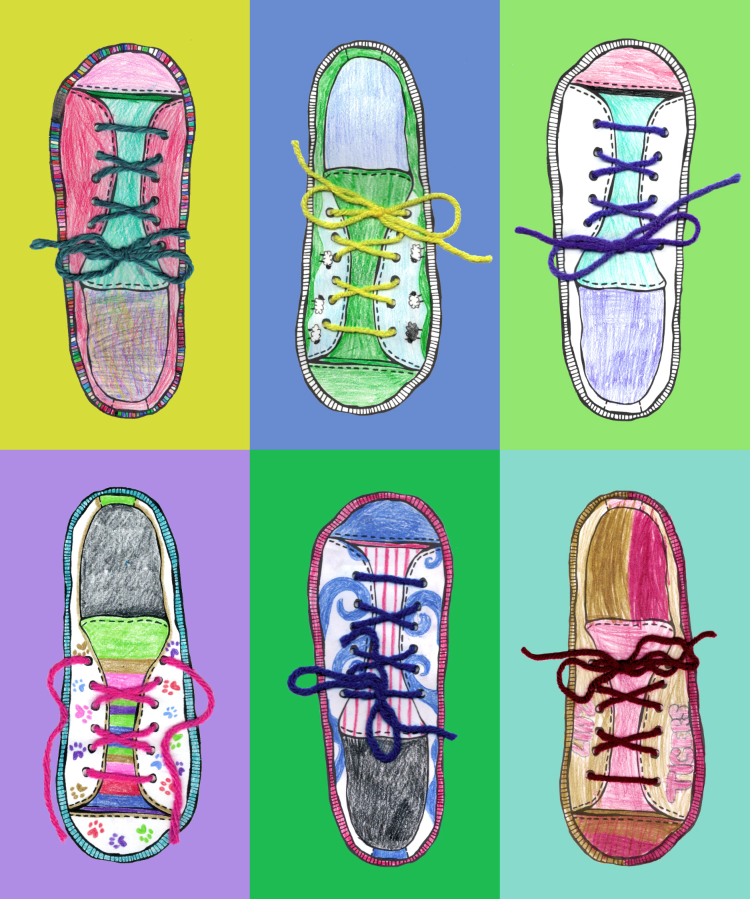
My niece and nephew are 7 & almost 9 years old and I thought the bags would be the most fun (and more likely to get used) if I could get the kids to help me with the fabric design. What better for a shoe bag than a fabric print with shoes?
So I drew a coloring book page with a canvas sneaker. I drew it in fine tip sharpie, scanned it and emailed it to my sister. She printed copies and let the kids color the shoes any way they liked. They chose colored pencils for these, but this would also work with markers, crayons, or watercolor.
Download: If you want to make your own shoe print, you can download my shoe coloring book page here. It is yours to use any way you like.
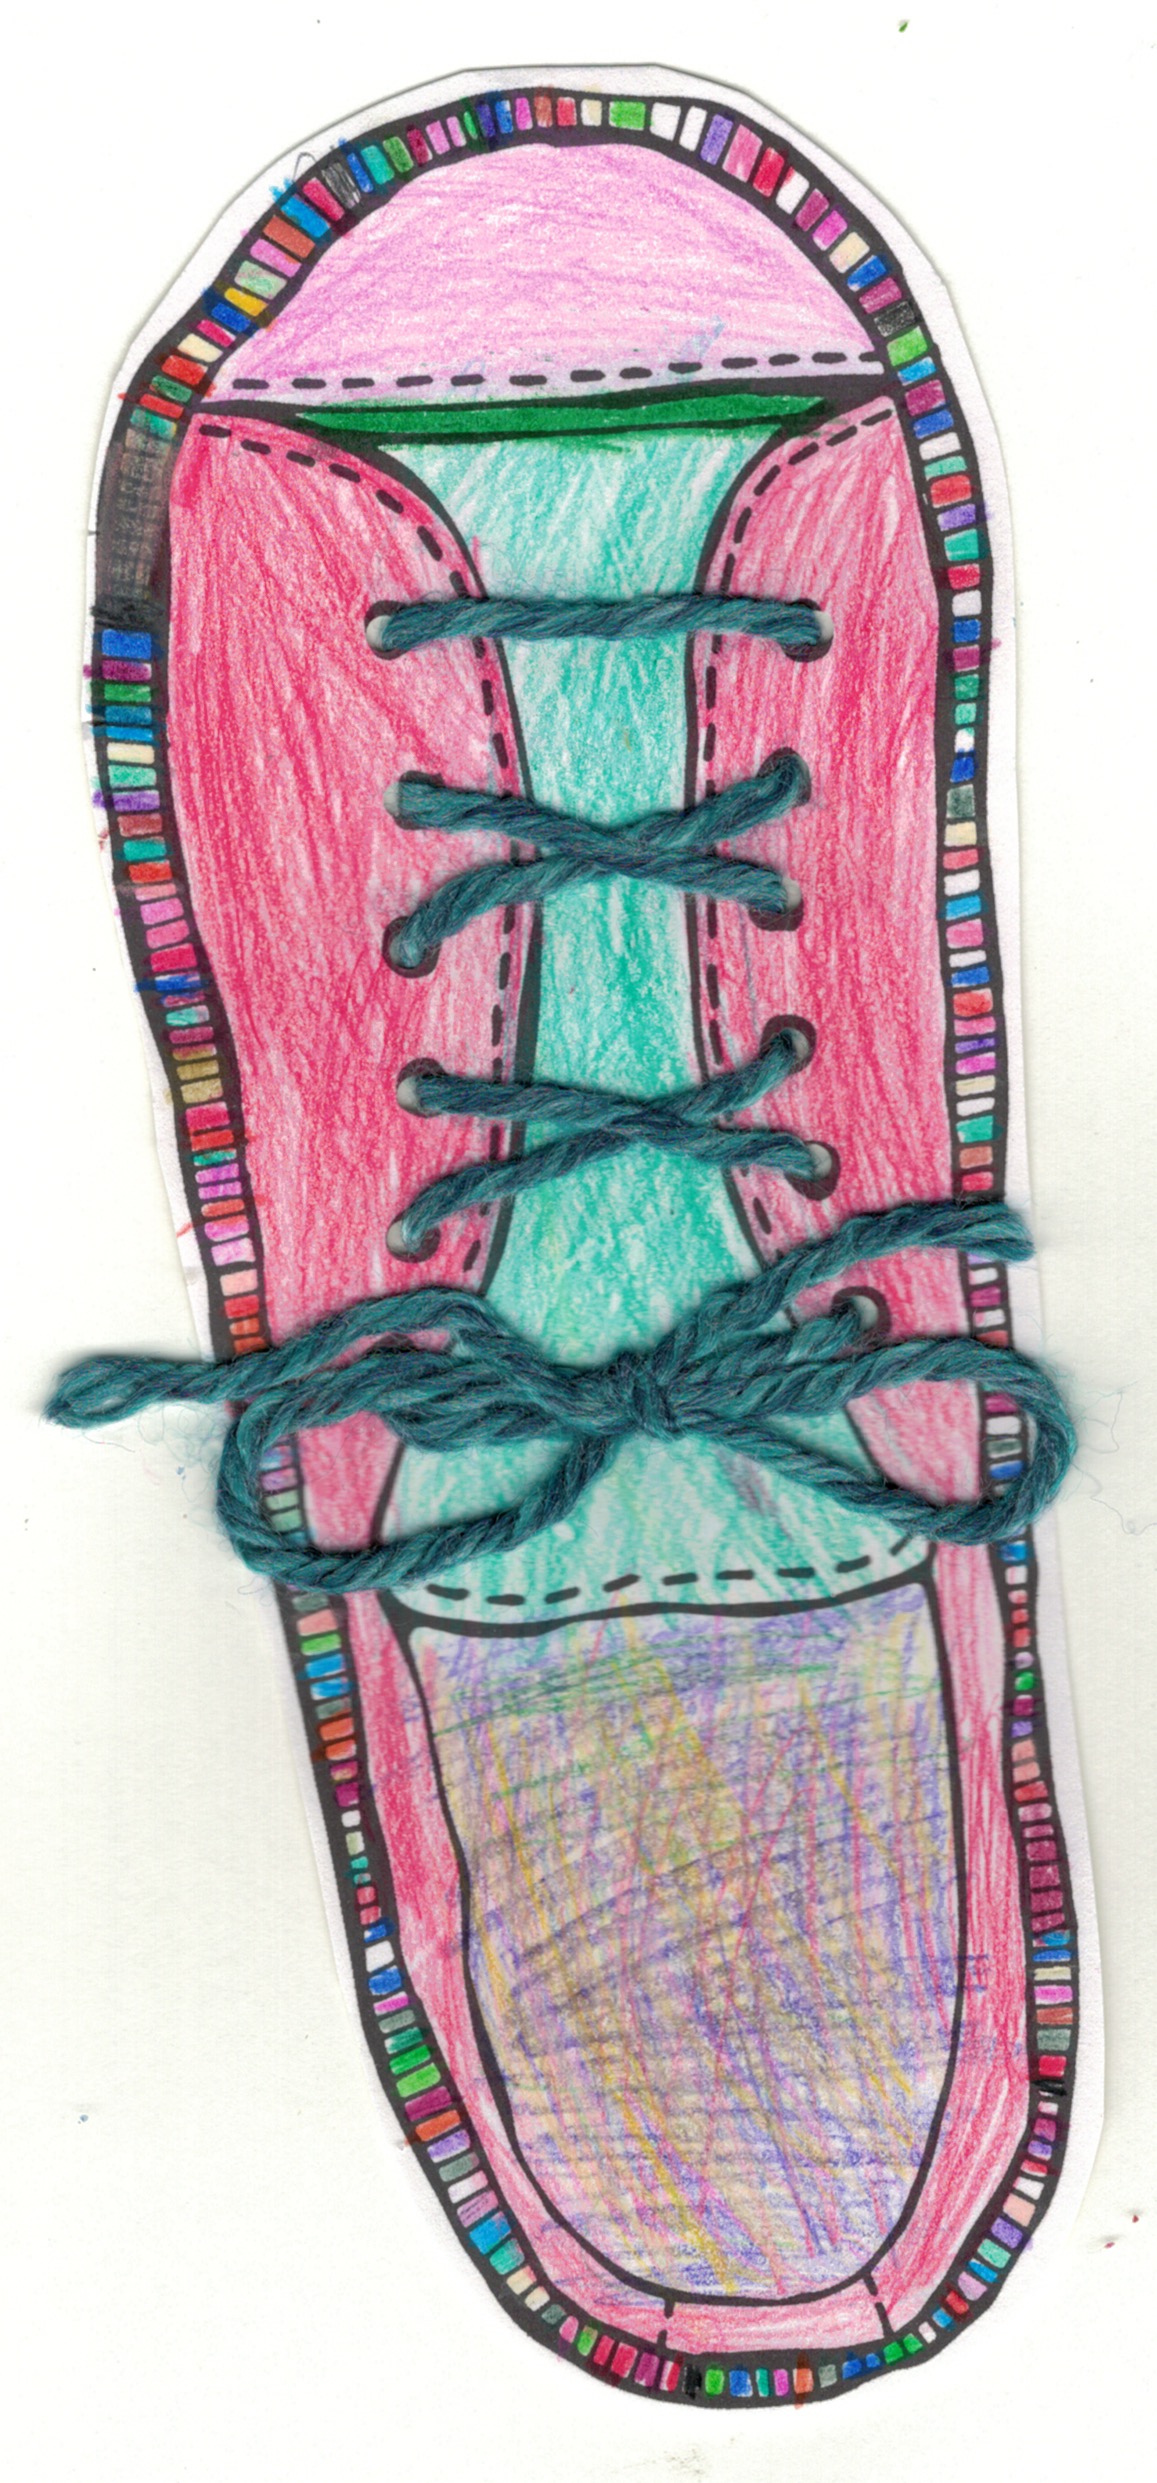
I love to add texture and dimension to my designs so when I got the colored shoes back from the kids, I used a 1/8 in paper punch to punch holes at the eyelets and I made shoelaces from colored yarn. I threaded it through like lacing the shoe and tied a bow. Then I scanned the completed shoes.
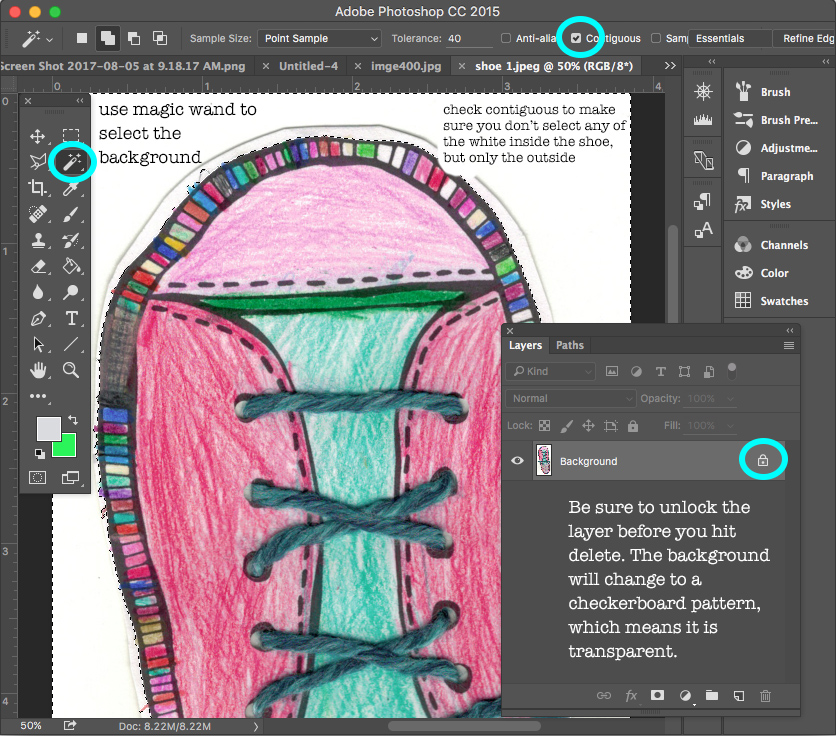
Make the background transparent.
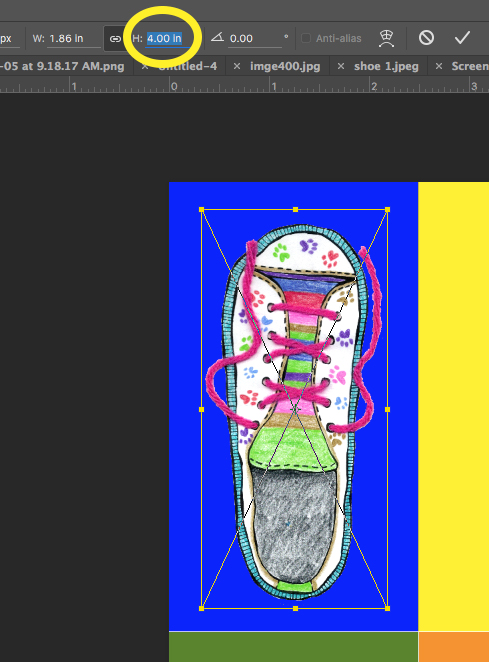
I opened each shoe in Photoshop so that I could cut out the shoe and make the background transparent. I used the Magic Wand tool to select the white background and then unlocked the layer so that I could delete that white edge and leave just the shoe.
- Choose the magic wand tool.
- Click the white area in the background of the shoe.
- Unlock the layer.
- Hit the delete key.
- The background should now be transparent (checkerboard).
- If your first click didn’t remove all of the white background, continue to select and delete the parts you don’t need.
- Here is a tutorial on how to adjust settings on the magic wand tool to fine tune and select more/less area.
- Save each shoe as a .psd file. (That’s a Photoshop file.)

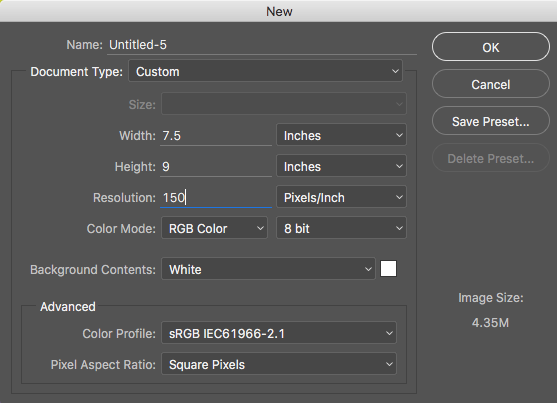
Create the background canvas.
I wanted to do a repeating Warhol-inspired pop art design with the shoes by putting them each on a brightly colored background rectangle, so I set up a new canvas in Photoshop for the background. I created a new file that was 7.5 x 9 inches at 150 dpi. That’s the size I decided to make the repeat for my design.
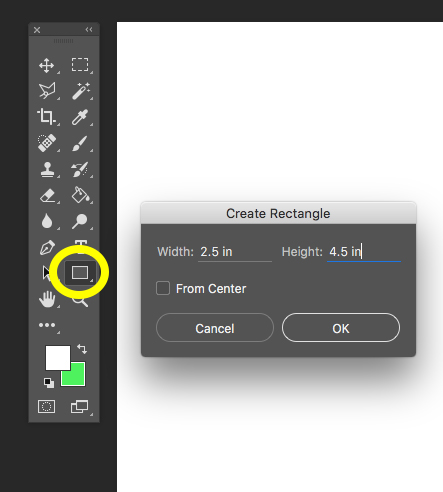
 I filled this canvas with 6 rectangles, each 2.5 x 4.5 inches. I drew these using the Rectangle Tool (yellow circle below) and filled them with a random color. Hint: If you click once with the tool inside your canvas, it will bring up a dialog box and you can type in the exact size of the rectangle you would like. Just repeat that to make all six rectangles. Here’s a little more about how to use the Rectangle Tool. Use the Move Tool to move the rectangles into place and be sure that you have selected the layer that you want to move. (Each rectangle will be on its own layer.)
I am going to match the colors to the shoes a little later, so the colors don’t matter at this step, just pick ones with a lot of contrast.

Add the shoes to the design.
Next, I placed the shoes into the design, using File -> Place Embedded and chose the edited version with the transparent background. I resized each one as I brought it in so that each shoe would fit in a rectangle. I adjusted the height to make each one 4 inches tall and made sure to click the chain icon (to the left of the yellow circle) to make sure it was scaled proportionally and not “squished”. If you want to adjust them after you have placed them, be sure that you have the right layer selected. Each rectangle and each shoe will be on a different layer at this point.

Match the background colors to the shoes.
Finally, to recolor the rectangles and match them to the colors in the shoes, I used the paint bucket/eyedropper tool in combination. The annoying part of this step will be keeping track of which layer you are on, so I recommend going to Layer -> Merge Visible and making your design all one layer for this step.
 I then switched to the Paintbucket Tool and hovered over a color in a shoe. When I hold down the option key with Paintbucket selected, my Paintbucket will transform to an eyedropper. I clicked with the eyedropper to choose a color from a shoe and then released the option key. Now the cursor switches back to paint bucket and I can click inside a rectangle to fill with that color. Continue to select (hold option – click) a color and paint (release option – click) until you have colors that you like.
My finished repeat is below.

Save it and order a yard.
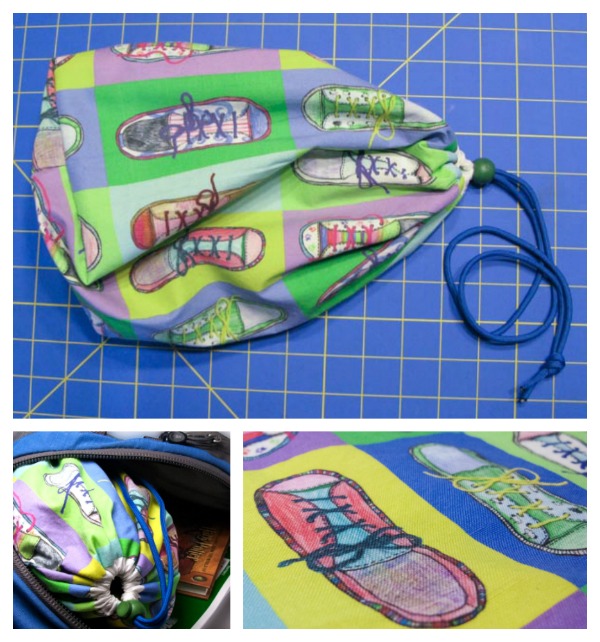
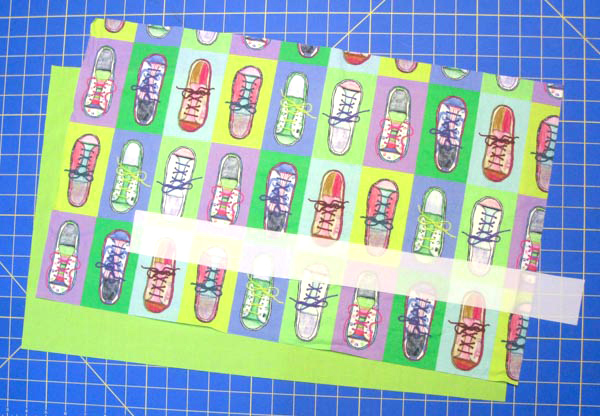
Now save this design as a .jpg and upload it to Spoonflower. I liked mine arranged as a half-drop repeat. You can get two bags out of one yard of fabric. I chose Basic Cotton Ultra for this project because I wanted the bags to be sturdy but not too bulky since they are designed to go inside another bag.
If you aren’t feeling like you want to design your own fabric or you don’t have kids around to do some coloring with you, I also curated a collection of great shoe fabrics by other Spoonflower designers. You can shop that Shoe collection here.
This is a great place to tell you that Spoonflower is giving you, my readers, a 10% discount! Use coupon code Rahn10 when you place your order. It’s valid until September 30, 2017 for orders of fabric, wallpaper and gift wrap and can not be applied with any other promotional offers.
Sewing the bag
Materials you need to make the bag.
- 1/2 yard of shoe fabric. Basic Cotton Ultra is a great choice.
- 1/2 yard of lining fabric. I chose a lightweight cotton/poly broadcloth in bright green.
- a 22 x 2 inch scrap of very lightweight fabric for the drawstring casing. I used a scrap from the selvedge of a piece of Spoonflower’s poly crepe de chine. Nylon or poly lining fabric is also a great choice. You want something that will allow the drawstring to bunch up and close the bag.
- 1 yard of 1/4 inch paracord
- A cord lock toggle. I got mine from this shop at Etsy.
Cut out rectangles.
 You need three rectangles to make each bag.
- 23 inches x 14 inches of your shoe fabric.
- 23 inches x 14 inches of your lining fabric.
- 21 inches x 2 inches of a very lightweight fabric for the drawstring casing.
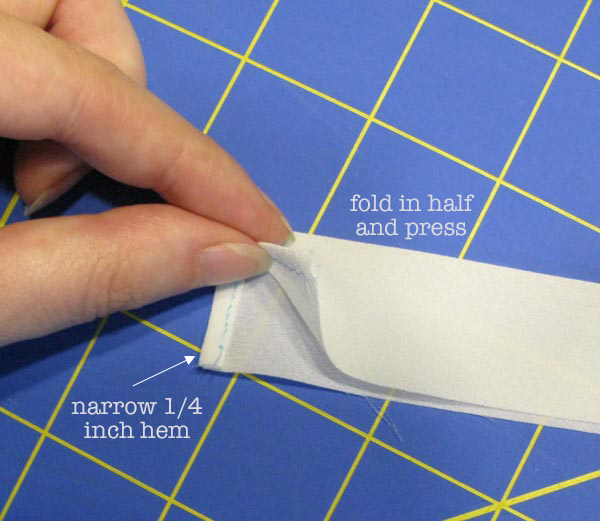
Hem and fold the casing.
 Start with the small rectangle of fabric for the drawstring casing. Make a narrow 1/4 hem at each short edge. Then fold the strip in half, matching the long edges and press.
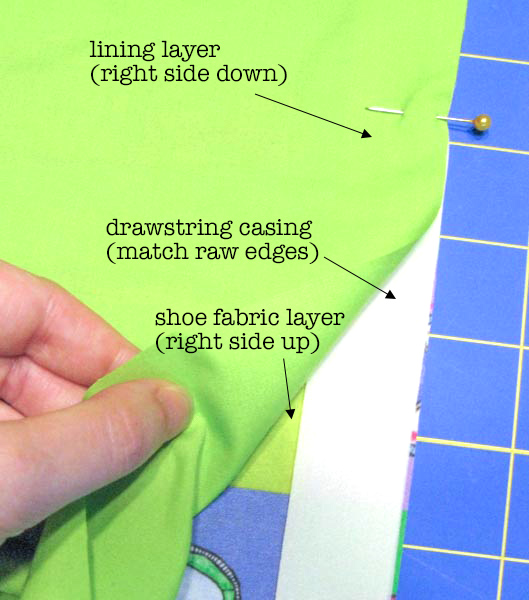
Stitch the casing (top) edge.
 Lay the shoe fabric right side up on your table. Place the casing in the center of the long edge of the rectangle, matching the raw edges. Place the lining fabric right side down, matching the long edge. Pin through all the layers and then stitch the long edge using a 1/2 inch seam allowance.
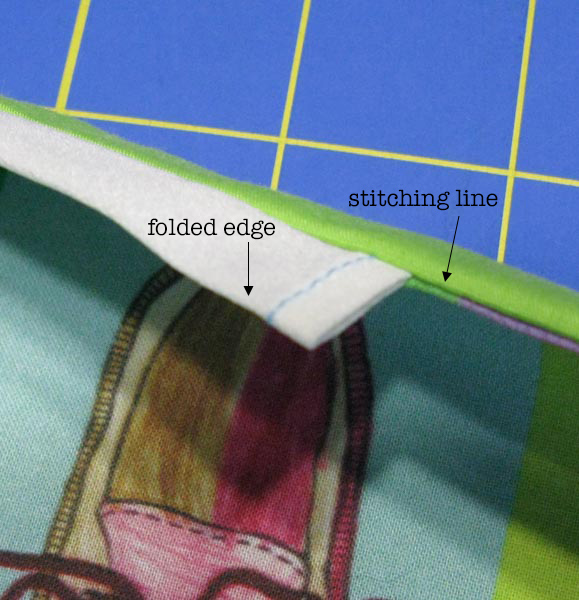
Turn the layers right side out and press so that the casing is free at the top and the shoe and lining fabrics are pressed down wrong sides together.

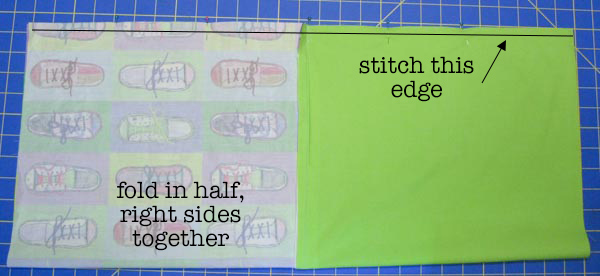
Stitch the side seam.
Unfold and open out your bag and refold it in half matching lining to lining and shoe fabric to shoe fabric. We are going to sew the outer and lining side seam all at once, making a tube. Match the long edges, pin and stitch with a 1/2 inch seam allowance. Press the seam open.

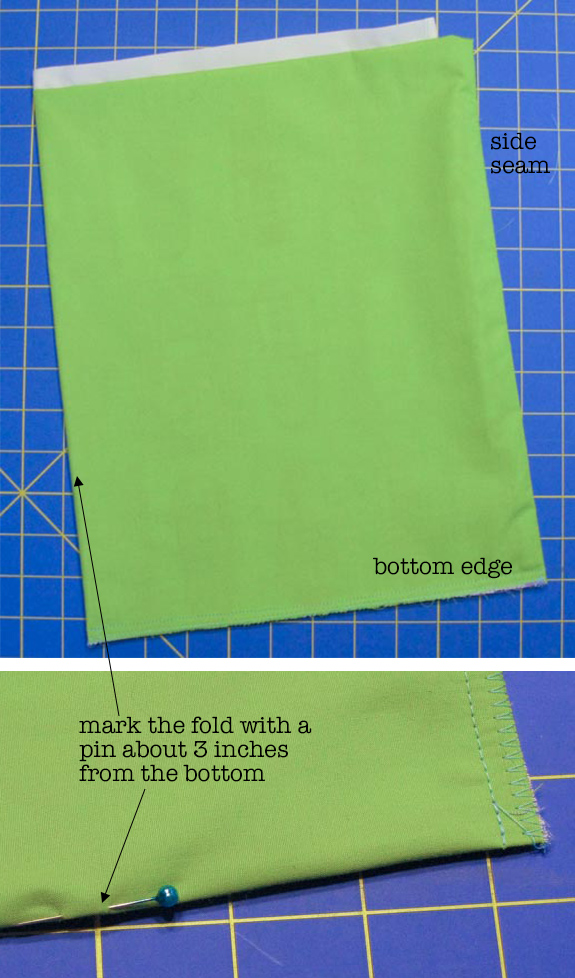
Mark the center, stitch the bottom.
Turn the tube so that the casing is at the top, the shoe fabric is to the inside and lining is outside. It will be like a doubled over tube, open at the top and bottom.
We need to mark the side of the bag for the next step. Fold the tube in half along the stitching line at the side seam and lay it flat on a table. Then mark the opposite folded edge with a pin, about 3 inches from the bottom corner. You will use this pin to help make a corner gusset in the next step.
 Stitch the bottom edge of the bag through all the layers, using a 1/4 inch seam allowance. You can serge or zig zag over this raw edge to keep it from fraying.
Open out the corners.
Starting with the side with the stitched seam, open out the corner of the bag and match the side seam (black arrow) to the bottom seam (white arrow). Stack them one on top of the other and fold it flat, creating a point right at the corner. Pin it to keep the seams from shifting.

Mark the gusset.
Measure 2.75 inches from the tip of the triangle and use a ruler to draw a light pencil line. Your line should be 5 inches from folded edge to folded edge. Stitch across the corner through all layers, following this line.
 Repeat for the other corner.
Since you don’t have a side seam on the opposite side, use the pin you placed to match the side to the bottom seam. Mark and stitch the same way. This will form square corners on the bottom of the bag. You can trim away the excess at the corners if you want to remove some bulk, but I like to just fold it towards the bottom and use is as an extra layer of reinforcement.
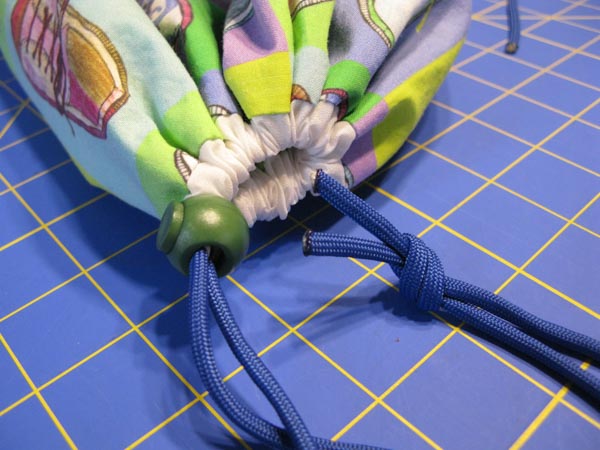
Turn it right side out & add the drawstring.

Turn the bag right side out. Cut a piece of paracord that is 36″ long. You can get one of my laser cut needles to thread the cord through the casing or use a large safety pin or elastic threader.
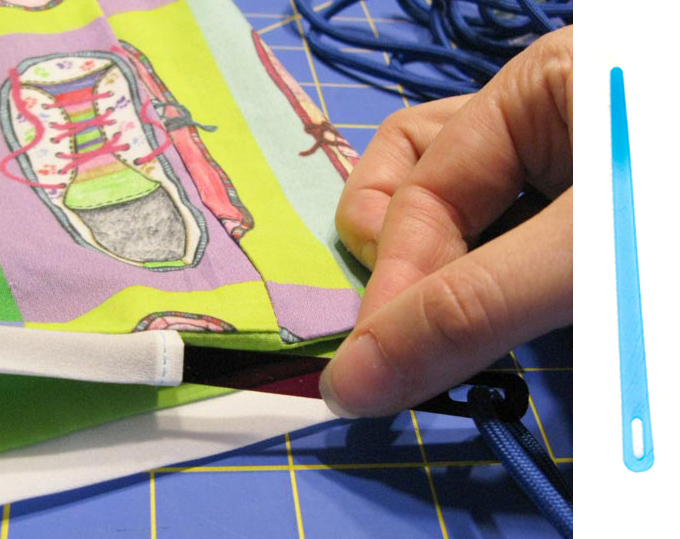
 Slide the cord lock over the ends of the cord and then tie the cord ends together in a knot. Melt the ends of the cord so it doesn’t fray. (Please be careful! It gets hot and you should work in a ventilated area.)


If you want to follow along with the other blog hop posts in this series: Wednesday, August 2 – Robin Szypulski | Kritter Stitches – Bookbag on SF blog • Amy Watkins | Cozy Reverie – First / Last day of school photo pennants • Kimberly Coffin | Sweet Red Poppy – 1st day of school outfit • Abby Glassenberg | While She Naps – Plushie key chain • Heidi Kenney | My Paper Crane – snack bags • Erin Williams | Printable Crush – book covers


 Stitch the bottom edge of the bag through all the layers, using a 1/4 inch seam allowance. You can serge or zig zag over this raw edge to keep it from fraying.
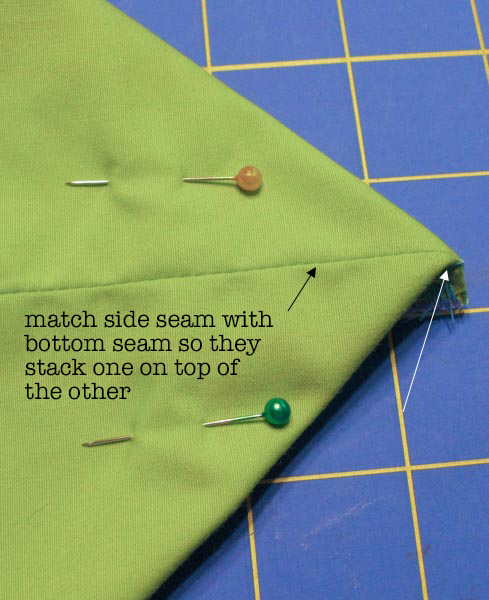
 Repeat for the other corner.
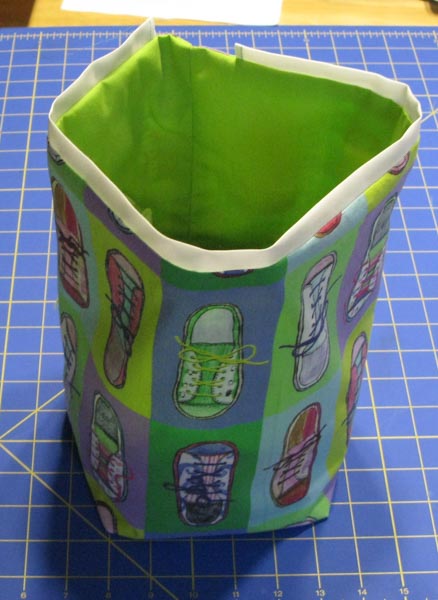
 Slide the cord lock over the ends of the cord and then tie the cord ends together in a knot. Melt the ends of the cord so it doesn’t fray. (Please be careful! It gets hot and you should work in a ventilated area.)