28 September, 2016

A Taste of Digital Fabric Design

2016-09-28T10:15:59-05:00, |Comments Off on A Taste of Digital Fabric Design

Have you ever dreamed of being a fabric designer? Online services like Spoonflower.com allow you to digitally print fabric with your own designs, from just a swatch to yards of fabric. Led by co-author of The Spoonflower Handbook, this seminar will give you the basics to get started designing your own fabrics, from how to deal with colors to resolution and file set up. See lots of samples and create a collaborative fabric design in class. No laptops needed, just paper and pencil for notes.

29 June, 2016

A teacher’s life: My week at Arrowmont School

2016-06-29T09:31:45-05:00An Artist's Life, Classes & Teaching, Gallery Exhibitions, Spoonflower & Fabric Design|Comments Off on A teacher’s life: My week at Arrowmont School

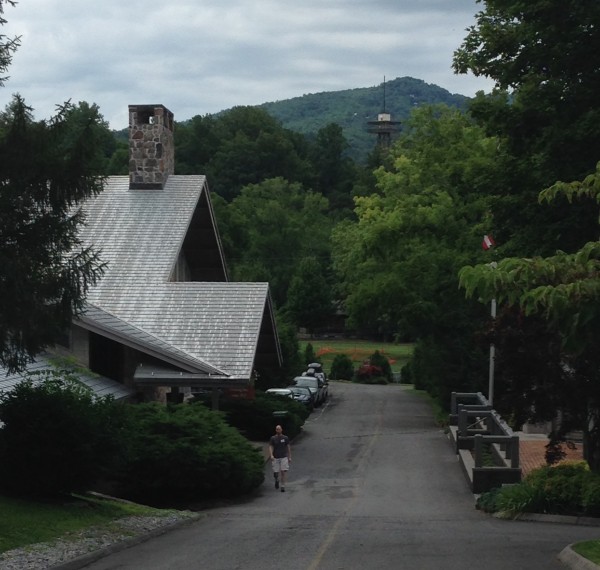
IMG_3597I just got back from teaching a week-long workshop at the Arrowmont School of Arts & Crafts in Gatlinburg TN. Arrowmont is like summer art camp for grownups in all the best and worst ways. Each class is an intensive week. Studios are open 7:30 am – 1:00 am nearly every day. Students and teachers stay in no-frills dorm-like rooms; meals are provided at the dining hall. There are evening slide talks and open studios. Above is a view of the main building as I am walking down from my cabin.

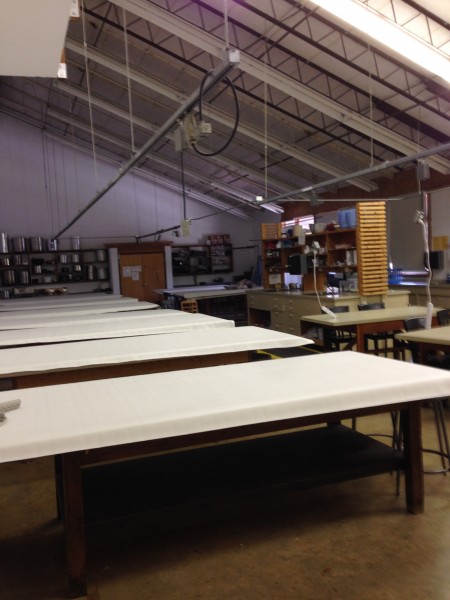
IMG_3530There was a little snafu with a late shuttle and some very bad communication when I first arrived, so my week started off a little rocky, but things smoothed out as the week went on. I was teaching in the textiles studio, which is set up like the most amazing dye lab you can imagine. Only we weren’t doing anything with dyes, because I was teaching a whole week about digital fabric design with Spoonflower. Having this lab full of computers and scanners is not exactly the norm for Arrowmont, but it worked out just fine. We got to try some things in class which I almost never have time to do, so it was fun for me to be able to teach the students some more complex techniques.

IMG_3622

Class started right away on Sunday evening and continued through Friday afternoon. There were 9 classes running during the week I was there. I had 6 amazing students in class; class sizes ranged between 3-15 people. Running parallel to us were classes in woodworking, paper, ceramics, mold-making, wire sculpture and mixed media jewelry. We had 37 hours of class time and we packed it full. We talked about color, patterns, making things seamless, effective repeats, scale, texture…

IMG_3651
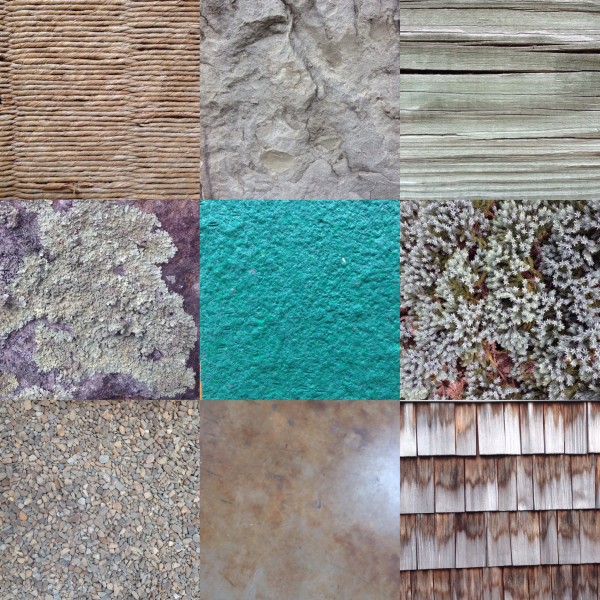
One afternoon we went for a photo walk around campus to collect photos of textures to use in our designs. We focused on work with Photoshop, but also explored a variety of other programs and tools that are really suited to fabric design. We made organic photographic patterns; we made geometric patterns from cut paper; we made faux batiks and digitally painted designs. Spoonflower worked with us to get fabrics shipped out lightning fast, so that we could create some designs on Monday and have the fabrics in our hands on Friday afternoon.

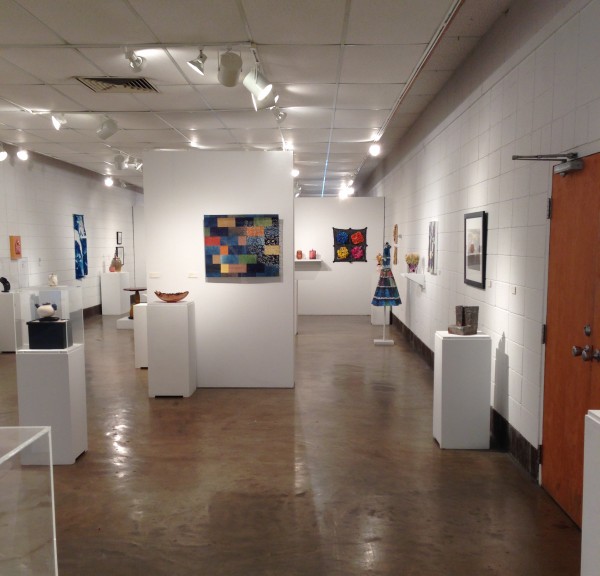
The gallery which was just outside of our classroom featured an exhibition of work by this year’s Arrowmont instructors. You can see my piece (my Wallflower dress) along the wall on the right. Arrowmont’s awesome gallery director came and filmed a little clip of me teaching to add to the interactive (QRcode) part of the gallery exhibition. I will post a little clip of that sometime soon.

IMG_3609

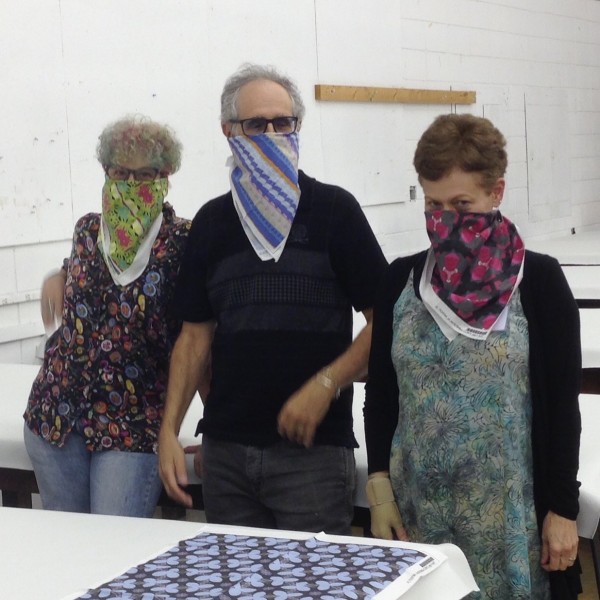
Our class worked really well together and I think everyone left totally fired up about designing some of their own fabrics. Below is a few of them goofing around with their freshly printed fat quarters on Friday afternoon. I was so proud of what they accomplished. And they blew me away with how much they learned. One student had me sit down on Friday with her and she talked through a step-by-step plan she had made for how to finish her “final project” design when she got home. She had come up with about 18 steps and knew exactly what to do at each step. SO proud!

IMG_3647

If you have ever wondered what this kind of workshop experience is like: intense, exhausting, focused. Part of the appeal is that you can come and have hours to use specialized equipment and facilities. With a digital class though, I had to be a little more on the ball. There were no special tools or equipment we needed to use; we all brought our own laptops. So the special and intense part of this class was having the one-on-one help and hands-on practice with the tools, with me to look over and remind you to check the checkmark or unlock the layer when suddenly something seemed to stop working.

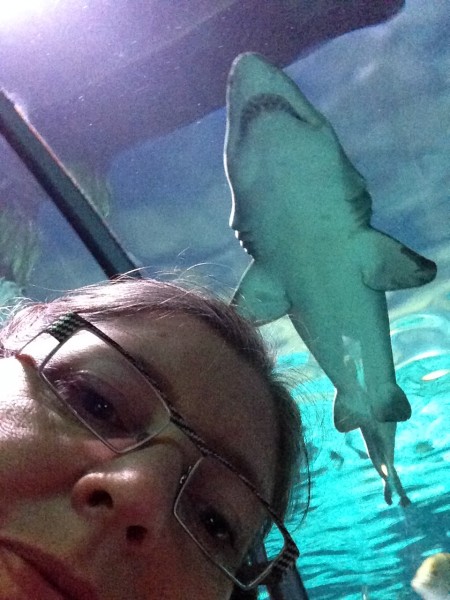
One of the funniest things about Arrowmont is that just a 5 minute walk away is the tourist trap town of Gatlinburg, which is full of t-shirt shops, ice cream, deep fried food and old time photos. (There’s also a Starbucks and a Walgreens, which I found the first night I was there.) Arrowmont feels like a magic bubble in the woods; they really are odd neighbors. There is a really nice aquarium in town, which I visited on Sunday morning since I didn’t have much classroom setup to do. I took a selfie with a shark.

IMG_3502

In our discussion about colorways, my class and I decided if you were going to walk down the street and then design a Gatlinburg fabric it would need to include these colors:

Screen Shot 2016-06-29 at 9.12.47 AM

(And if you are designing fabric for anyone under the age of 8, throw in some neon green.) I met some fascinating teachers, I had fantastic students to work with and I had some great conversations with the work-study students that were busy all over campus. Thanks to Arrowmont for a one-of-a-kind experience.

9 May, 2016

New Work: Shadows, Spoonflower & Davie

2016-05-09T19:29:07-05:00Everything Else, Gallery Exhibitions, Spoonflower & Fabric Design|1 Comment

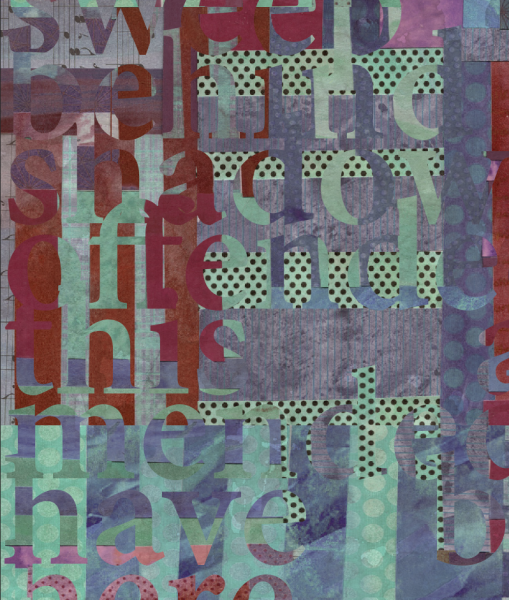
shadows

Shadows

2016

Digitally printed polyester pique.

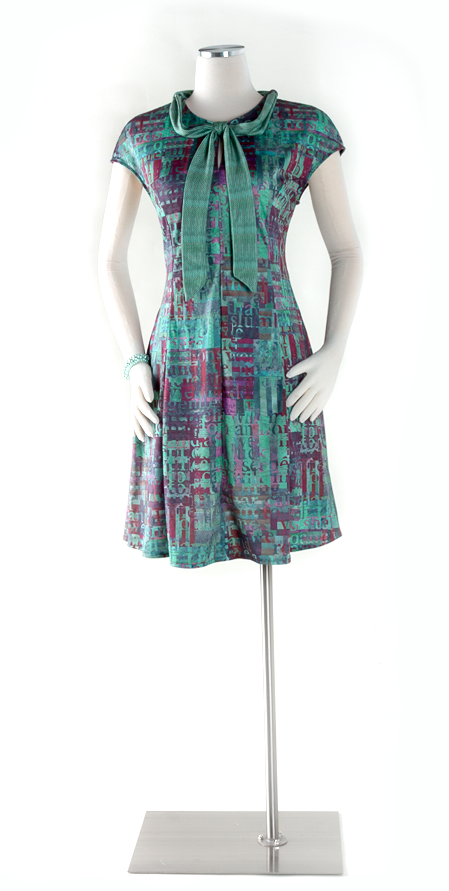
I had the photo studio set up for another big project shoot, and I realized that I hadn’t had a chance to talk about this dress that I made this spring. The pattern is a modified version of the Davie dress by Sewaholic. I love the way this one fits and I have made several versions of it. The fabric is Spoonflower’s performance pique.

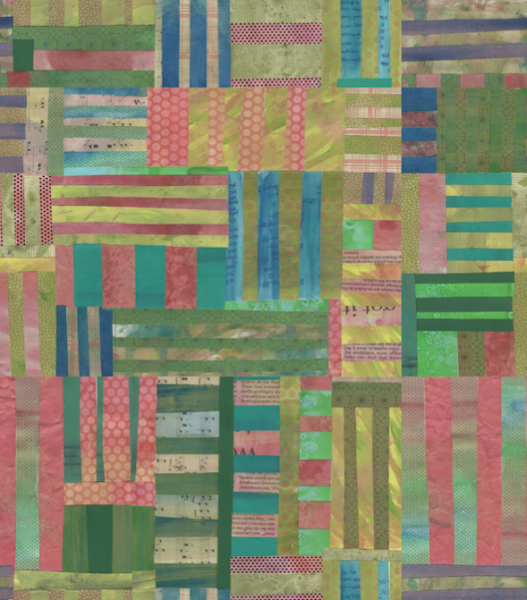
The design is a combination of cut painted paper and text. The paper design started out like this and I actually used it in a fabric collection of “Fish Market” designs that I have up at Spoonflower.

Screen Shot 2016-05-09 at 10.37.35 AM

I layered two copies of that cut paper together and then cut text from one layer. The text is the closing speech delivered by Puck from A Midsummer Night’s Dream:

“If we shadows have offended,
Think but this, and all is mended,
That you have but slumber’d here
While these visions did appear…”

Why that text? Because I like it. And Midsummer is my favorite Shakespeare play. I wanted to do a text based design, where it wasn’t something necessarily readable, but text was a design element.

I manipulated the colors, but you can still see all of the texture of the painted papers in the design. The tie is made from a small repeated section of that aqua with black polkadots pattern you see below.

Screen Shot 2016-05-09 at 11.01.47 AM

A little note about the fabric. It’s polyester, and I feel like I spend a lot of time defending things for being polyester. This is awesome polyester. Seriously. Comfy, soft, breathable, unwrinkleable, machine wash, amazing print quality. There’s nothing negative on that list. I understand that there are yucky polyesters. There are also horrific wools, nasty nylons and even some unwearable cottons. So this is a little bit of a soap box and a little bit encouragement to not judge a fabric by its label.

16 February, 2016

Digital Fabric Tutorial: Taking your design up a notch

2016-02-16T09:41:54-06:00Spoonflower & Fabric Design, Tutorials|Comments Off on Digital Fabric Tutorial: Taking your design up a notch

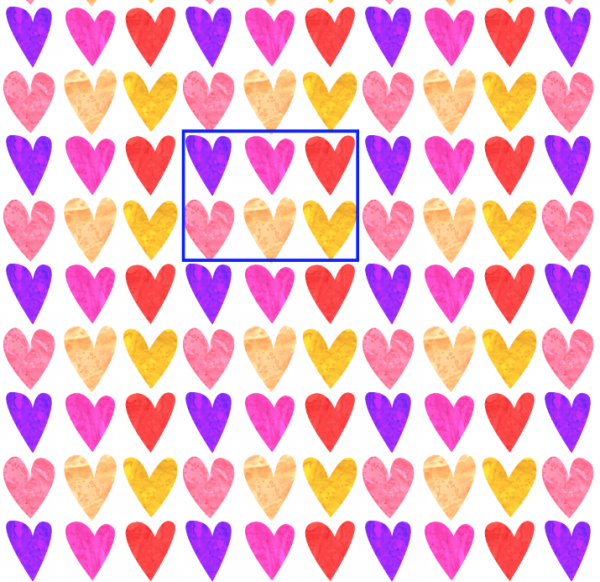
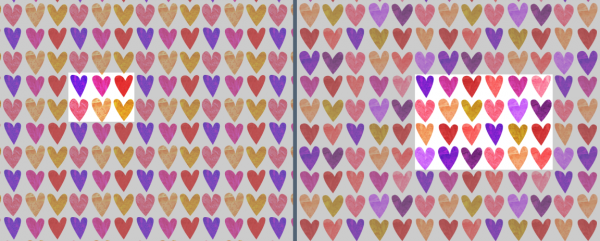
I posted a tutorial last week to make your own Valentines hearts design.  Today I want to talk about how you can take this basic design and make it better.  In the original design tutorial, I cut and scanned 6 hearts and created a repeating pattern from that little motif, which I have outlined in blue below so it is easy to spot.  Those 6 hearts repeat over and over to make the pattern.
Screen Shot 2016-02-16 at 8.54.19 AM

If you step back and look at this design, it works, but the purple hearts form a grid-like pattern that is pretty obvious.  Your eye is drawn to that regular pattern; it gets kind of stuck and doesn’t move around the whole design. There is maybe even an illusion that the purple dominates the design a little bit.

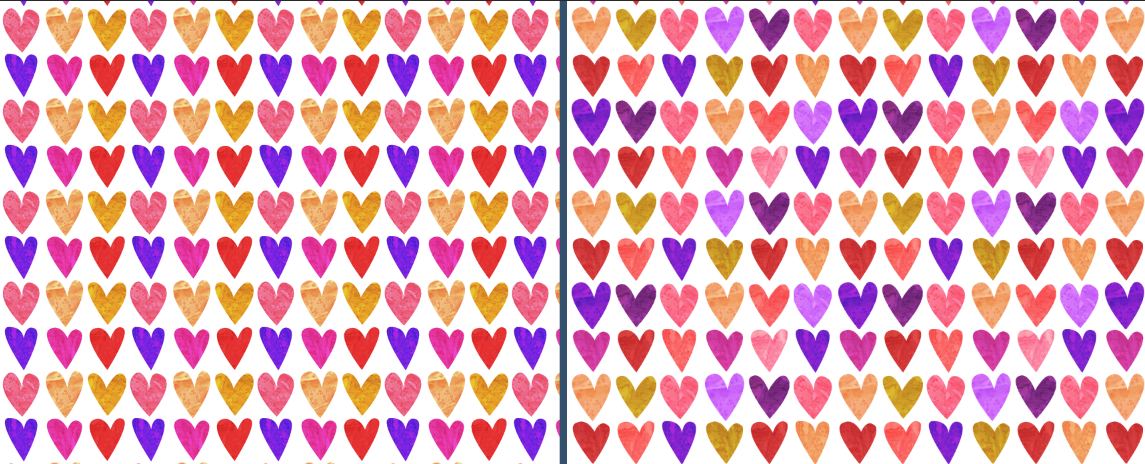
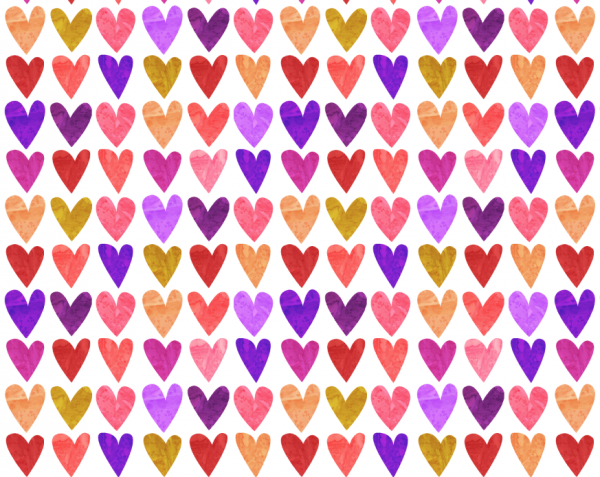
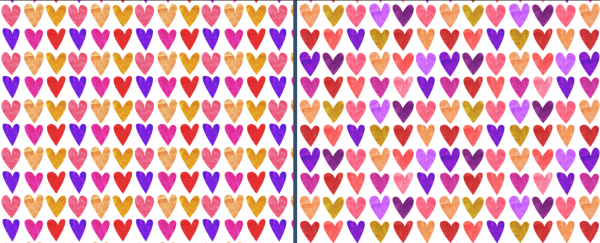
One technique you can try to make your repeat tile have better flow and seem more dynamic is to make it bigger.  For example for the repeat below, instead of 6 hearts, I made a larger canvas and copy/pasted the same hearts so I had 24 hearts instead of 6.  I also added 4 more colors to my palette, taking the total from 6 to 10.  I used the same method to paint and overlay the texture.

Can you find the repeat tile now?  I think it’s much harder to do.  There’s more variation with colors and more distance between two elements of the same color.  I repeated some of the colors, so they form a less grid-like pattern.

Screen Shot 2016-02-16 at 9.02.46 AM

Here are the two designs side by side, first showing the repeating tile and then the designs on their own.

Screen Shot 2016-02-16 at 9.39.30 AM

Screen Shot 2016-02-16 at 9.19.13 AM

Starting with 48 hearts would add even more variation to the design.  I could also try varying the hearts themselves a little bit.  That could be as simple as flipping a few of them horizontally or even by cutting a few more hearts at the beginning of the design before I scanned.  I could also choose to have it repeat using a half-drop or half-brick pattern which would shift the tiles and add a little more variability. (You do have to plan ahead for half-drop/brick to make sure that your pattern matches up when shifted 1/2 tile.)

I often work this way when I am doing a repeat.  Start first with the small version and get it close to the design look and colors I want.  Then I increase my canvas size, put four copies of the design on the canvas and start to create variations.  Sometimes I repeat that process one or two more times until I have a repeating pattern that I like.  I check it often to see what it looks like when it is repeating and to see what stands out.

5 January, 2016

Design-your-own-Fabric Tutorial: Making Wings

2016-02-23T13:27:14-06:00Spoonflower & Fabric Design, Tutorials|5 Comments

wings

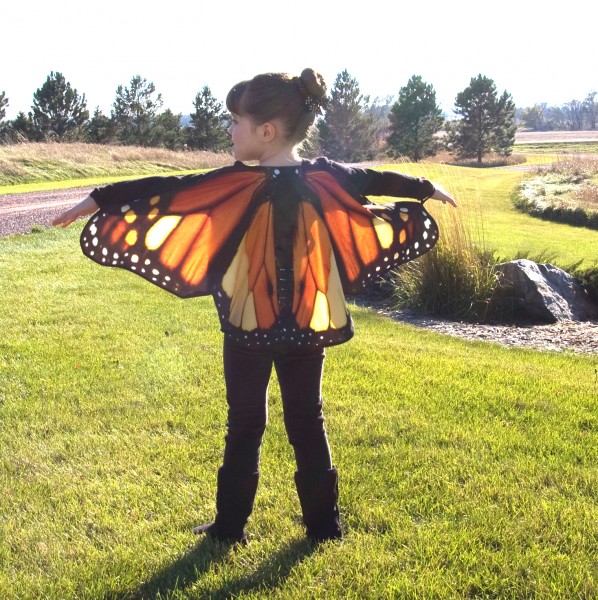
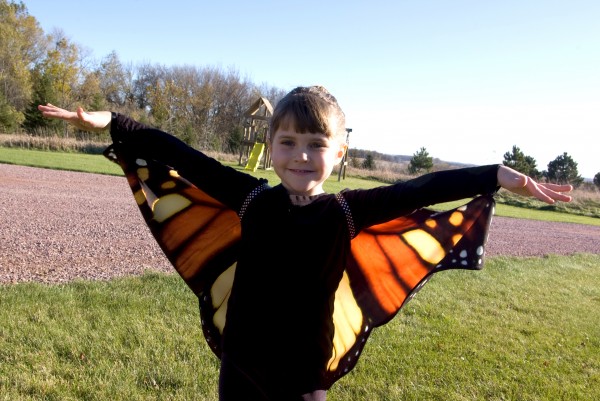
For Halloween, my niece wanted to be a butterfly fairy.  Her talented mama made the fancy princess dress, but I was asked to help with the fairy wings.  We thought it would be the most fun if the wings were not stiff wire edged things, but more like a flowy cape, so you can pretend to fly, which is absolutely necessary when you are 5 years old.  So I designed some wings and had them printed at on fabric at Spoonflower.

Here’s how you can make your own.

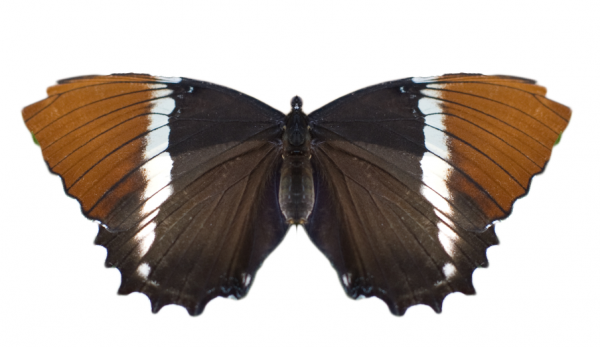
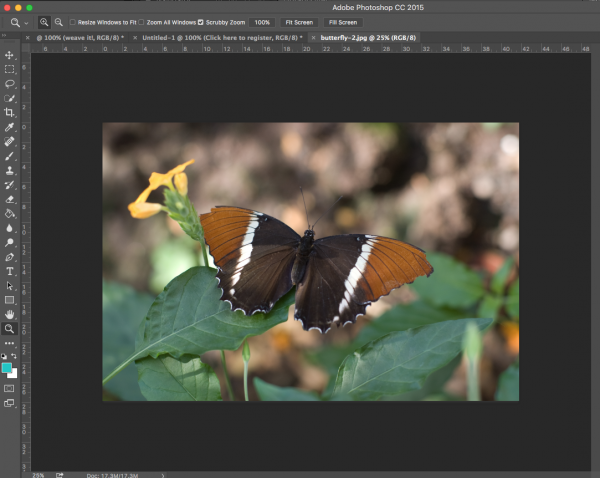
I started with a photograph of a butterfly.  For the wings above, I used a monarch because that matched the colors of her costume, but I did some screenshots for you using another butterfly that we photographed at the zoo, so you can see some other variations.  It helps to have a butterfly shape that goes pretty straight across at the top (not a strong V shape), but you can adjust that a little in a later step.
Screen Shot 2016-01-05 at 10.33.27 AM

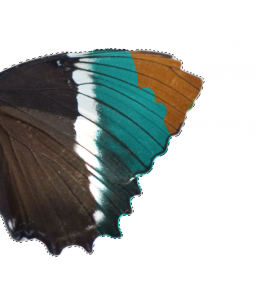
First, I opened the photo in Photoshop and made a new layer, so the butterfly photo is on one layer and there is a blank background layer. I selected the butterfly using the Quick Select and Lasso tools, inverted the selection (so now the background is selected instead of the butterfly) and deleted the background. I selected the butterfly and straightened it out a little (using the Transform tool).  You can see that my butterfly is a little lop-sided here right to left, which is perfectly fine for a butterfly, but makes it harder to make a 2 sided cape.  So I am going to fix that.
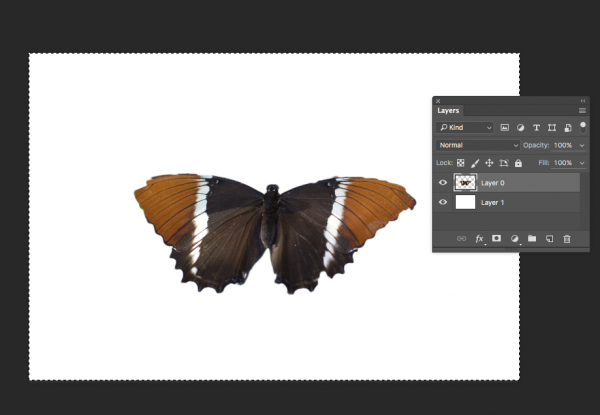
Screen Shot 2016-01-05 at 10.37.48 AM

I used the Marquee Select tool to select the right half of the butterfly and delete it.  Then I copied the left half, flipped it horizontally and moved it over to the right side.
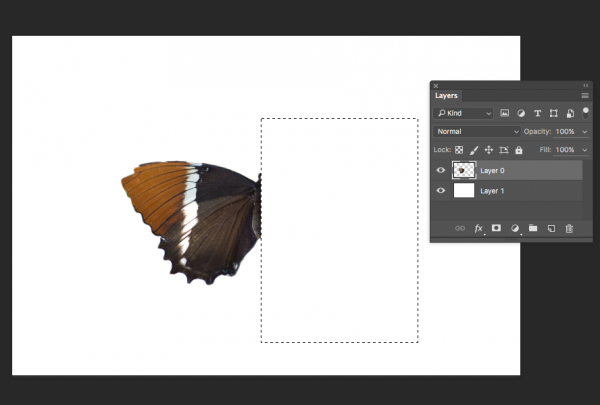
Screen Shot 2016-01-05 at 10.38.12 AM

Screen Shot 2016-01-05 at 11.33.03 AM

This is going to make it much easier to sew together later because I won’t have to worry about a front and back side; they are both the same and will match up when I put them right sides together to sew it.  I selected and merged the two layers (right and left side) to make it into a single butterfly layer again and used the Eraser tool to touch up a little bit at the head and tail and any jagged edges from my quick selecting job, so I had nice smooth lines around all the edges.
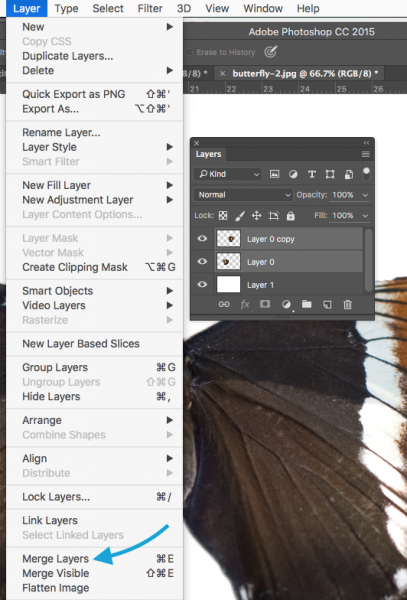
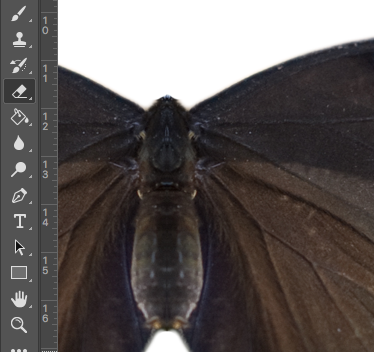
Screen Shot 2016-01-05 at 10.40.08 AM


Screen Shot 2016-01-05 at 10.40.52 AM

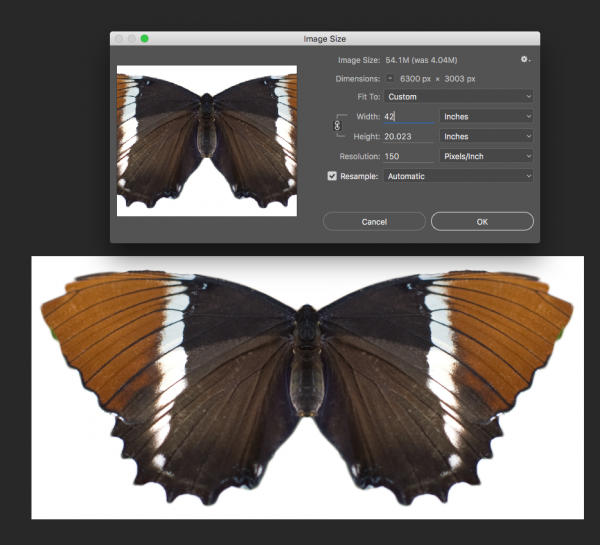
Next, I need to make this butterfly the right size to fit my little butterfly fairy.  We measured her wingspan, which was 41 inches from wrist to wrist.  Using the Crop Tool, I cropped the butterfly to get rid of the extra white space around it and resized it to be 42 inches across at 150 dpi.  Make sure you check the “lock” icon to the left of width/height so that it maintains the same ratio and doesn’t squash your photo.  (I made it 42 because I left a little space for a seam allowance.  You will see how that works in just a bit.)
Screen Shot 2016-01-05 at 10.57.43 AM

An aside for a just a minute about resolution.  I didn’t worry too much about what the resolution of this photo was to begin with because I don’t actually need this print to be super crisp and sharp.  For this project I was totally ok with it being a little pixellated or fuzzy because it’s going to read as a butterfly no matter what.  This won’t be the case for every project; you have to use your judgement.

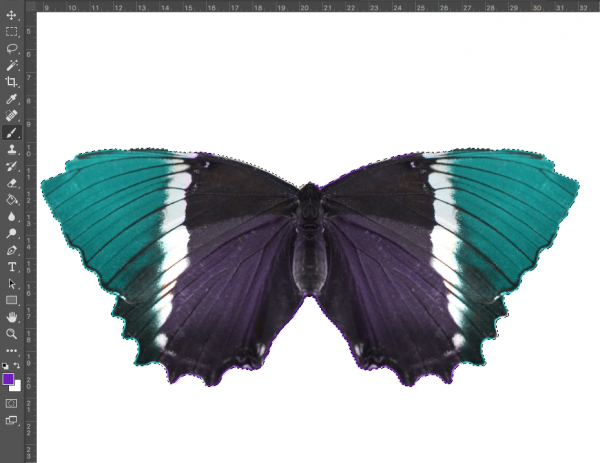
Now to add some color.  For our monarch butterfly, I recolored a bit to add some yellow to the orange and black so that it matched her dress.  You can add any color you like to make a butterfly in your favorite color or you can skip this step if you love your butterfly the way it is.  Select the butterfly, choose the Paintbrush Tool and set it to “Hue” in the toolbar Mode menu.  Then choose a color in the palette and paint over your butterfly.

Screen Shot 2016-01-05 at 11.50.38 AM

Screen Shot 2016-01-05 at 10.43.08 AM

Screen Shot 2016-01-05 at 10.45.11 AM

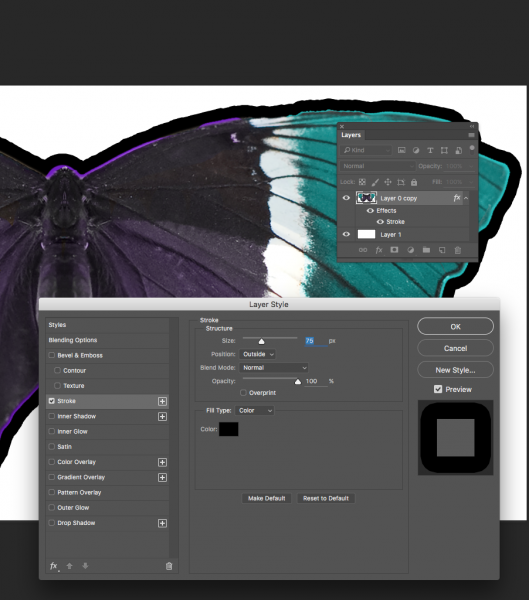
Lastly, I don’t want to have to sew precisely around every scallop on the edge of that wing to make sure that I don’t have any white showing on my finished wings.  So I am going to add a seam allowance in black to allow give me a little wiggle room.  Double click the butterfly layer in the Layers Palette and a new Layer Style Palette will pop up (you can also choose Layer Style from the top Layer menu).
Screen Shot 2016-01-05 at 11.02.10 AM

I chose Stroke under Styles and set it to put a 75 pixel stroke on the outside of my butterfly and set the color to black.  75 px at 150 dpi = 1/2 inch.  So now I have a 1/2 inch black border around the edge.  Save this.

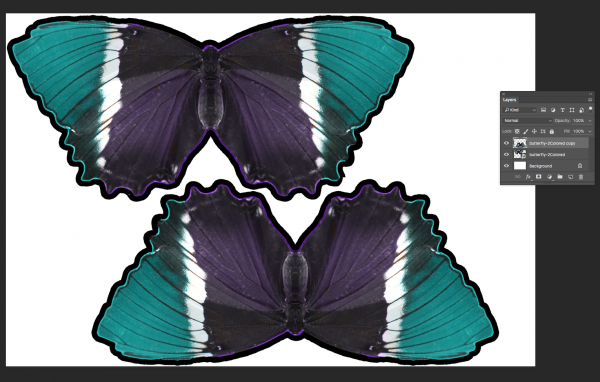
My butterfly wings are just barely small enough that I can put two of them (front and back) on a single yard of fabric.  I chose the Poly Crepe de Chine from Spoonflower for these wings because it is exactly the right weight and floaty-ness for wings.  So I made a new canvas 52×36 inches at 150 dpi and placed two butterfly wings on it.  If your wings are bigger, you may need 2 yards and then you can just upload as is and center the design.
Screen Shot 2016-01-05 at 12.10.42 PM

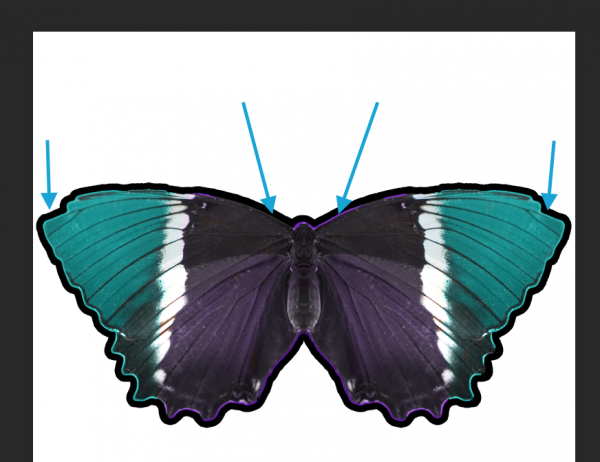
Export as a .jpg, upload to Spoonflower and wait with great anticipation while they are printed.  To finish up the wings, I cut them out and pinned them right sides together.  I cut two 20 inch pieces of black and white polkadotted ribbon and tucked them in at the top edge, about 4 inches either side of the center.  I cut two 8 inch pieces of narrow black elastic and tucked them in at the top edges of the wing tips.  Then I stitched around the whole thing with a 3/8 inch seam allowance (catching all of the ribbon/elastic as I stitched), leaving a little space to turn right side out.  Clip the seam allowance as needed, turn and press with a synthetics setting.  Slip stitch the opening.
Screen Shot 2016-01-05 at 12.13.11 PM

To wear the butterfly wings, you can either use the ribbon ties at the neck just like a cape, or we wrapped them over the front of her shoulders and tied them behind her back (my sister’s brilliant idea), so you only saw two little stripes of ribbon.  (The fairy liked not having it around her neck.)  The elastic loops slipped over her wrists.  She had a fancy fairy dress to match these, but I love them with all black too. Not in to butterflies?  Why not look for a photo of a moth, a bat, a hawk or there are even lizards with “wings” that might be perfect for pretending to be a dragon or griffin!  We also made a tiny pair of matching wings for her doll to have a matching costume.  Same method, smaller scale. 
wings2

PinterestButterfly

2 December, 2015

Photo Cheater Quilt: A tutorial in 6 parts

2015-12-02T09:01:43-06:00Spoonflower & Fabric Design, Tutorials|Comments Off on Photo Cheater Quilt: A tutorial in 6 parts

I put together a really fun digital fabric quilt project using a collection of rainbow-hued photographs.  The finished quilt gets lots of “oohs and aaaahs” when I bring it to class as a sample.  Spoonflower has just posted the whole tutorial to their blog and here is a round-up of the links.

How to Create a Photo Cheater Quilt

Cheater Quilt Lesson One: Developing your Theme & Curating Photos

Cheater Quilt Lesson Two: Assembling your Color Collages

Cheater Quilt Lesson Three: Creating your Canvas

Cheater Quilt Lesson Four: Placing the Blocks

Cheater Quilt Lesson Five: Materials & Finishing your Quilt

Share!

Please show us your finished quilts by sharing a photo using hashtag #SpoonChallenge on your favorite social media outlet! We would love to see them.  My friend Amy from PennyCandyHandmade took the idea and ran with it.  See her awesome Hawaii-themed quilt here.
Go to Top